Manolo Blahnik Woven Slingbacks

In elementary school, I had a teacher named Ms. Kelly. She was brunette with stick straight brown hair and bangs that framed her eyes. In my memory, she looked like Brenda Walsh from 90210, but I was six-years-old at the time and my memory is probably a little off. What I distinctly remember is that she wore black, pointed toe slingback flats to school pretty much everyday. I know this because I used to stare at her shoes a lot. I was opinionated about fashion even then, and for some ridiculous reason, I couldn't stand her shoes. Don't get me wrong, she was a great teacher and a kind person but for some reason, I hated those slingbacks. I was six and my favourite shoes were a pair of jelly glitter huarache sandals so who the hell was I?
Fast forward to today. My go-to shoe this summer are my new white Manolo Blahnik slingbacks. They go with everything from all-black to denim-on-denim. The kitten heels makes them comfortable to wear when I have meetings in the city all-day and hi, they're so chic and timeless!
Finally, I totally get why Ms. Kelly wore those flats every day.


My go-to shoe this summer are these woven Manolo slingbacks. They go with everything from jeans to skirts and loose trousers. The kitten heels makes them comfortable and the pointed toe is feminine and elongates the leg.


Archive
- May 2025
- February 2025
- January 2025
- December 2024
- October 2024
- August 2024
- July 2024
- June 2024
- May 2024
- March 2024
- February 2024
- January 2024
- December 2023
- November 2023
- October 2023
- September 2023
- August 2023
- July 2023
- April 2023
- March 2023
- February 2023
- January 2023
- September 2022
- July 2022
- June 2022
- May 2022
- April 2022
- February 2022
- December 2021
- October 2021
- September 2021
- August 2021
- July 2021
- June 2021
- May 2021
- April 2021
- March 2021
- February 2021
- January 2021
- December 2020
- November 2020
- October 2020
- September 2020
- August 2020
- July 2020
- June 2020
- May 2020
- April 2020
- February 2020
- January 2020
- December 2019
- November 2019
- October 2019
- September 2019
- August 2019
- July 2019
- June 2019
- May 2019
- April 2019
- March 2019
- February 2019
- January 2019
- December 2018
- November 2018
- October 2018
- September 2018
- August 2018
- July 2018
- June 2018
- May 2018
- April 2018
- March 2018
- February 2018
- January 2018
- December 2017
- November 2017
- October 2017
- September 2017
- August 2017
- July 2017
- June 2017
- May 2017
- April 2017
- March 2017
- February 2017
- January 2017
- December 2016
- November 2016
- October 2016
- September 2016
- August 2016
- July 2016
- June 2016
- May 2016
- April 2016
- March 2016
- February 2016
- January 2016
- December 2015
- November 2015
- October 2015
- September 2015
- August 2015
- July 2015
- June 2015
- May 2015
- April 2015
- March 2015
- February 2015
- January 2015
- December 2014
- November 2014
- October 2014
- September 2014
- August 2014
- July 2014
- June 2014
- May 2014
- April 2014
- March 2014


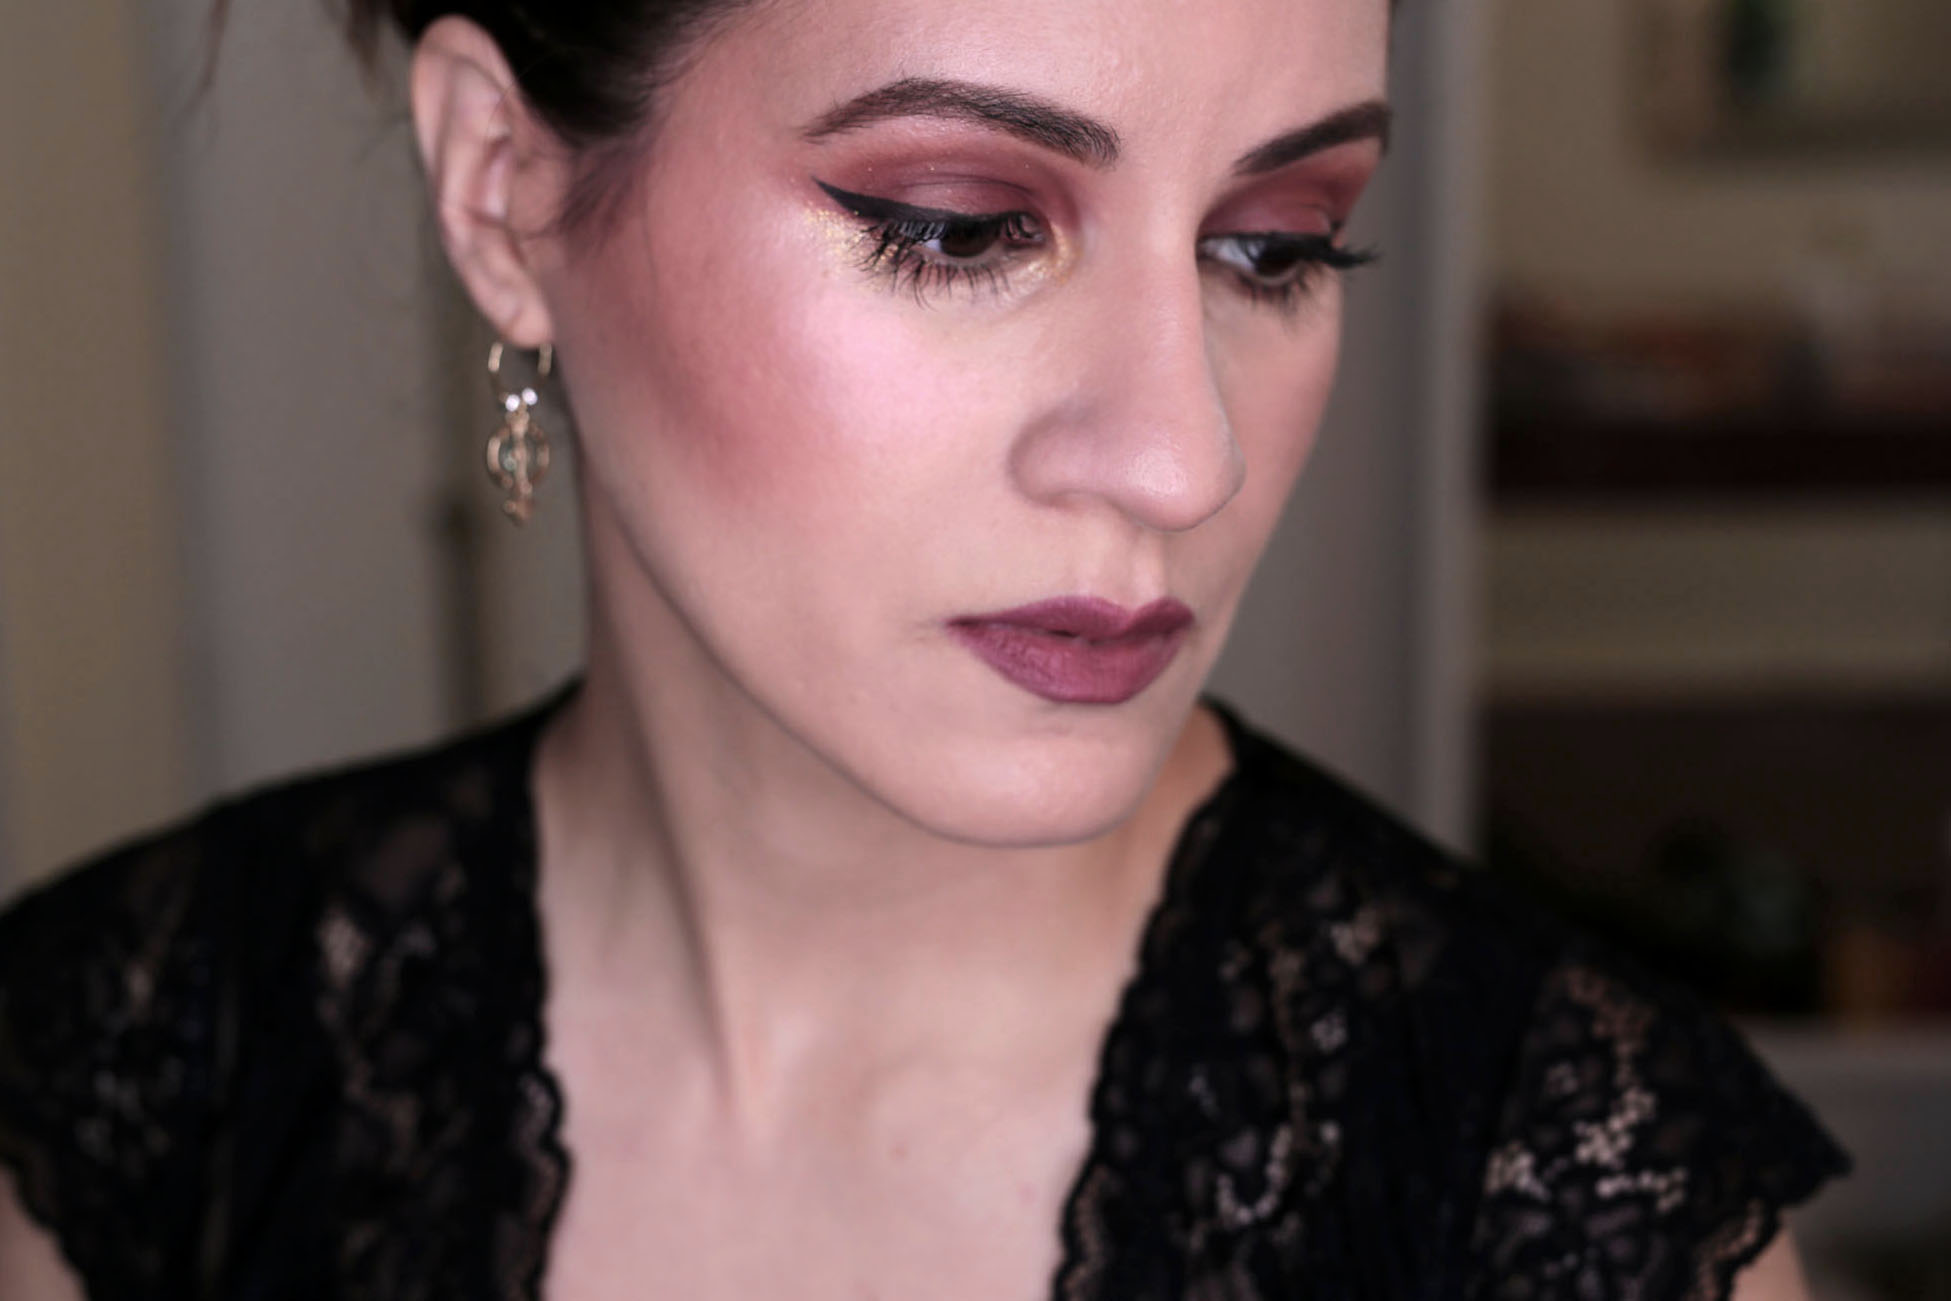
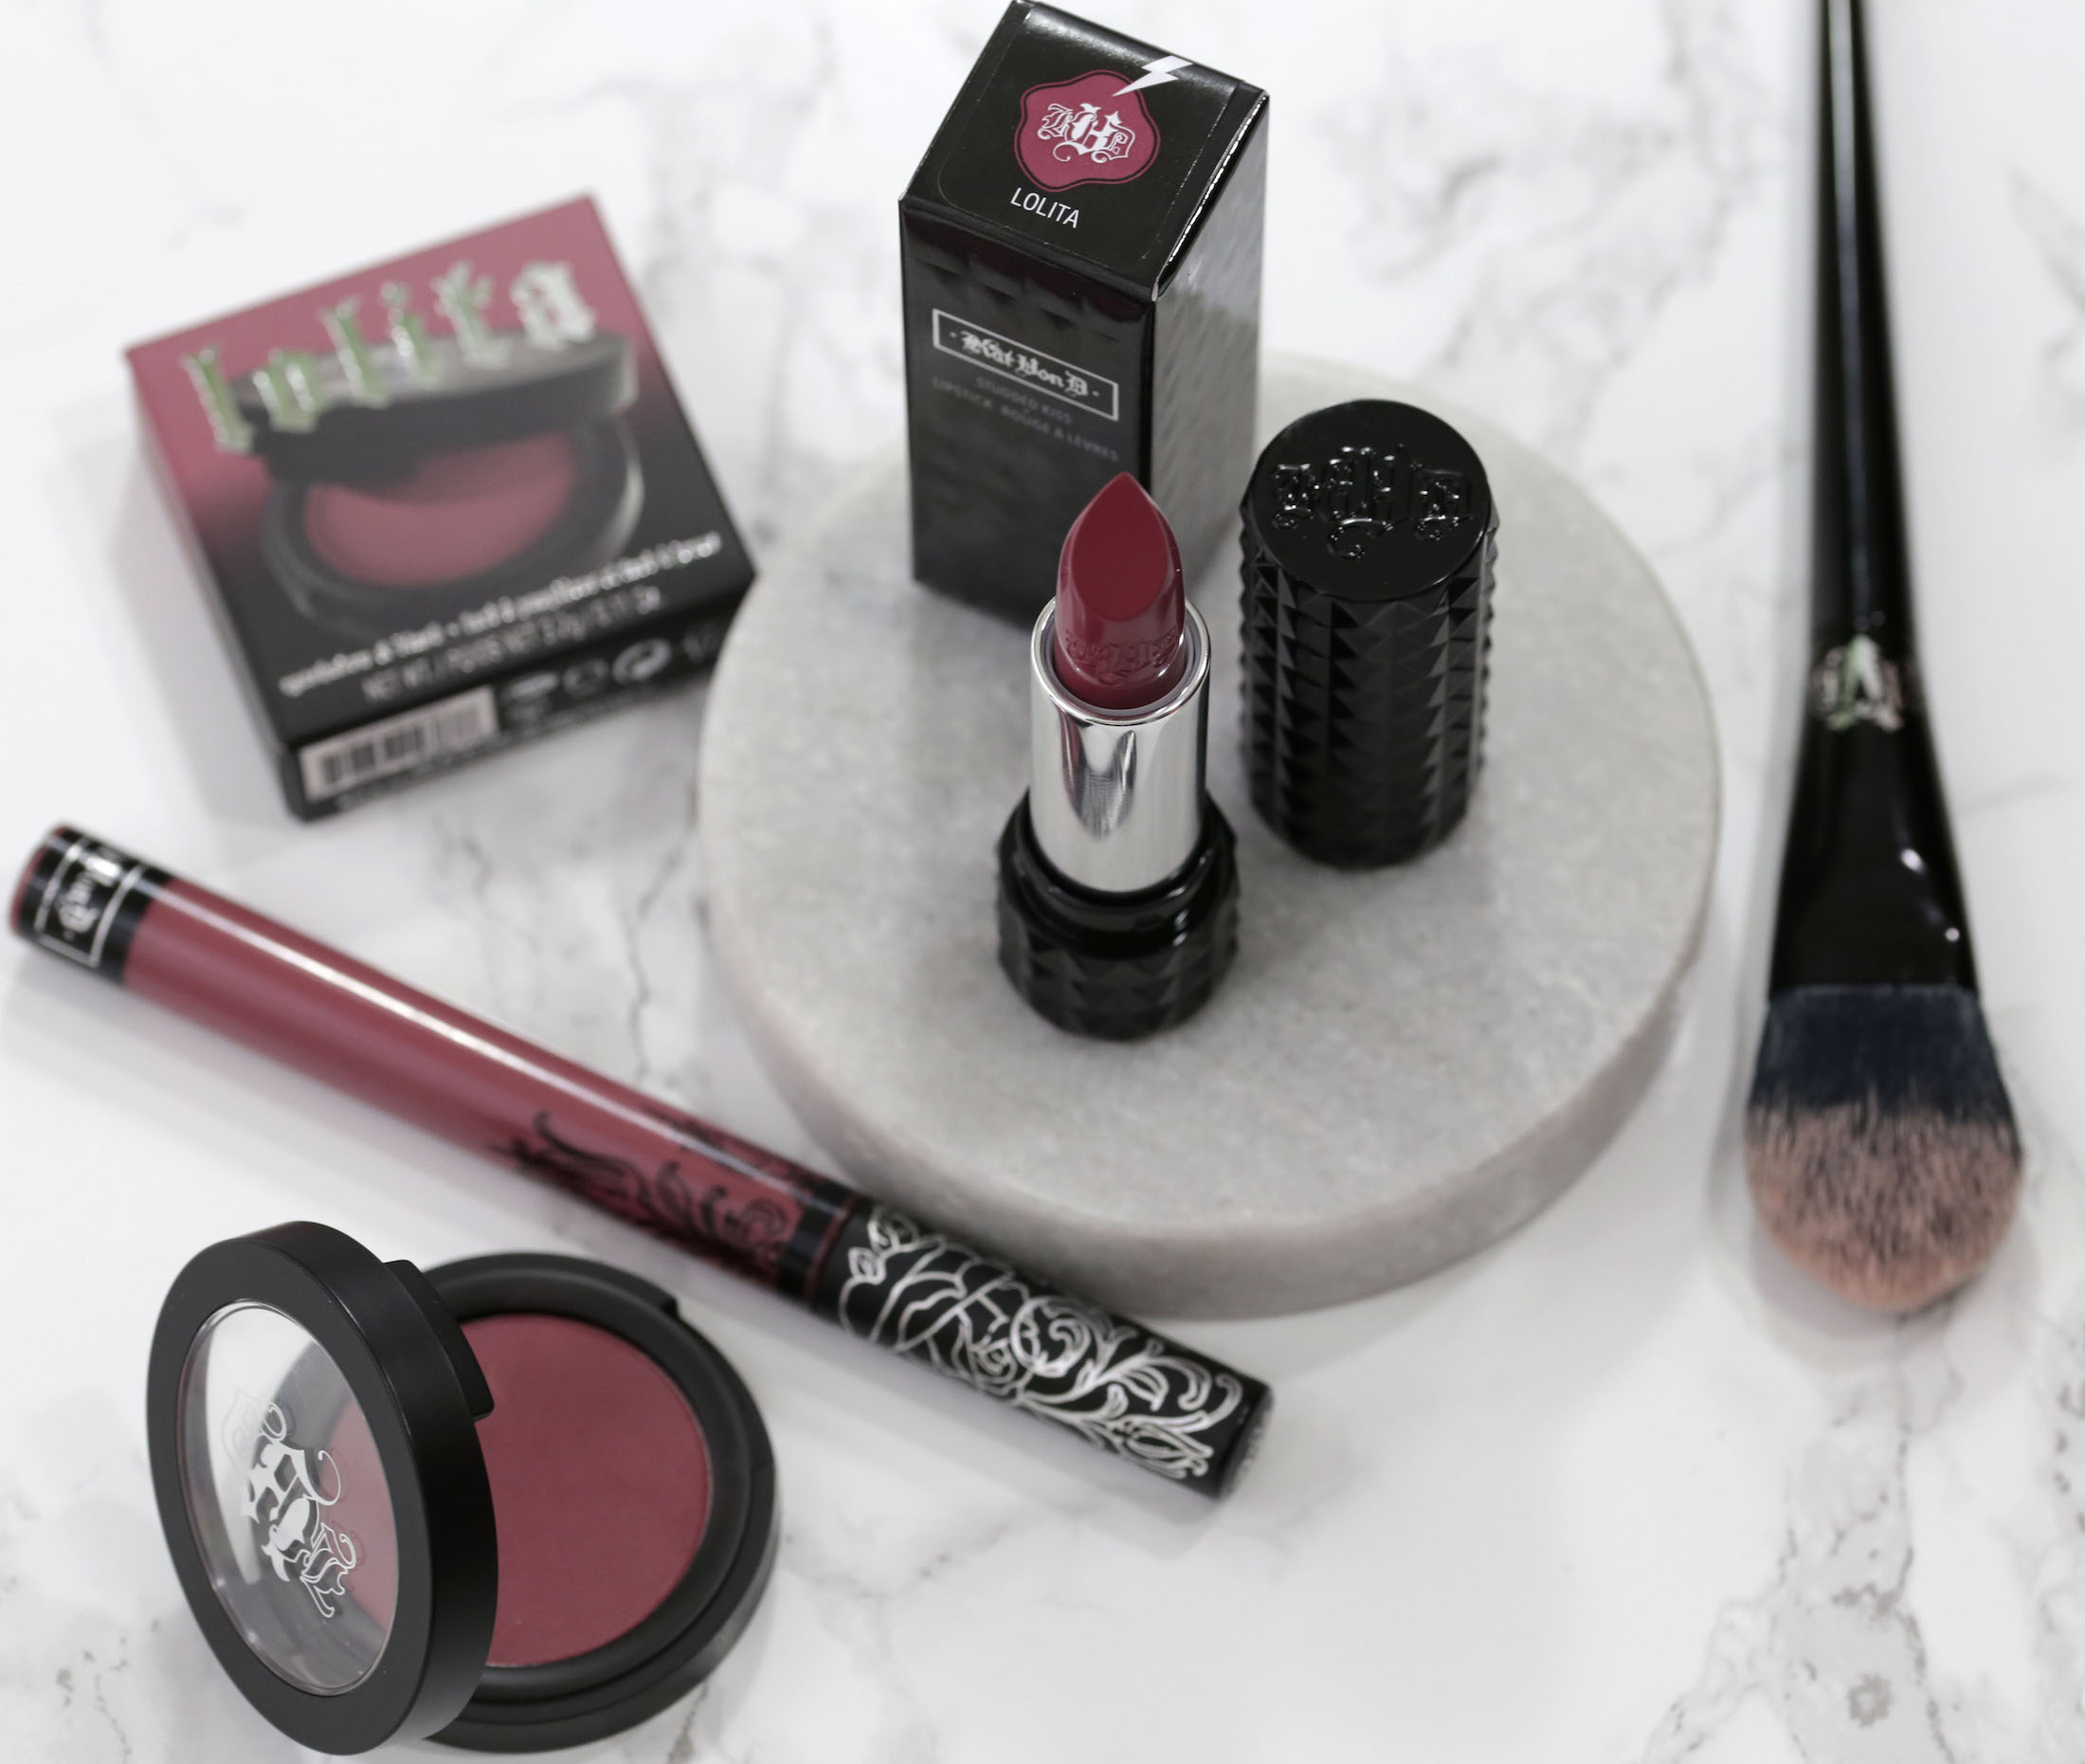
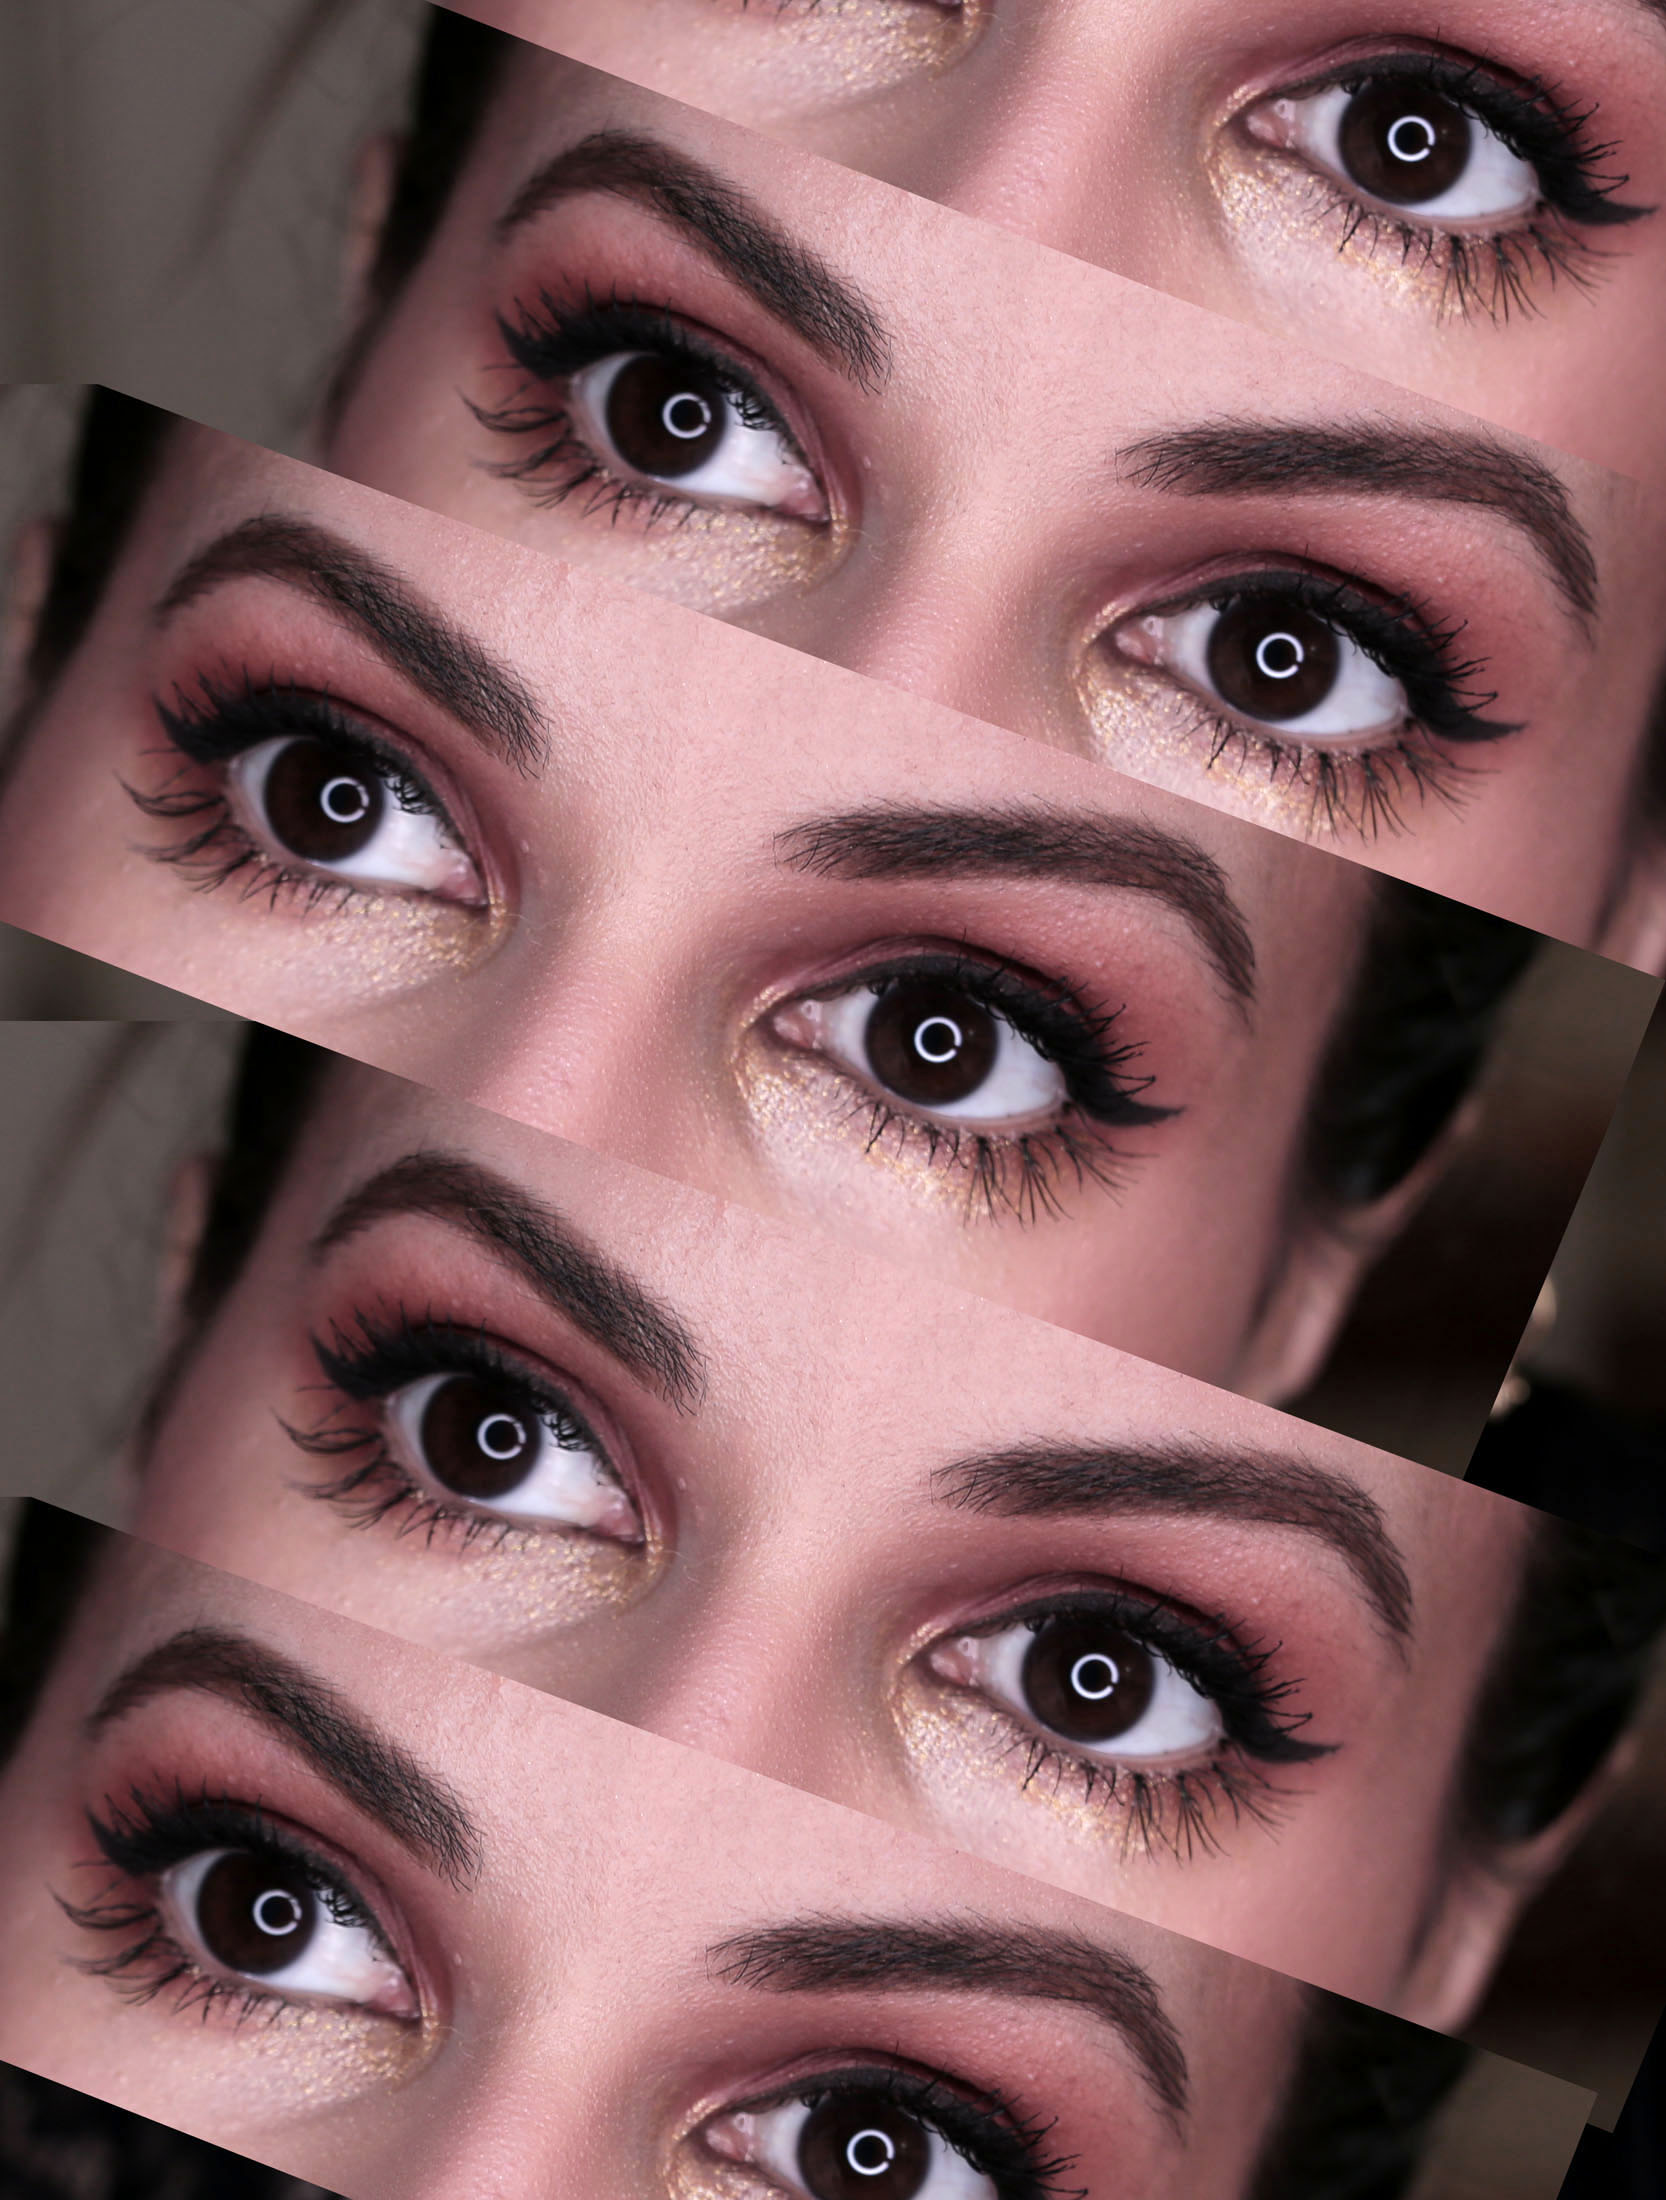
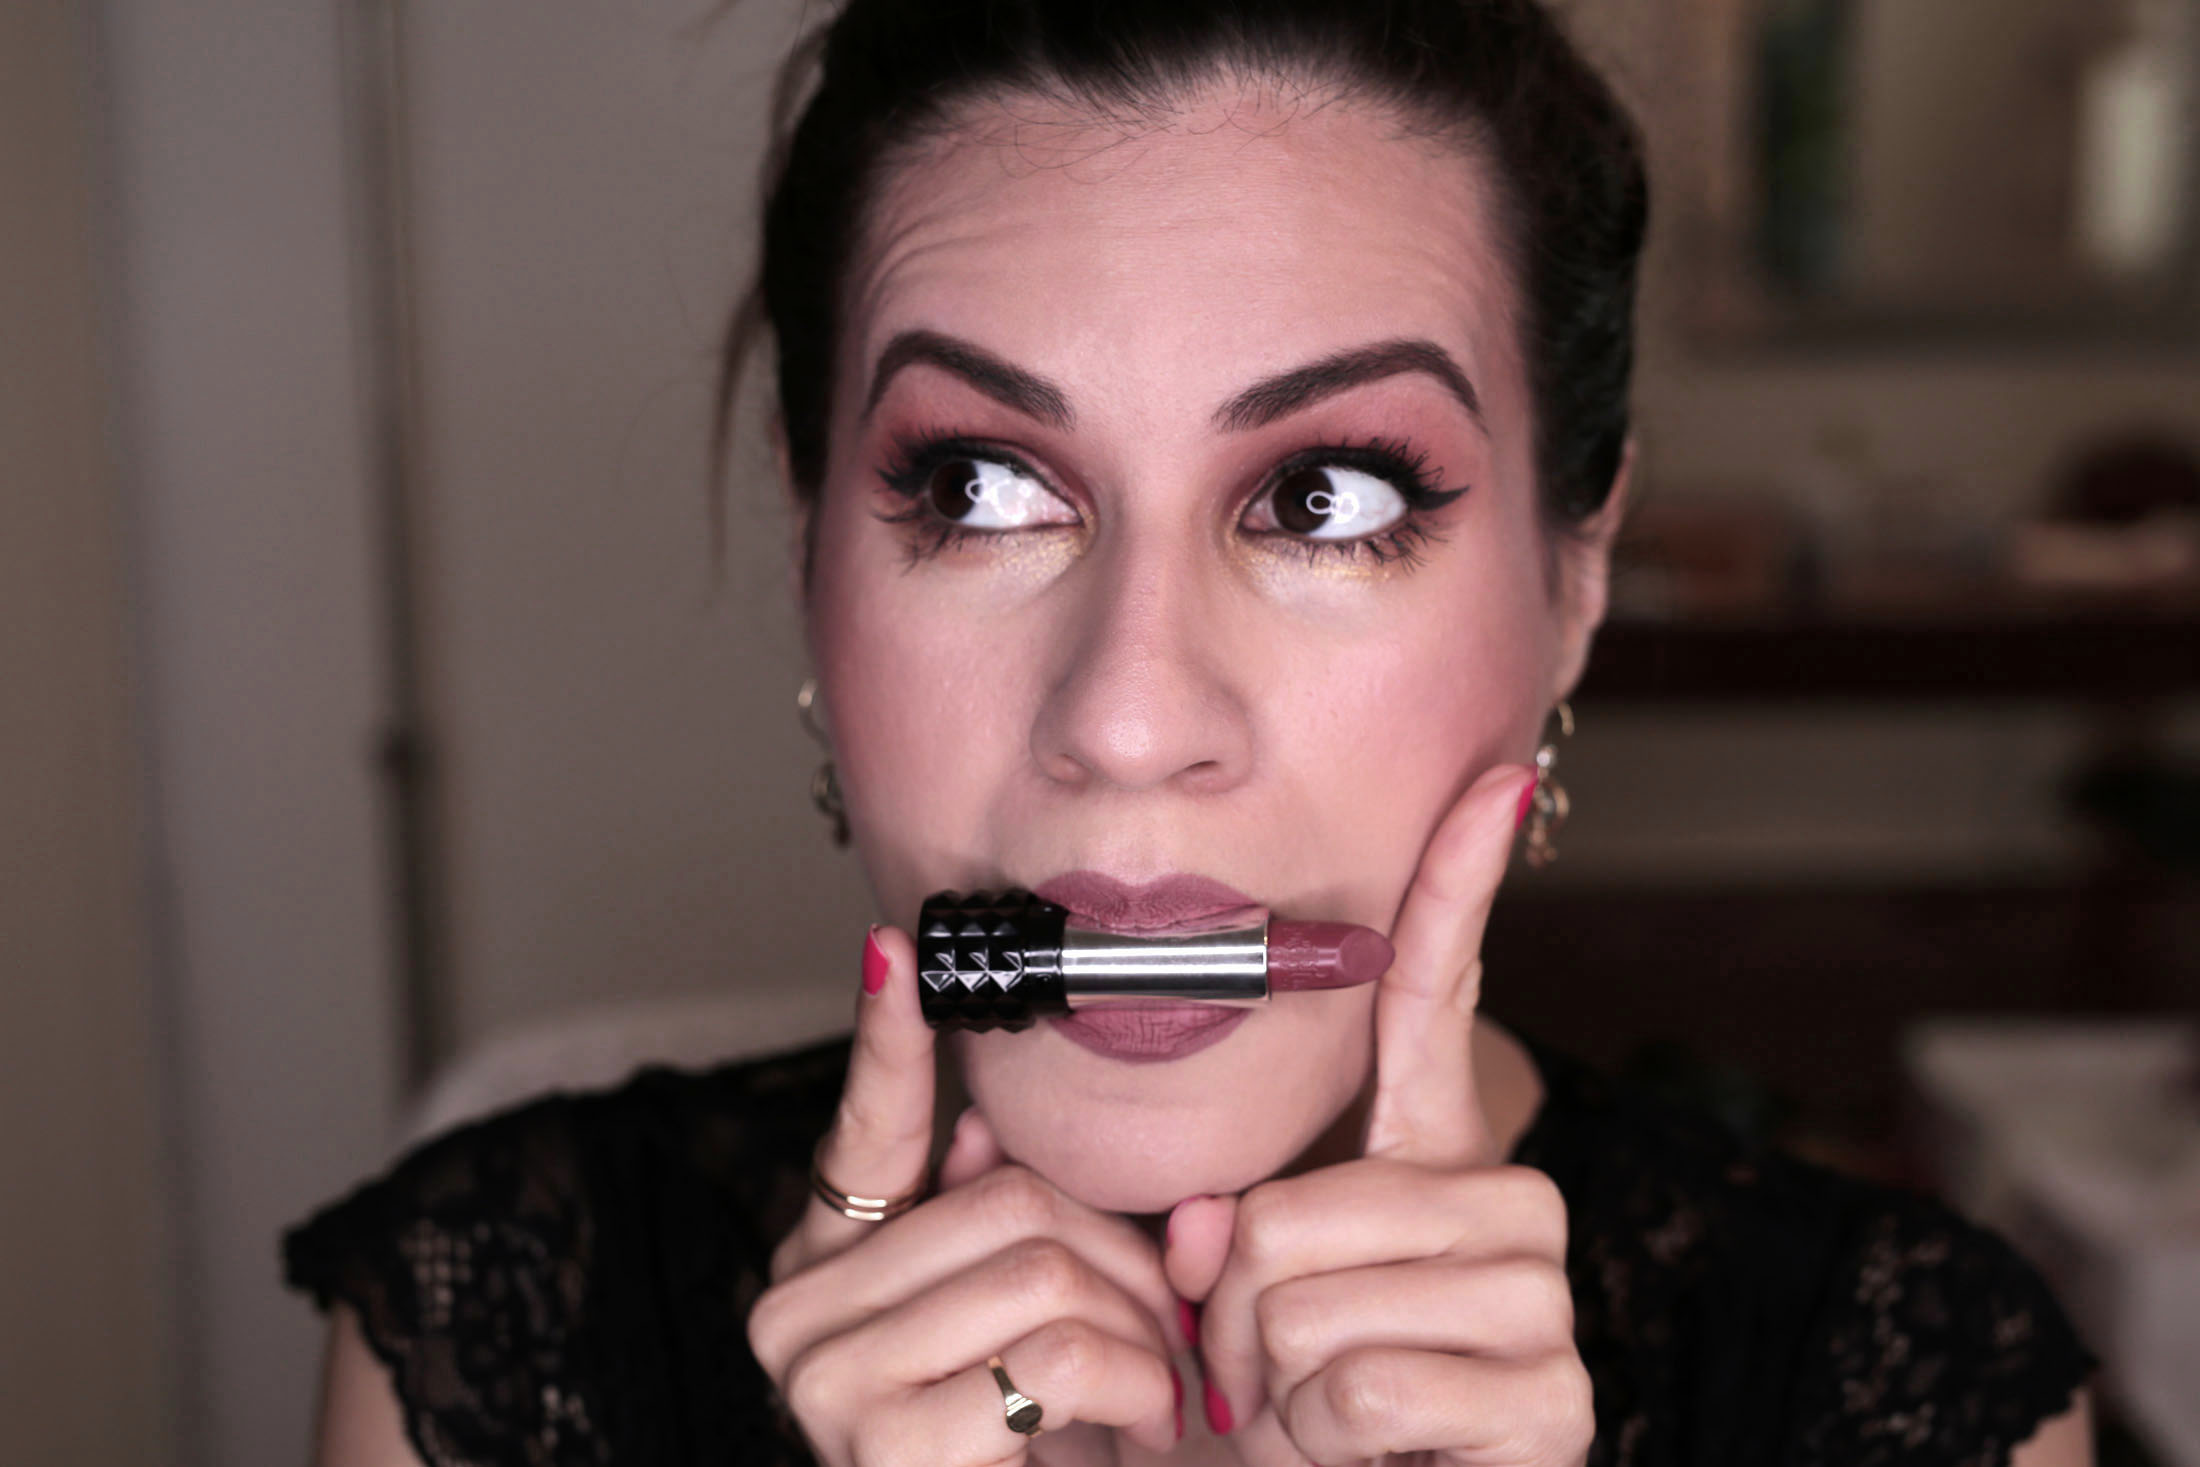
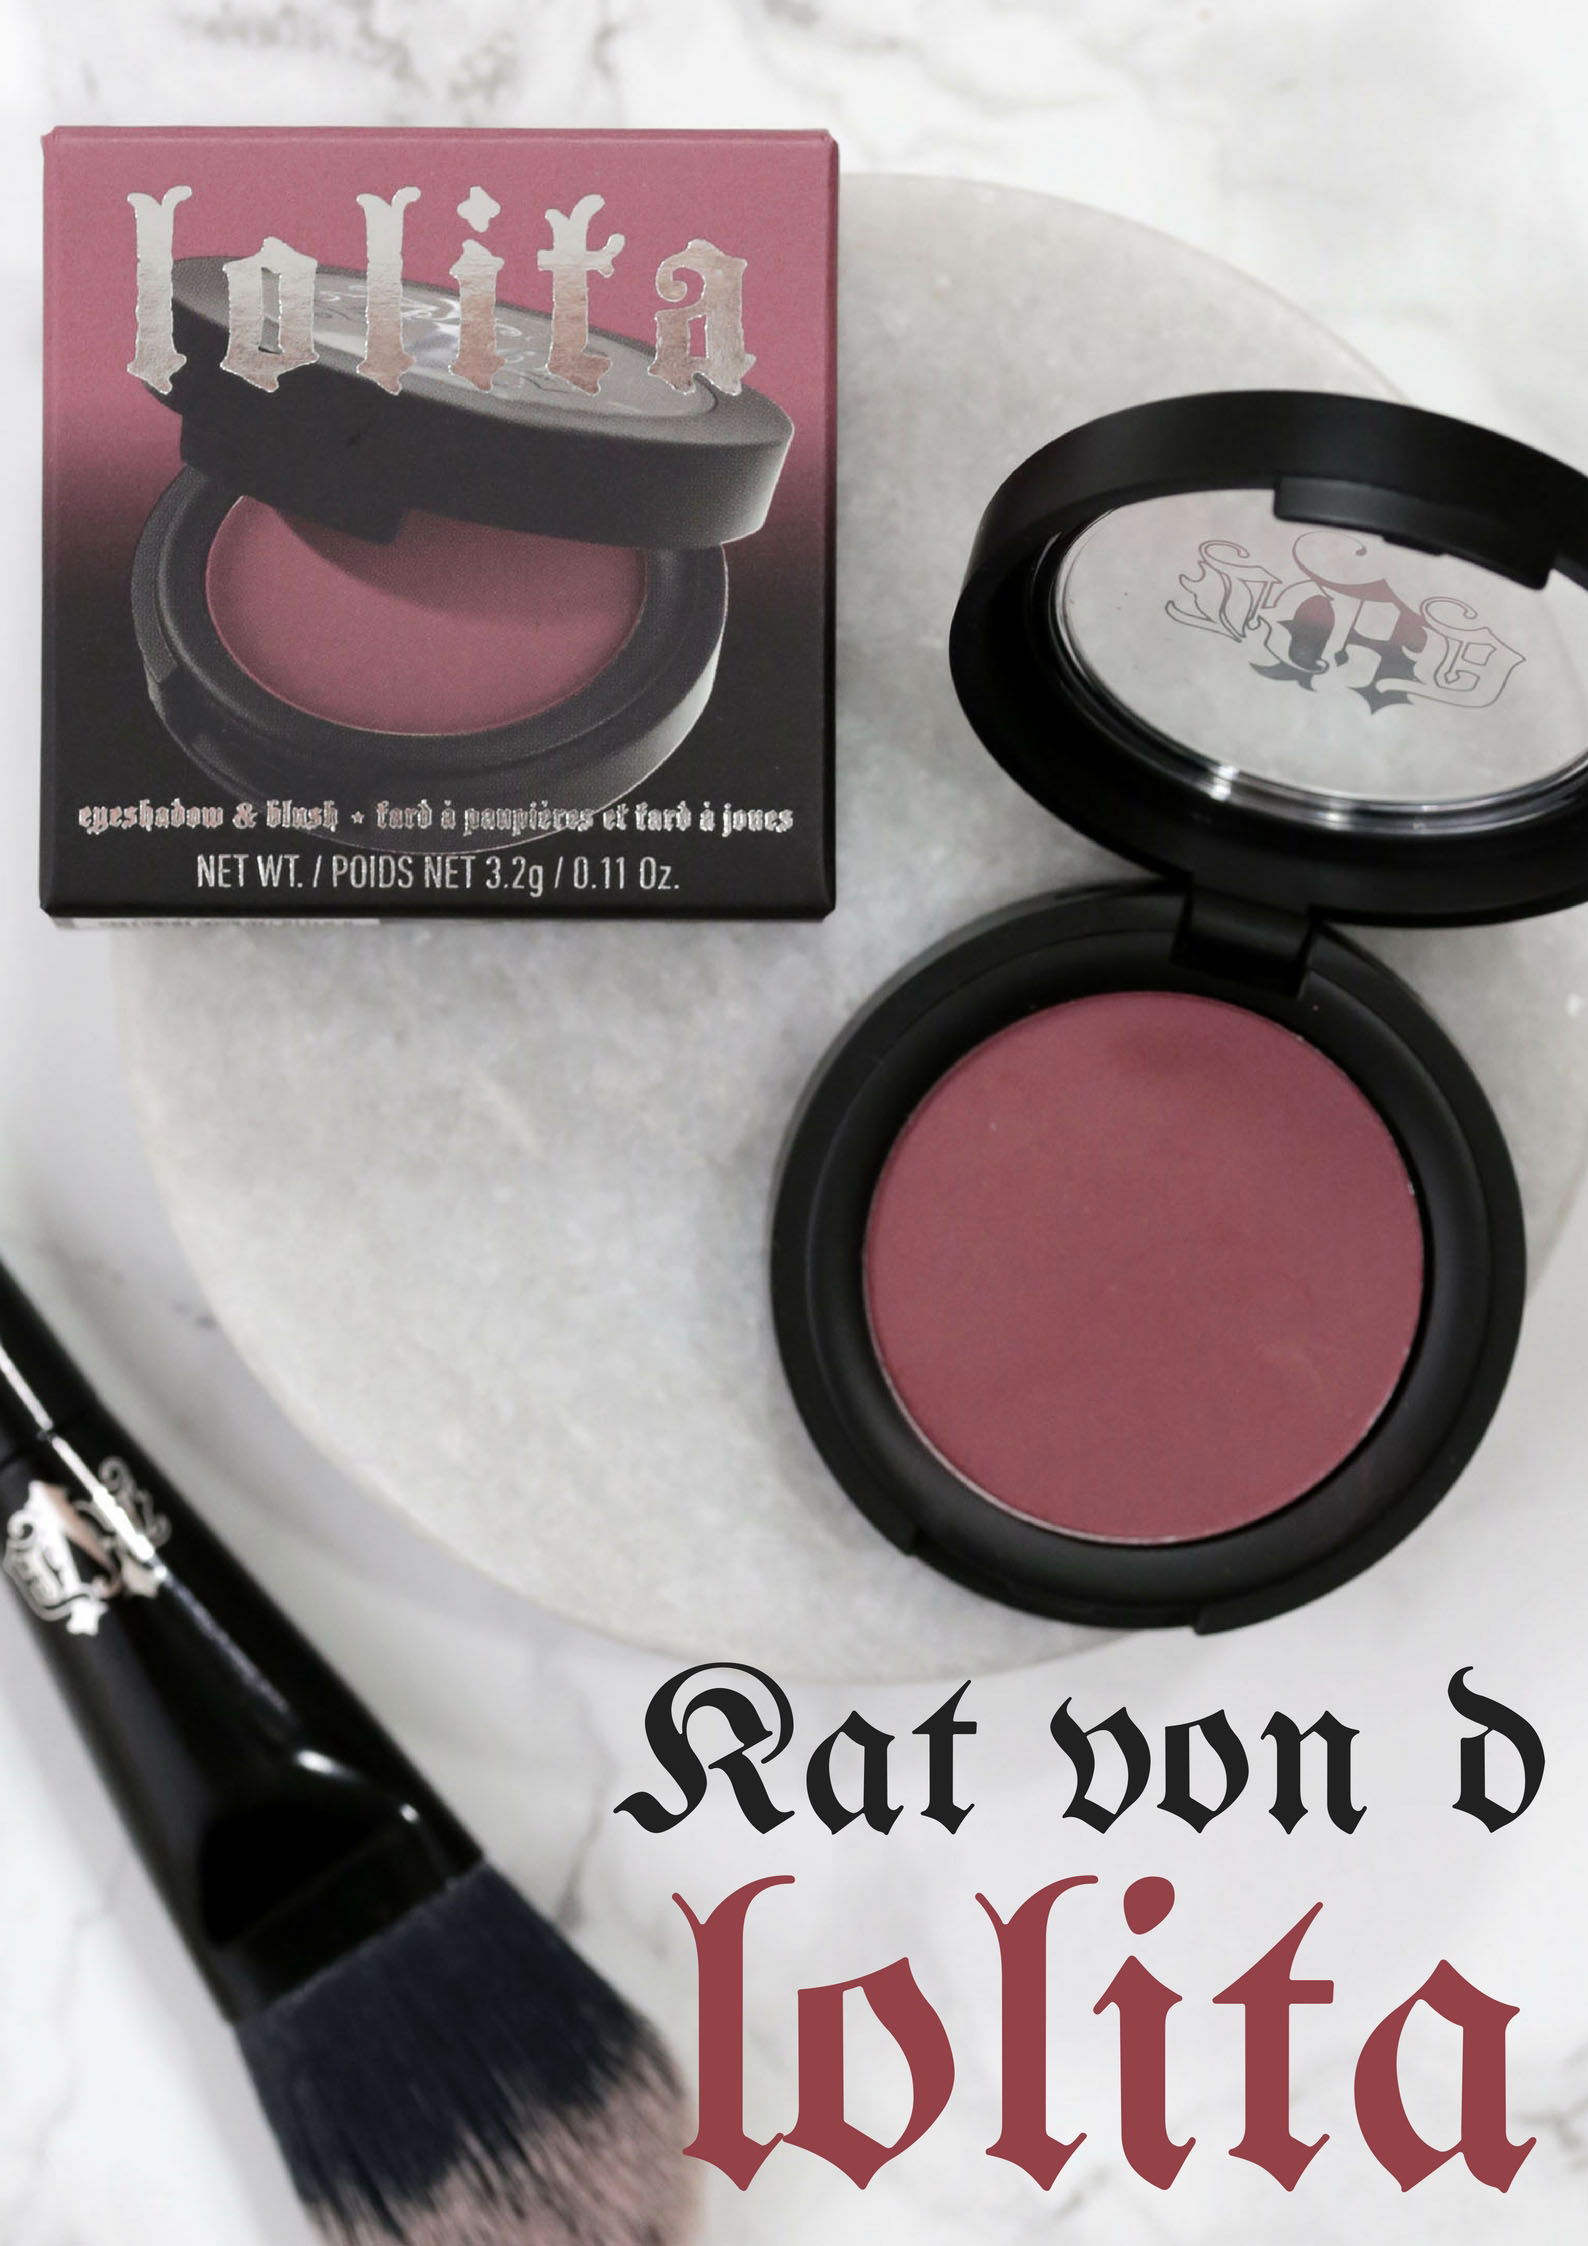
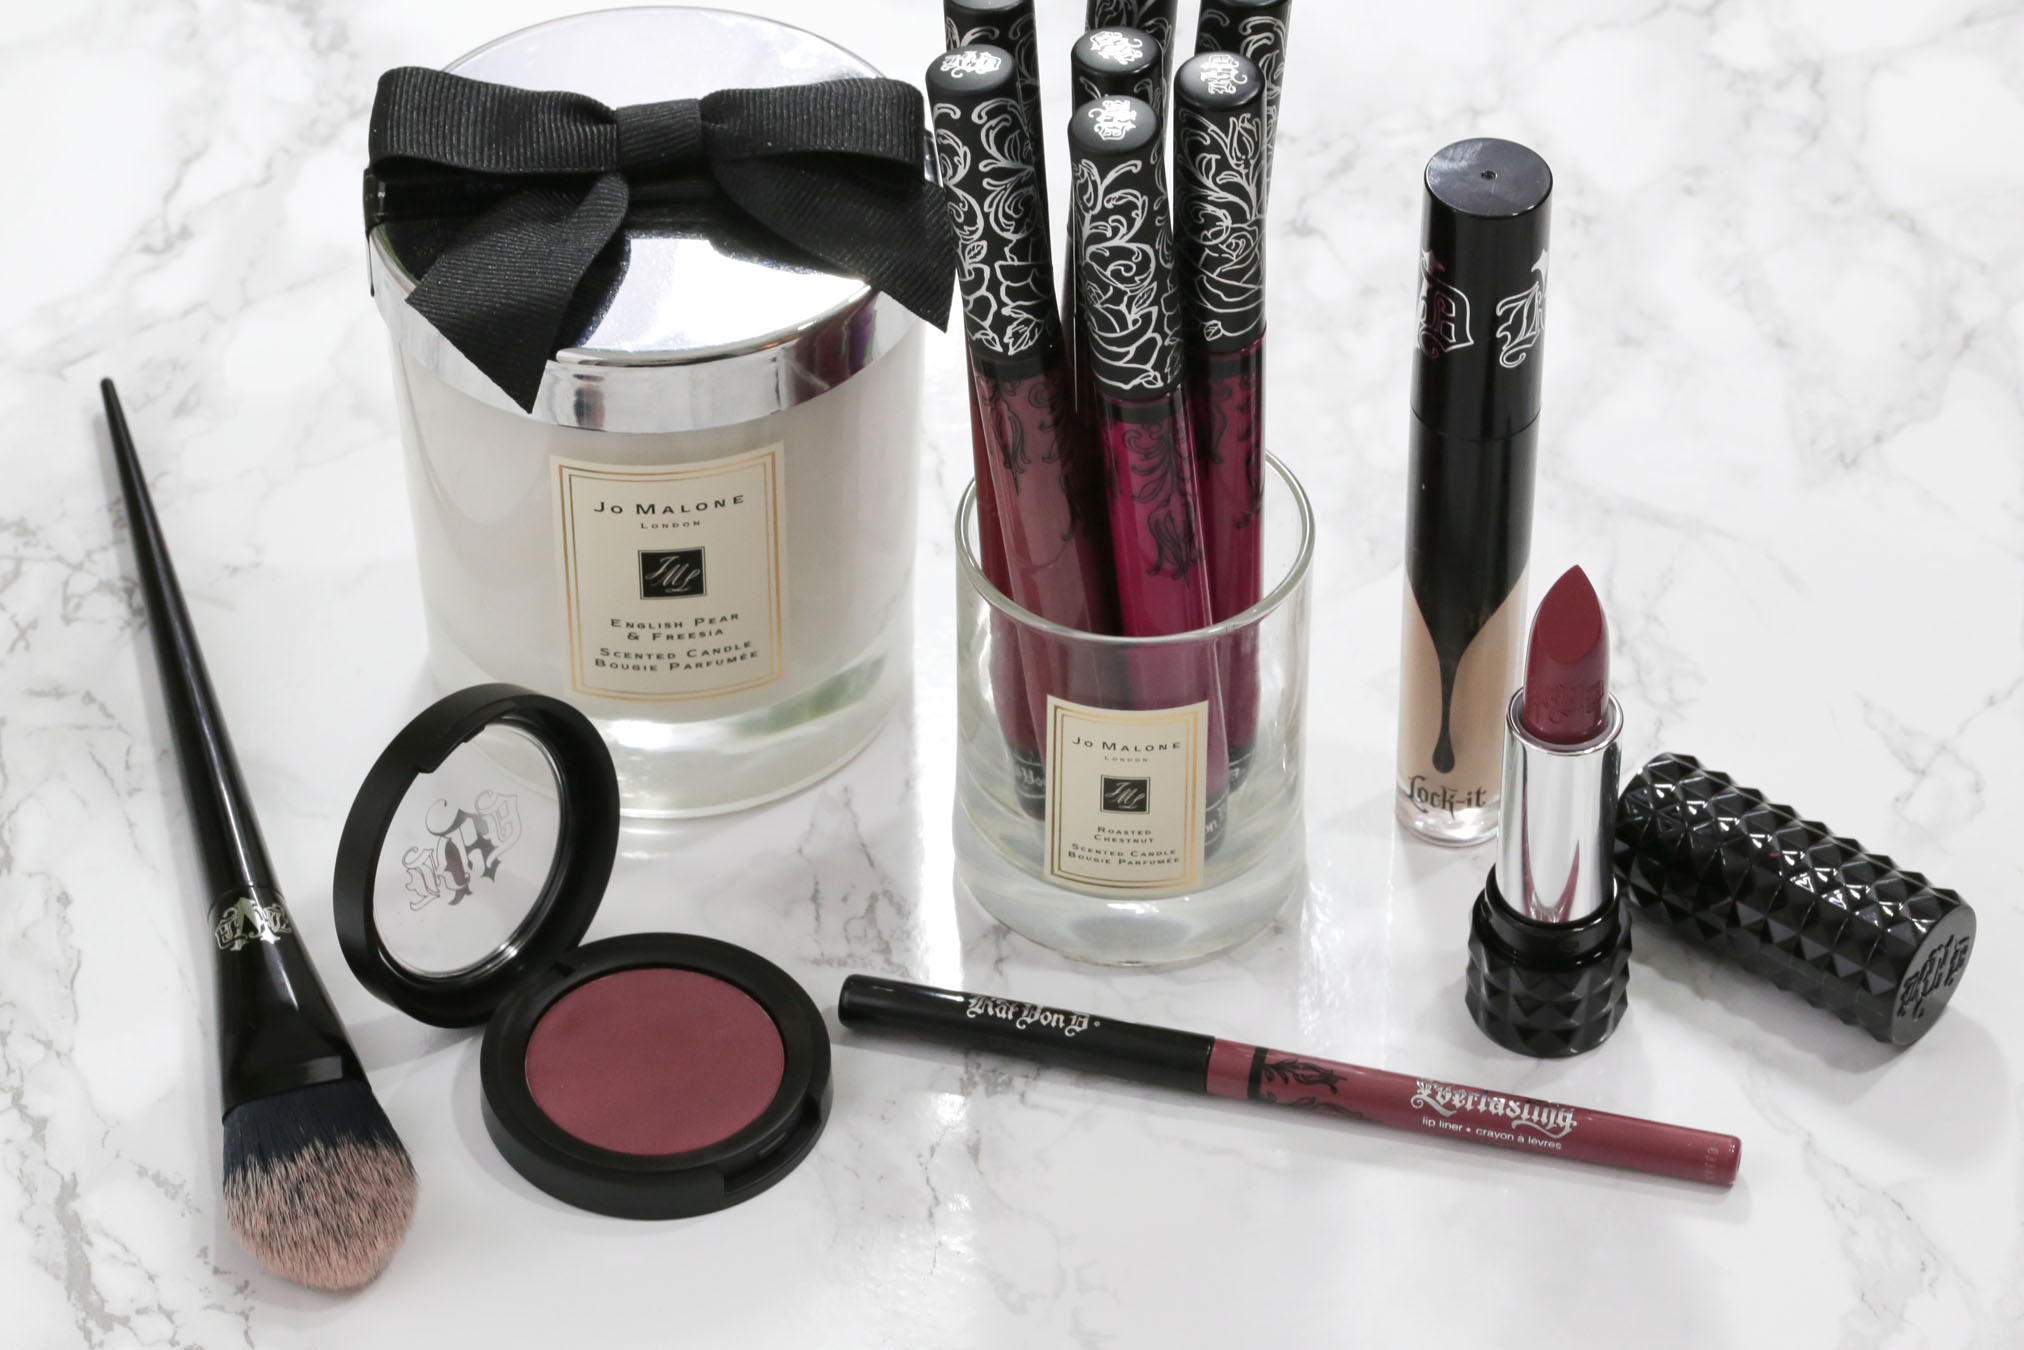
Monochrome makeup with Kat Von D's new Lolita eyeshadow & blush

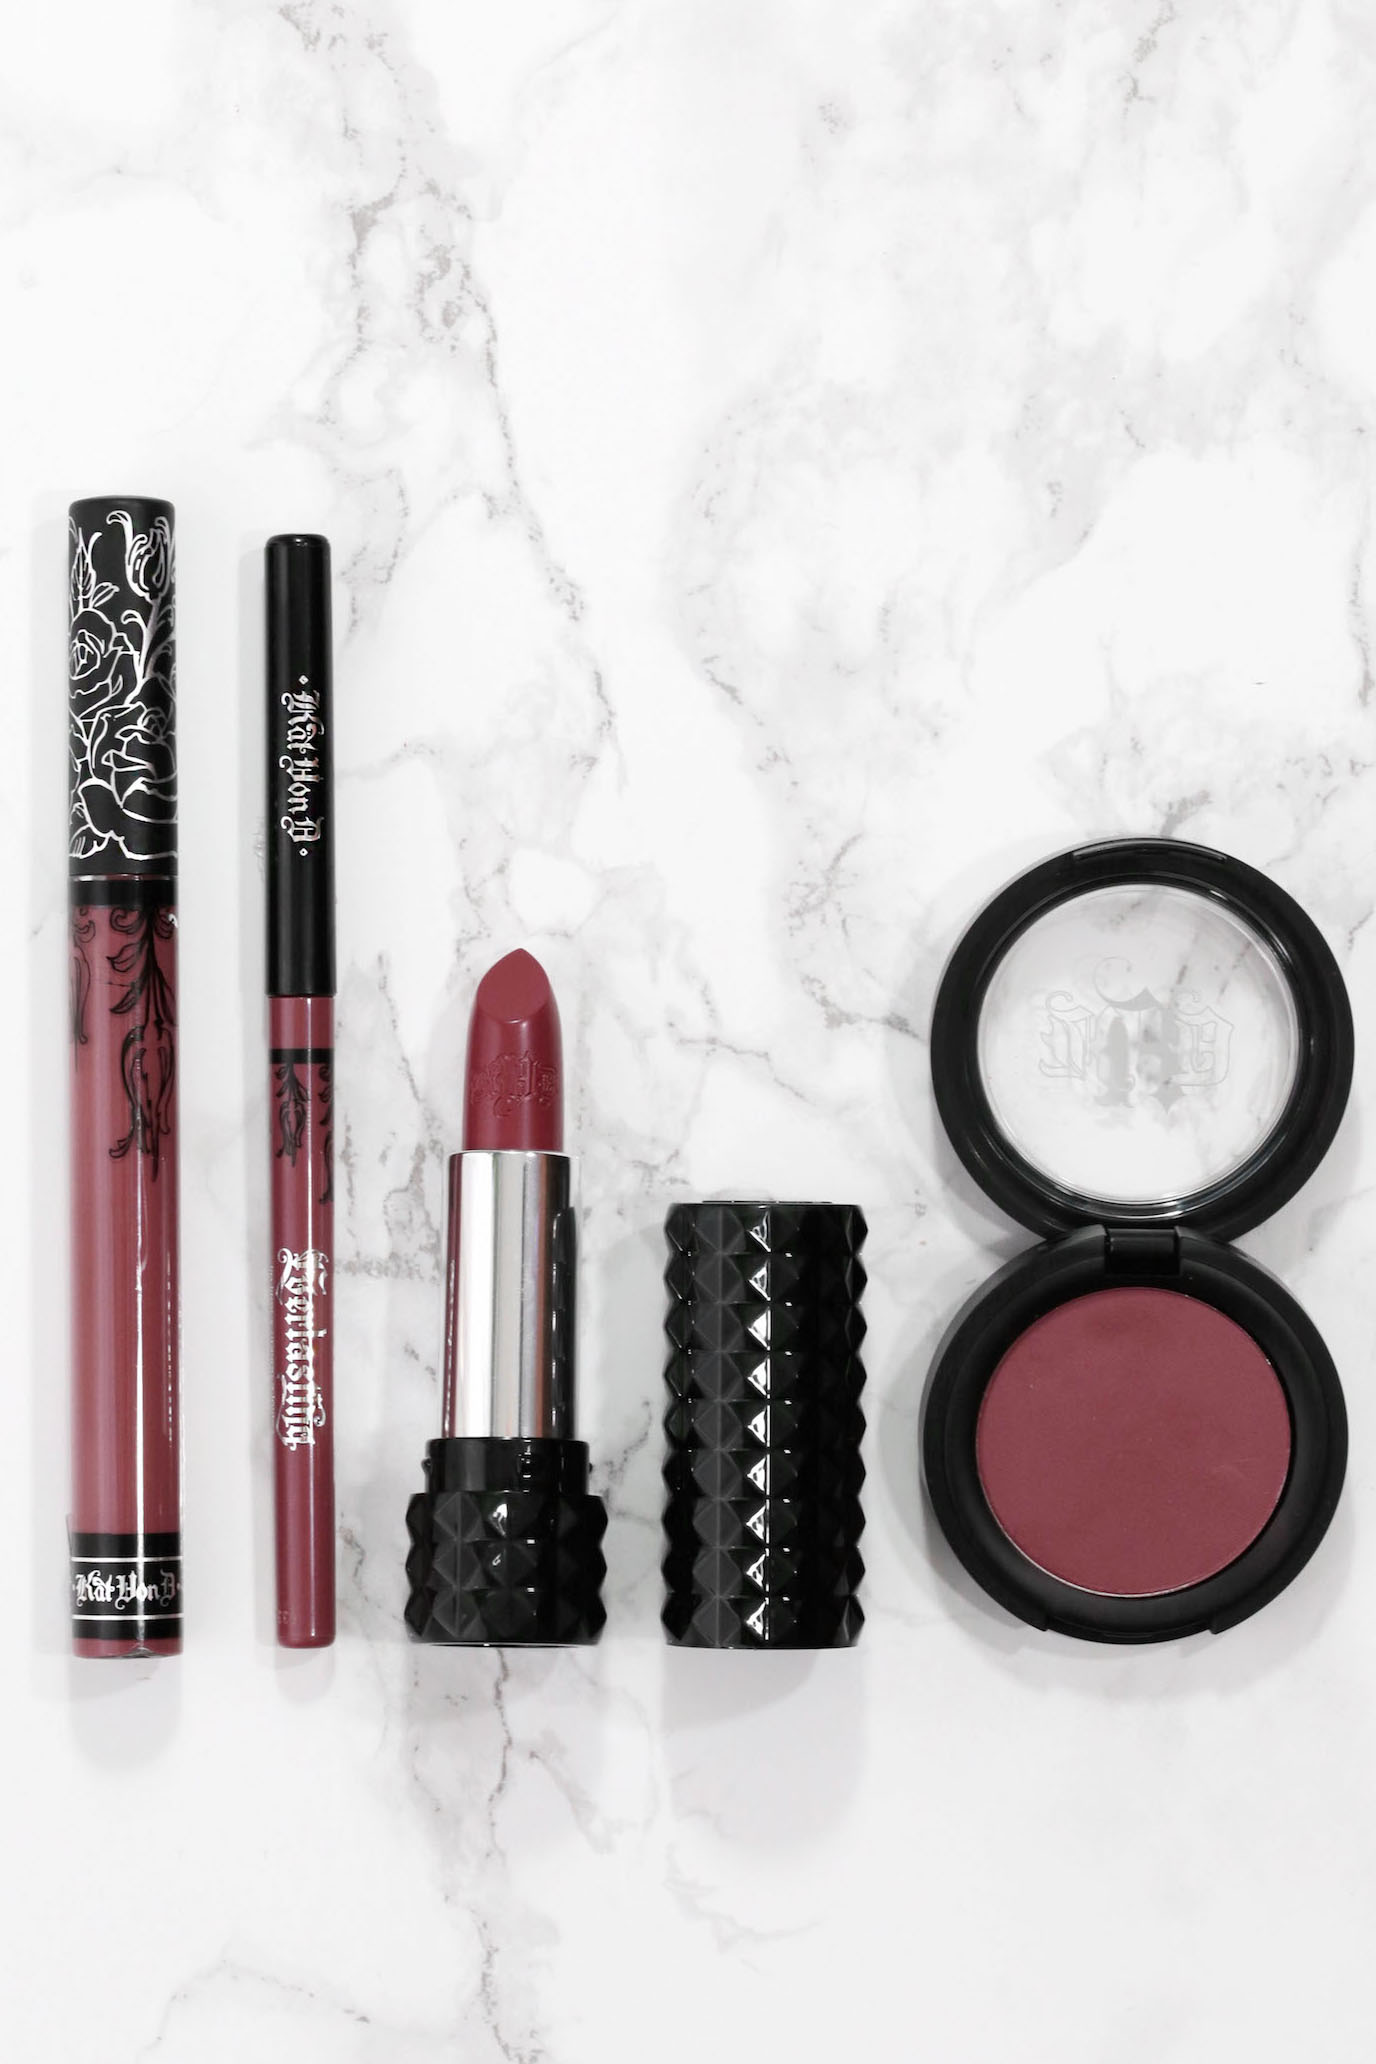
Fans of Kat Von D's iconic lipstick Lolita are going crazy over the new eyeshadow/ blush duo. It's already sold out on Sephora.com and with reason. The chestnut rose colour is equally as flattering on the eyes as it is on the lips.
For a bit of depth and colour to the face, just add a bit of Lolita to the cheeks and finish the look with a swipe of Lolita lipstick and your monochromatic makeup is ready.
Monochromatic makeup featuring KVD's Lolita
1.
Prime the eyelids using your favourite primer and apply some of your favourite lip balm to the lips. Adding lipbalm in the start of your makeup routine will not only hydrate the lips but will also keep your lipstick from drying out and lasting longer.
2.
Now start with the eyes and sweep Lolita shadow on the eyelids and bring it up the crease. Blend with a clean fluffy brush until there are no harsh lines.
3.
Sweep a gold shadow on the lower lash line. I used a gold shimmer lipgloss from Bite Beauty's holiday 2016 collection.
4.
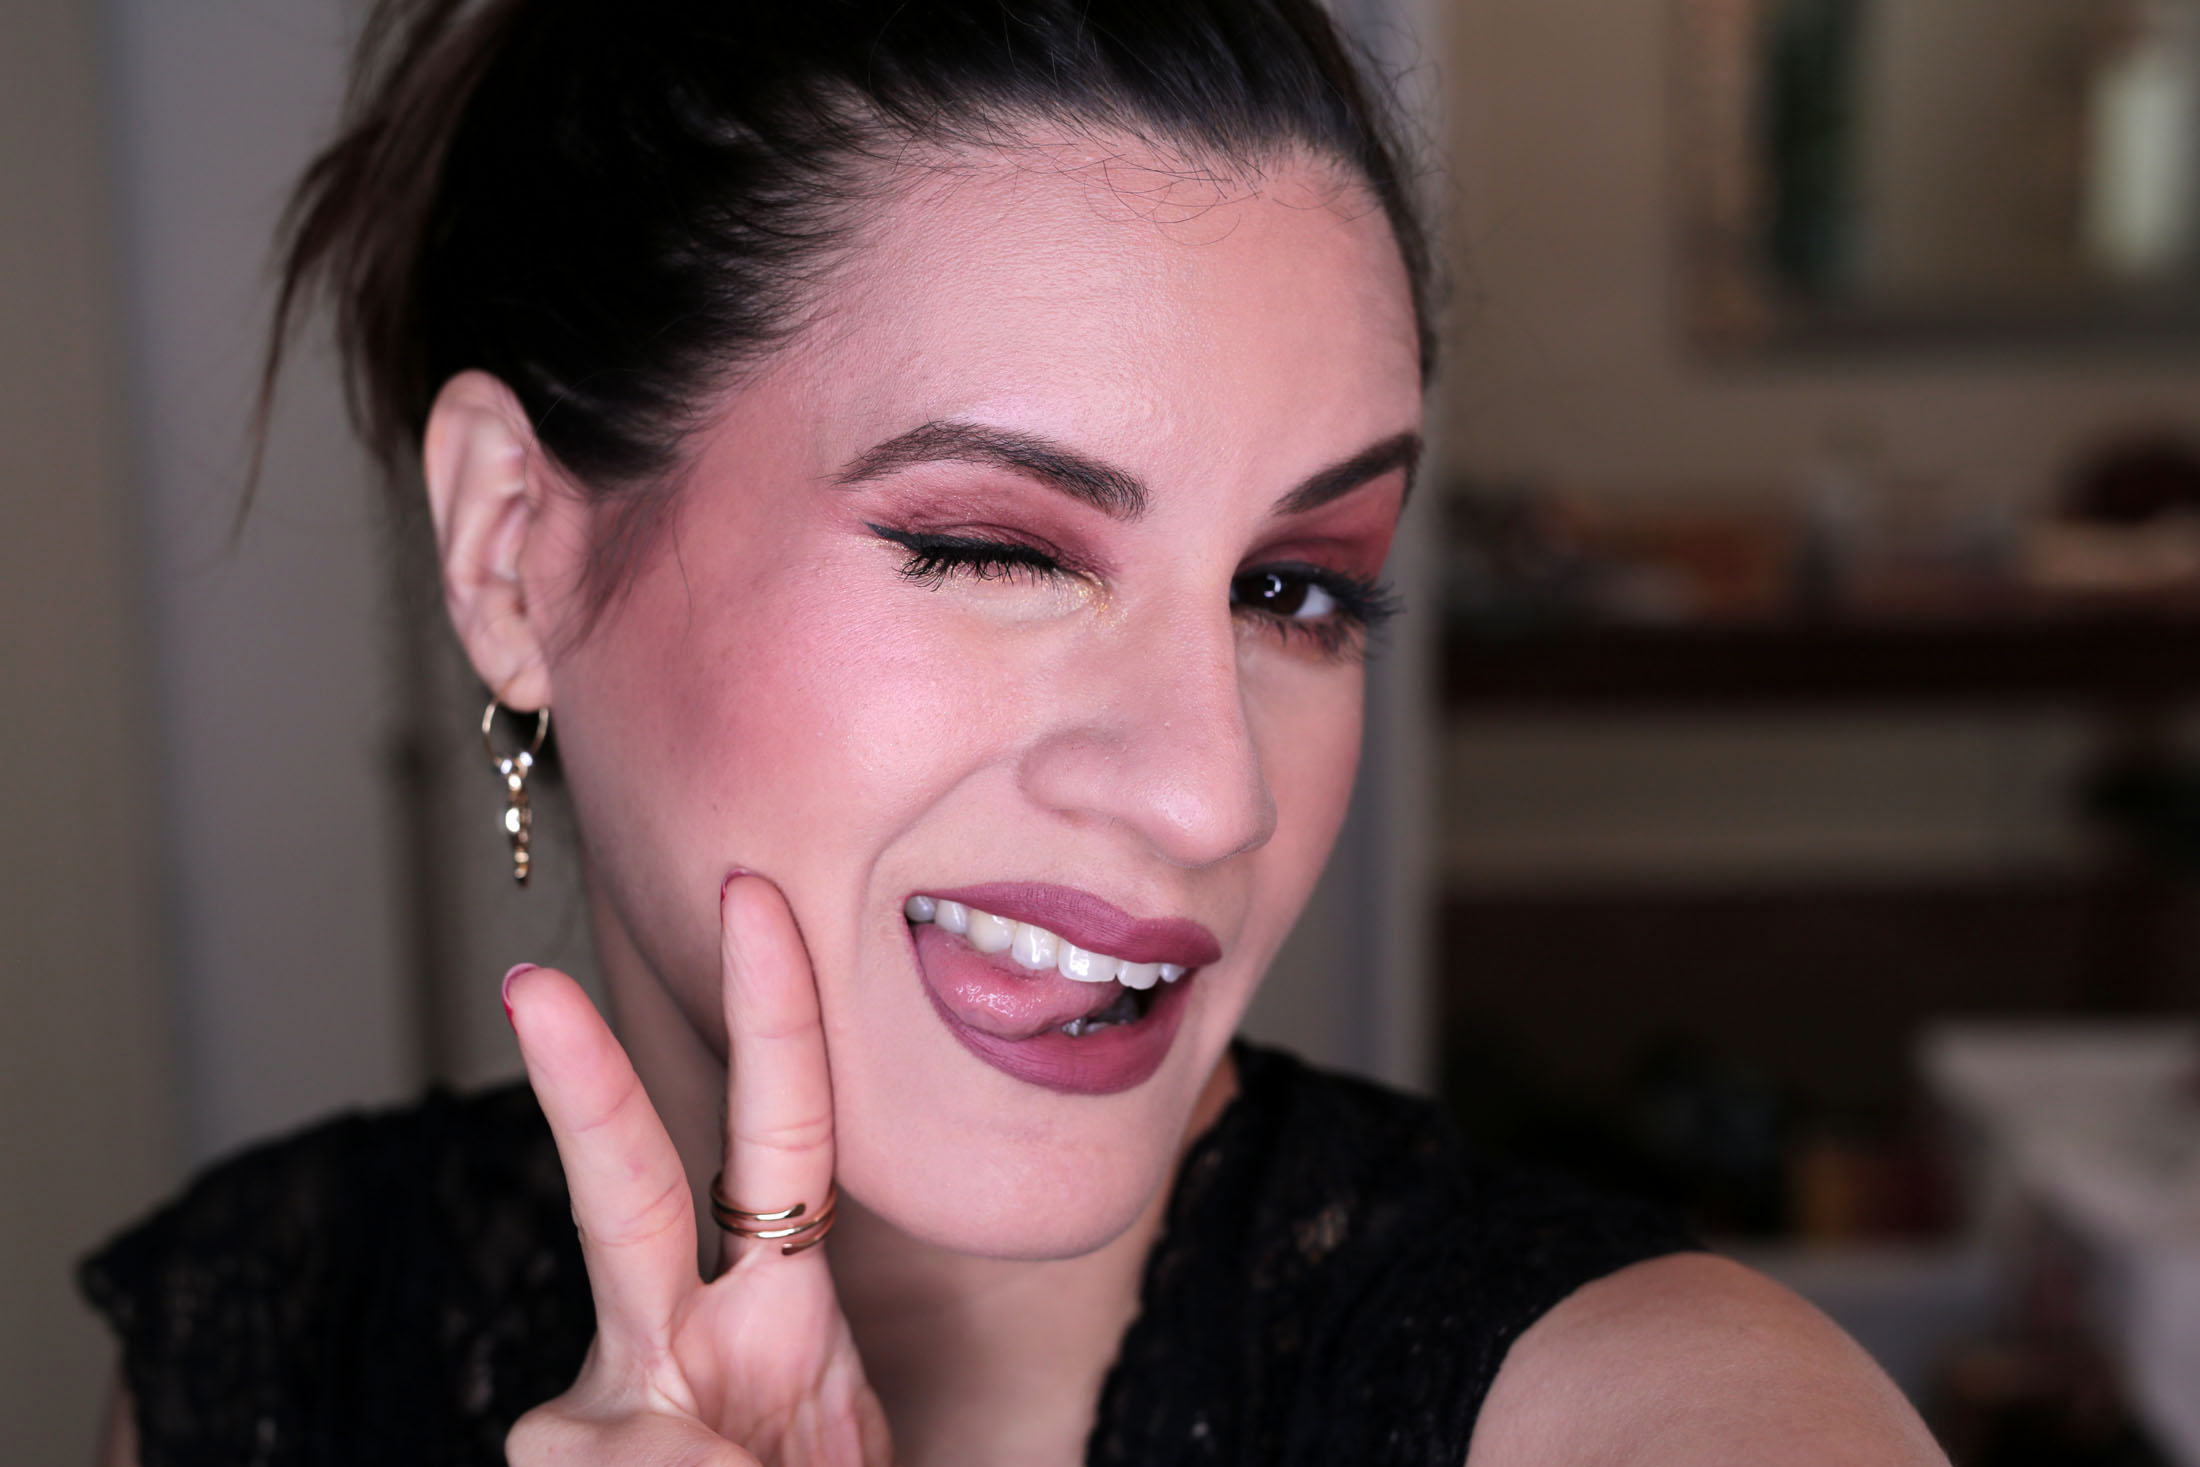
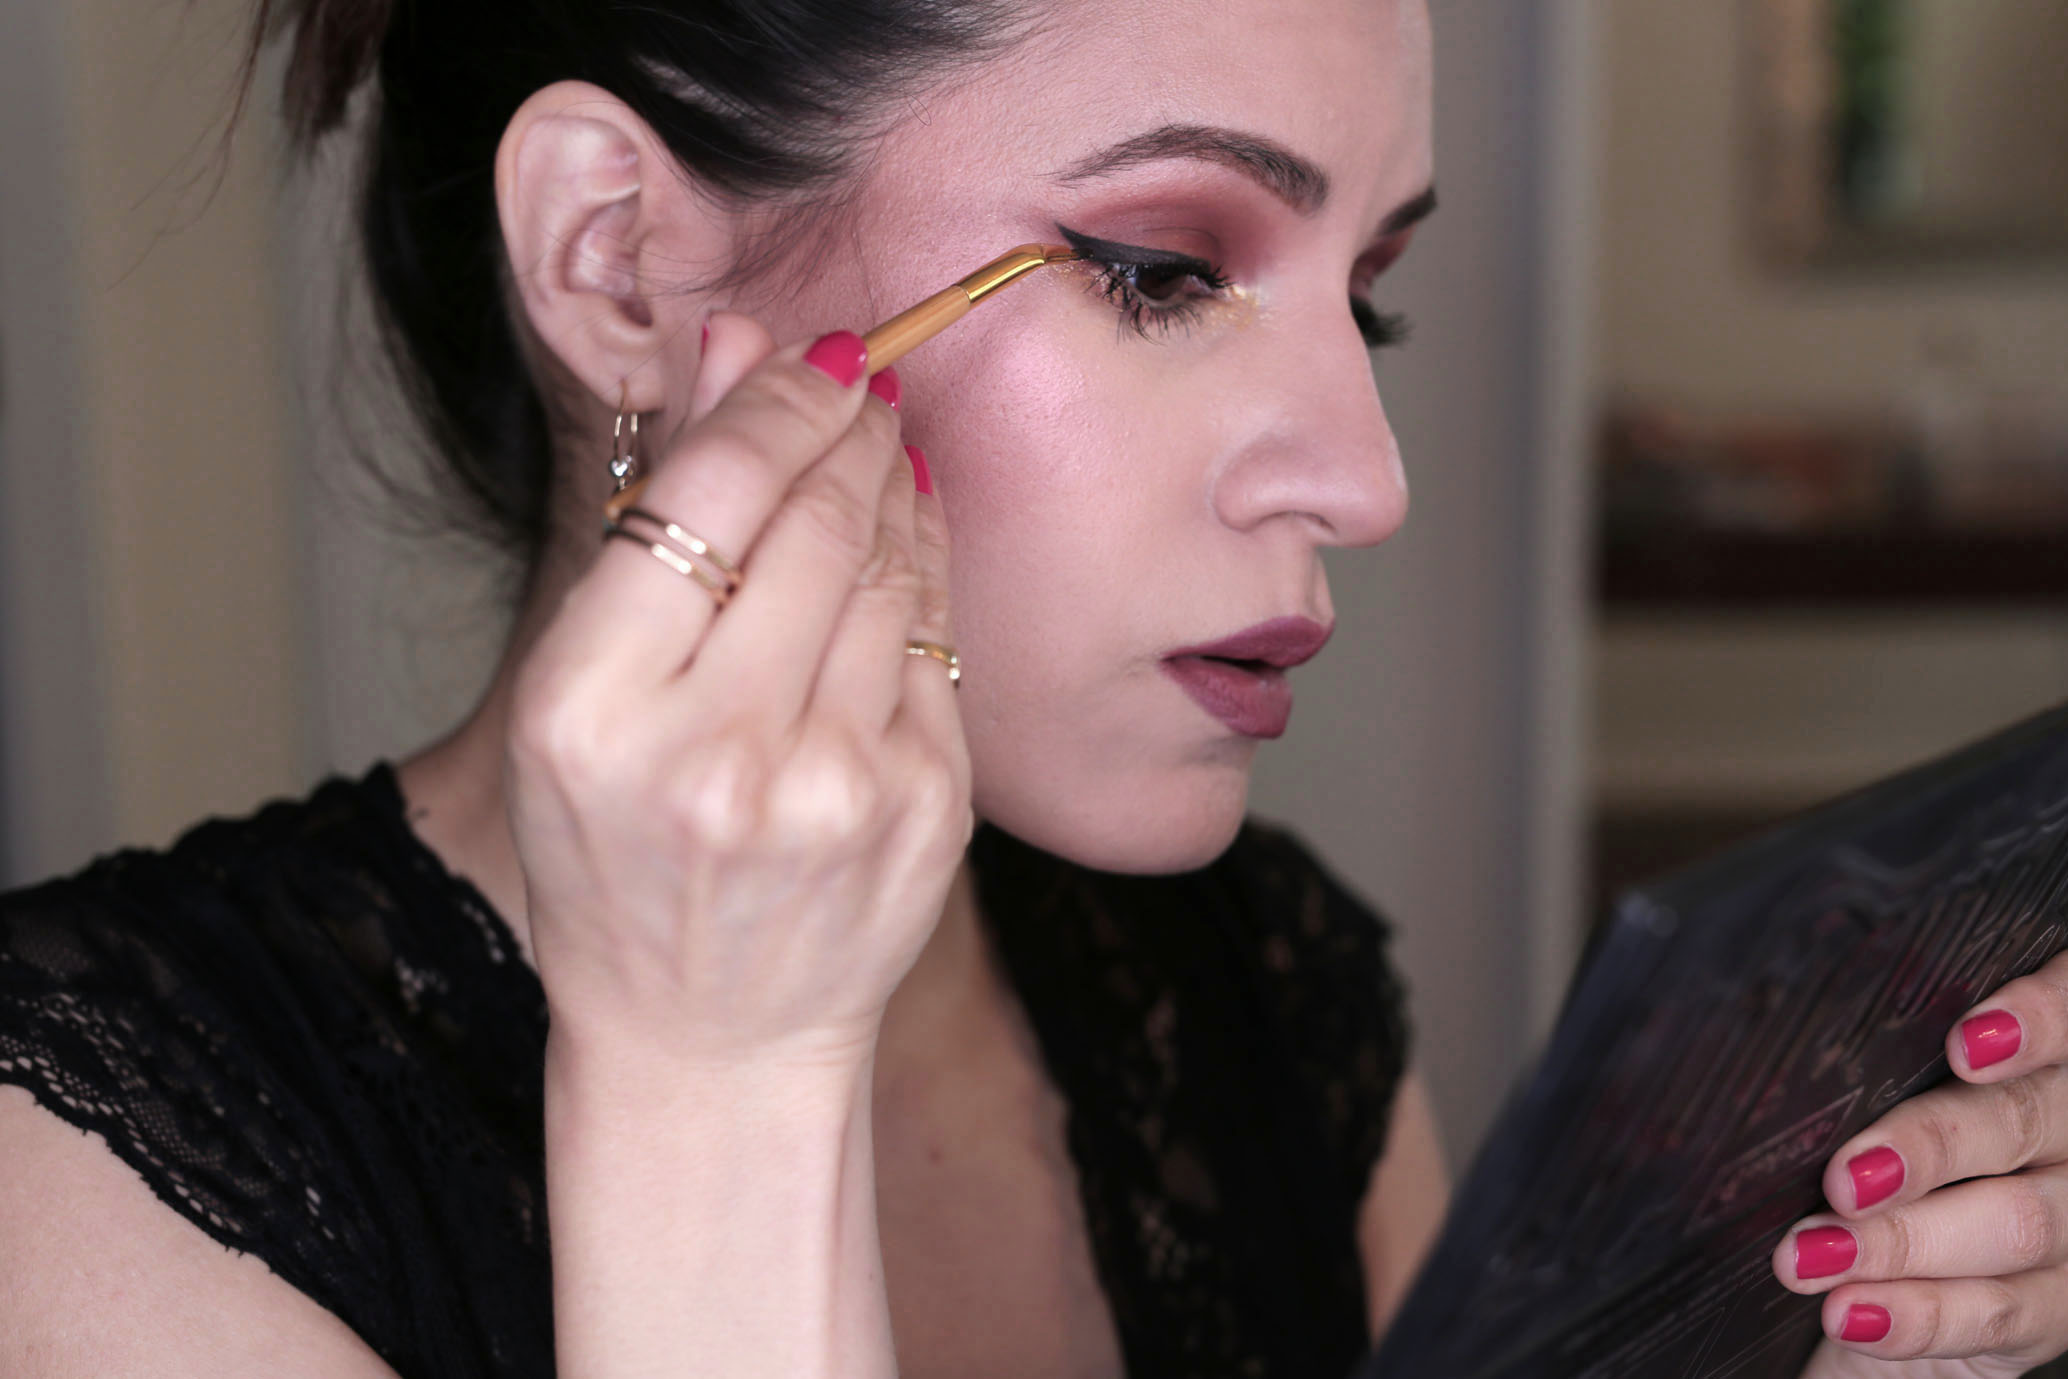
Now add a winged line for some drama. Curl your lashes and coat them with your favourite mascara.
5.
I added three individual lashes to my lower lash line and flipped the curl outward for a more dramatic effect.
6.
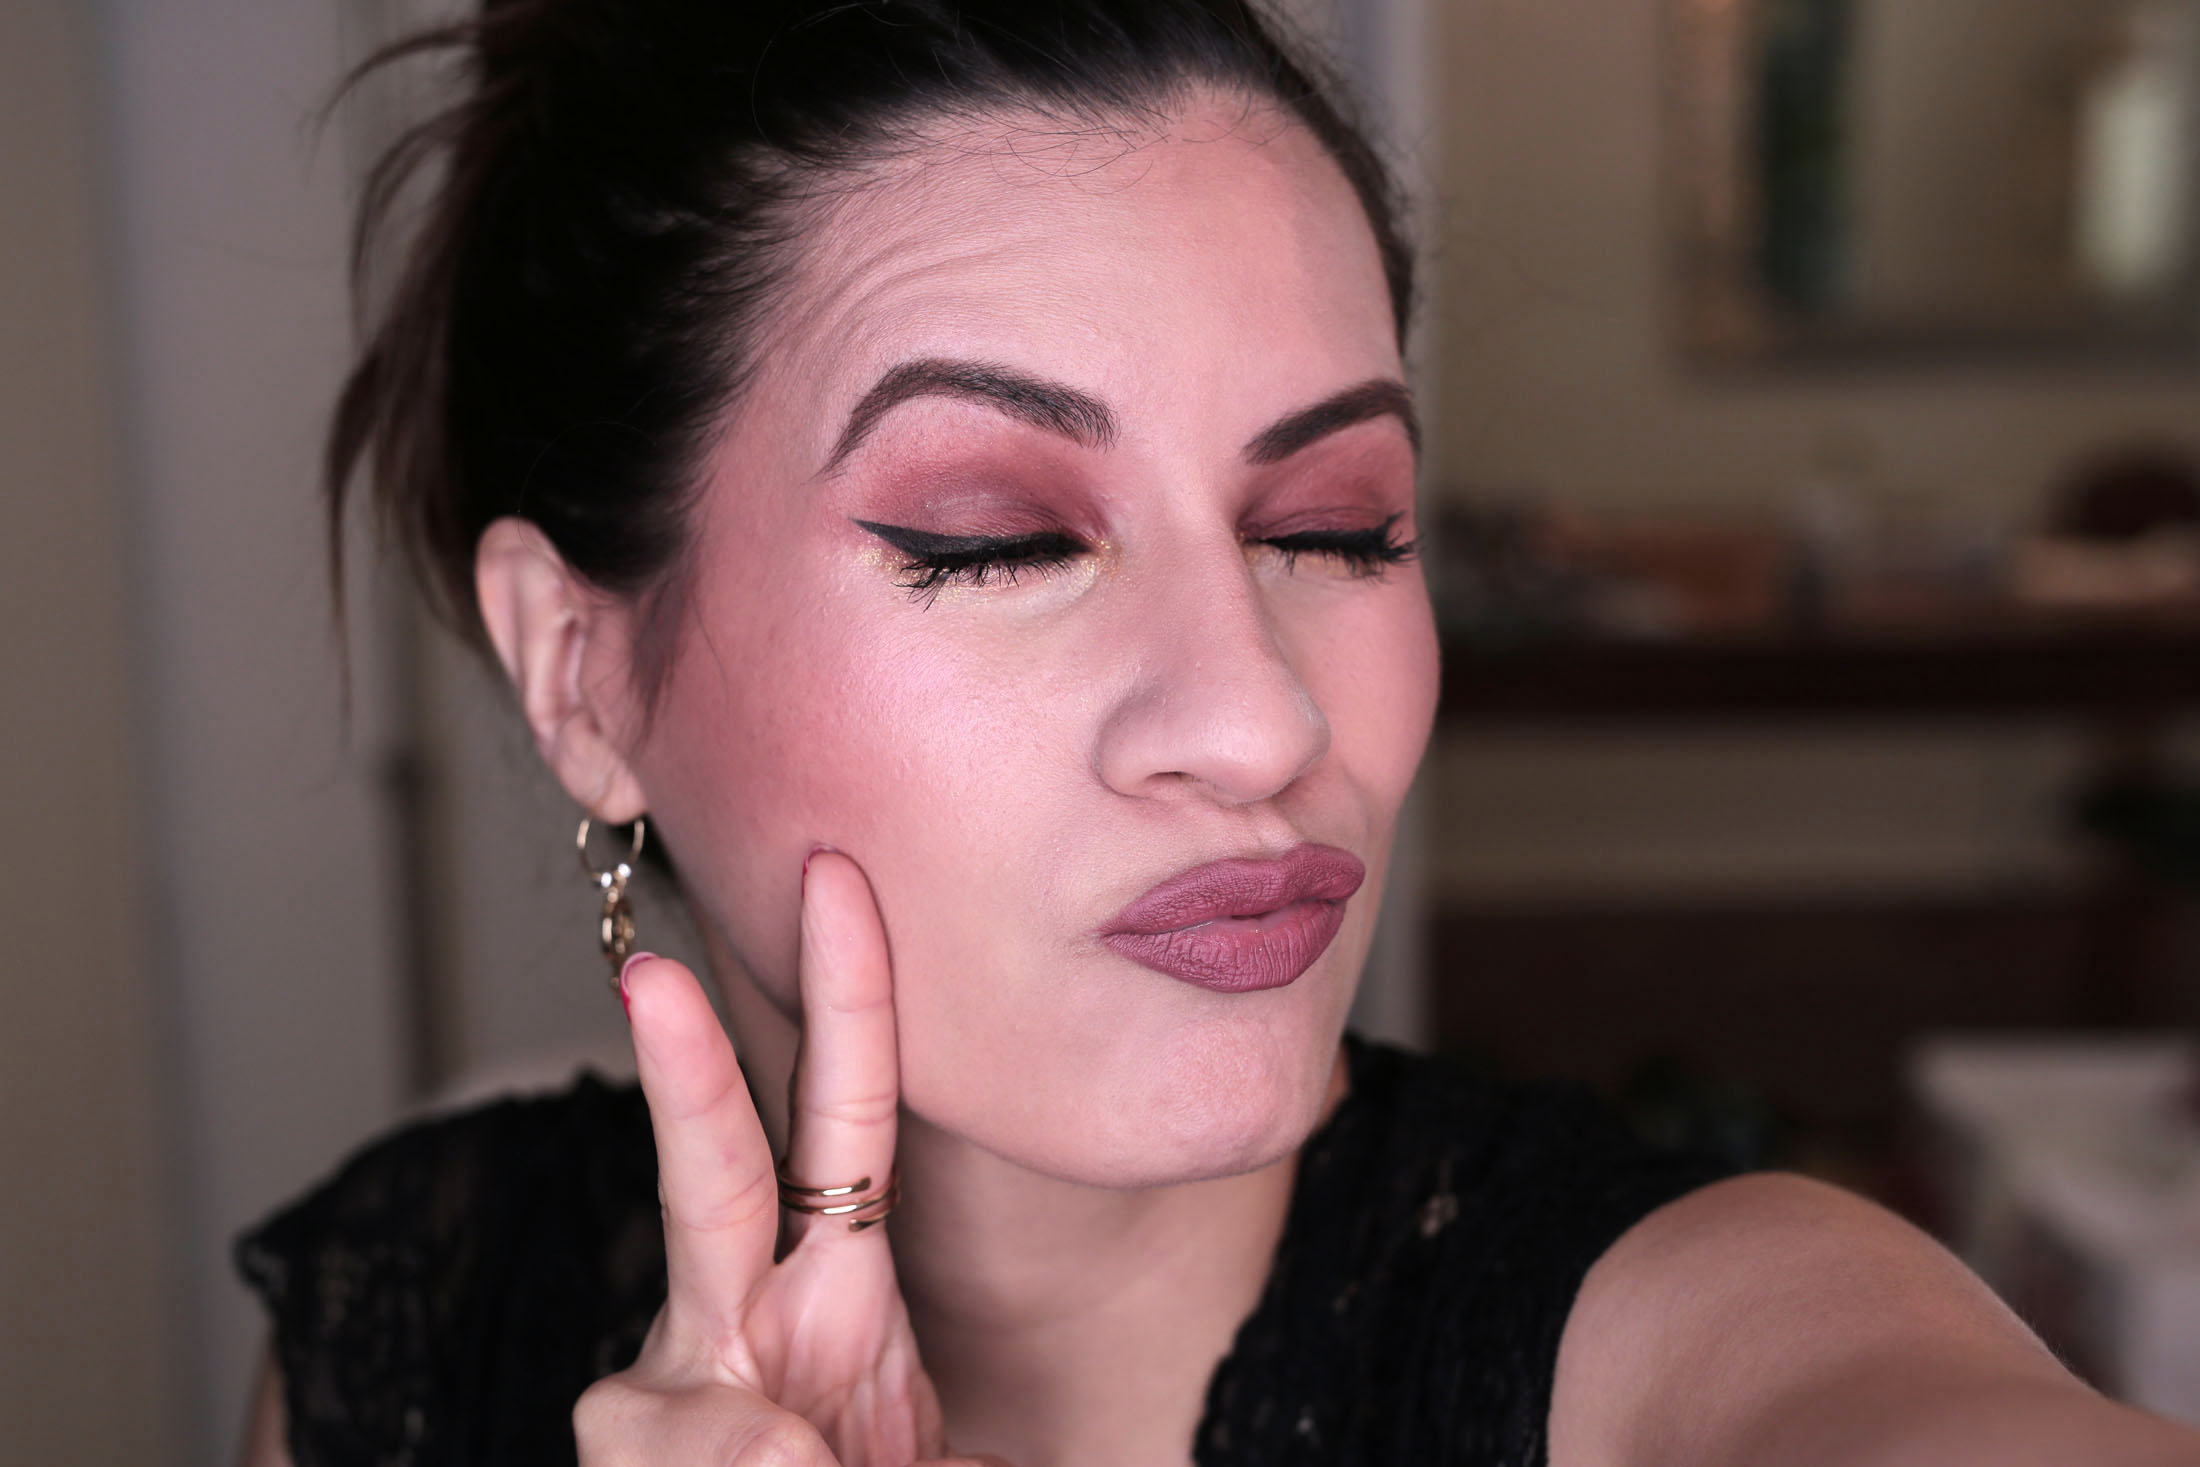
Now Sweep some Lolita blush on the your cheeks, focusing on the hallows of the cheeks blending upwards to the temple. Normally I wouldn't do this but I really wanted to emphasis the colour and celebrate the Lolita shade.
7.
Finally, line the lips using the Lolita Everlasting lip liner. Fill them in using the Lolita Everlasting Liquid Lipstick in Lolita. Once that dries, apply the Lolita Studded Kiss Lipstick to your entire lips. It might seem excessive but layering your lipsticks will give you a longer lasting lip and the lipstick will add moisture.

Lolita looks so beautiful on the eyes because it's a brown-based pink shade that's universally flattering.

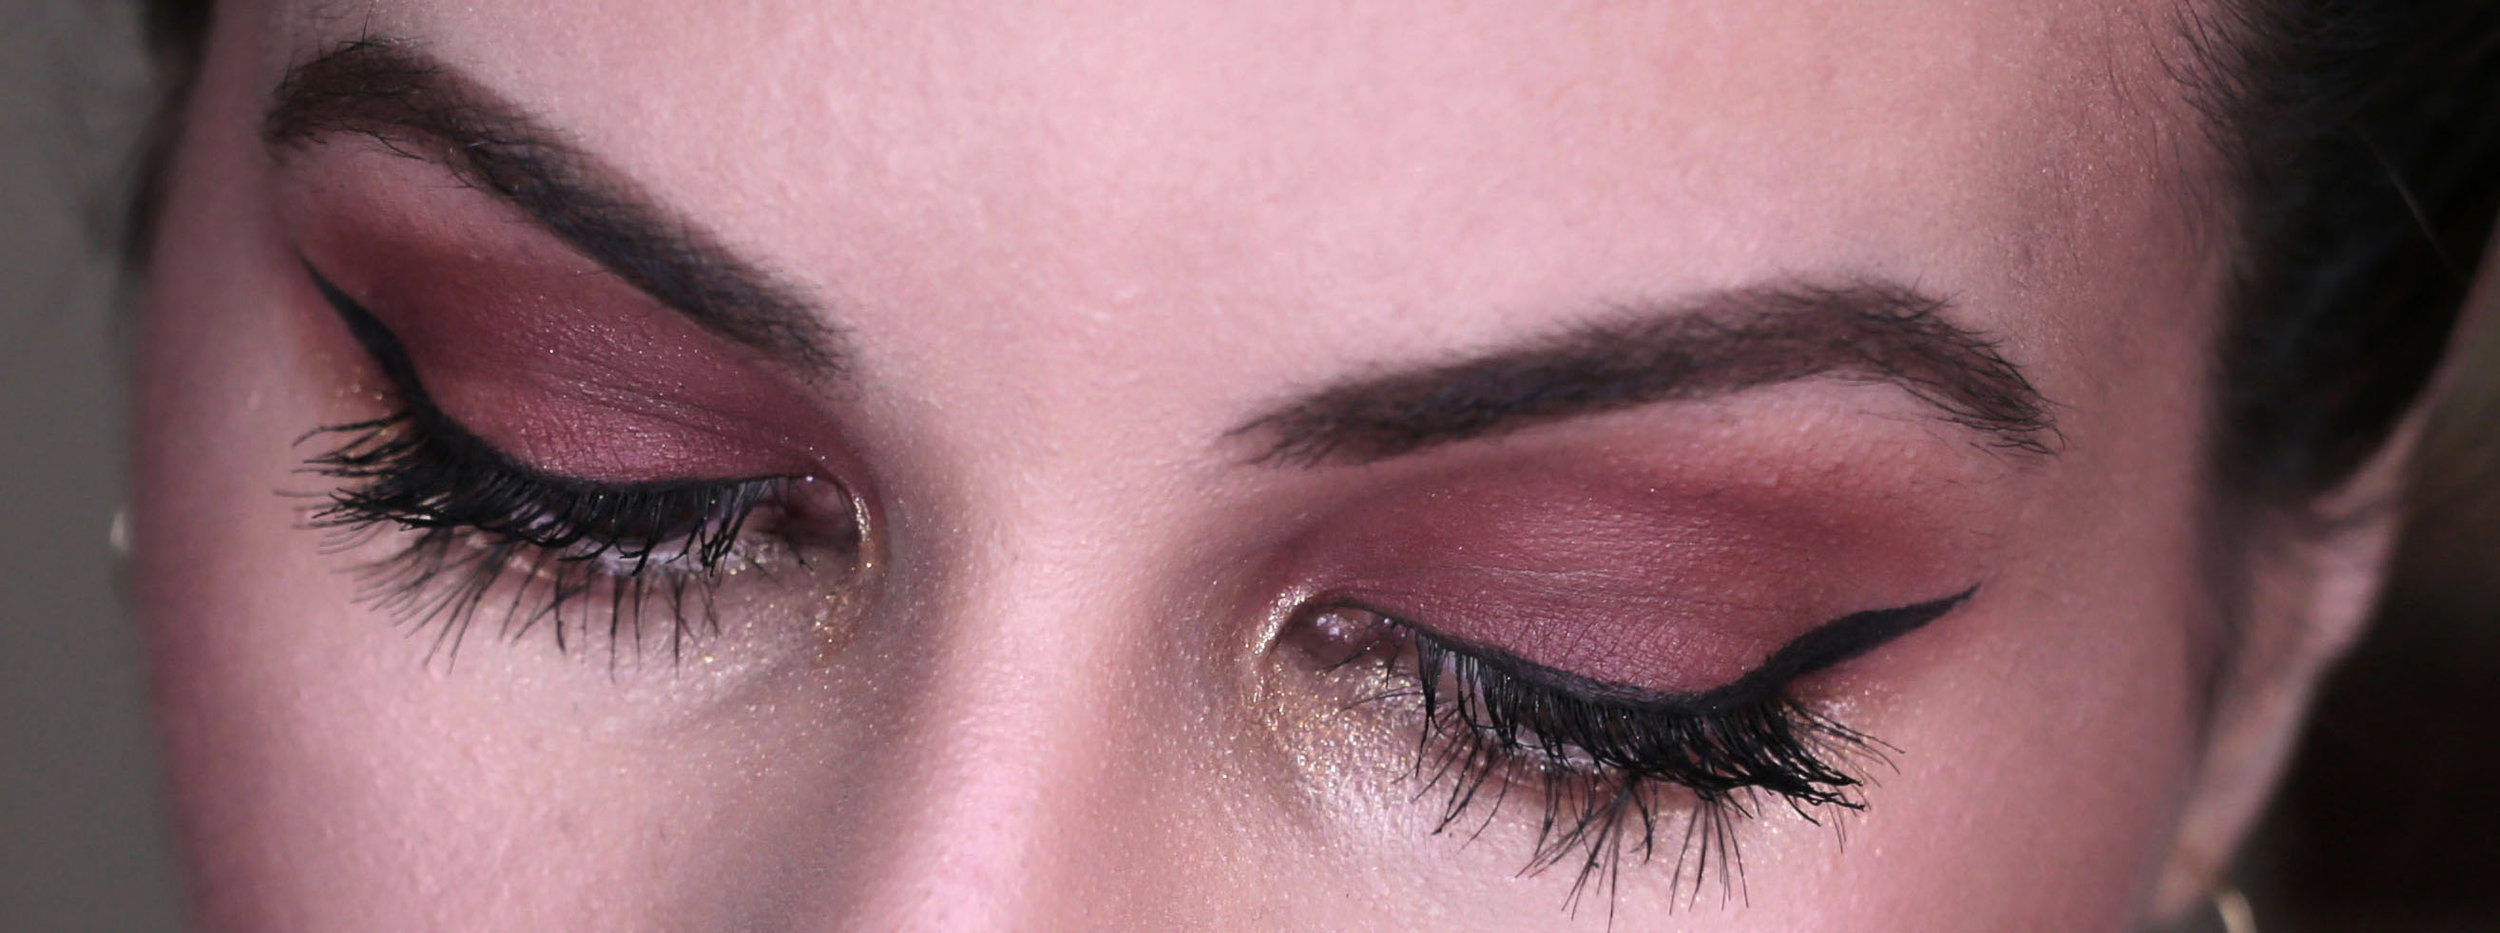
I wanted to break up the monochrome look a little bit by adding a gold gloss to the lower lashline. I used a lipgloss from Bite Beauty's holiday 2016 collection but any gold eyeshadow will do.
DISCLAIMER: Kat Von D Lolita Collection was provided by the brand.
All opinions are my own and completely honest.
Photography by Nathalie Martin.
Archive
- May 2025
- February 2025
- January 2025
- December 2024
- October 2024
- August 2024
- July 2024
- June 2024
- May 2024
- March 2024
- February 2024
- January 2024
- December 2023
- November 2023
- October 2023
- September 2023
- August 2023
- July 2023
- April 2023
- March 2023
- February 2023
- January 2023
- September 2022
- July 2022
- June 2022
- May 2022
- April 2022
- February 2022
- December 2021
- October 2021
- September 2021
- August 2021
- July 2021
- June 2021
- May 2021
- April 2021
- March 2021
- February 2021
- January 2021
- December 2020
- November 2020
- October 2020
- September 2020
- August 2020
- July 2020
- June 2020
- May 2020
- April 2020
- February 2020
- January 2020
- December 2019
- November 2019
- October 2019
- September 2019
- August 2019
- July 2019
- June 2019
- May 2019
- April 2019
- March 2019
- February 2019
- January 2019
- December 2018
- November 2018
- October 2018
- September 2018
- August 2018
- July 2018
- June 2018
- May 2018
- April 2018
- March 2018
- February 2018
- January 2018
- December 2017
- November 2017
- October 2017
- September 2017
- August 2017
- July 2017
- June 2017
- May 2017
- April 2017
- March 2017
- February 2017
- January 2017
- December 2016
- November 2016
- October 2016
- September 2016
- August 2016
- July 2016
- June 2016
- May 2016
- April 2016
- March 2016
- February 2016
- January 2016
- December 2015
- November 2015
- October 2015
- September 2015
- August 2015
- July 2015
- June 2015
- May 2015
- April 2015
- March 2015
- February 2015
- January 2015
- December 2014
- November 2014
- October 2014
- September 2014
- August 2014
- July 2014
- June 2014
- May 2014
- April 2014
- March 2014

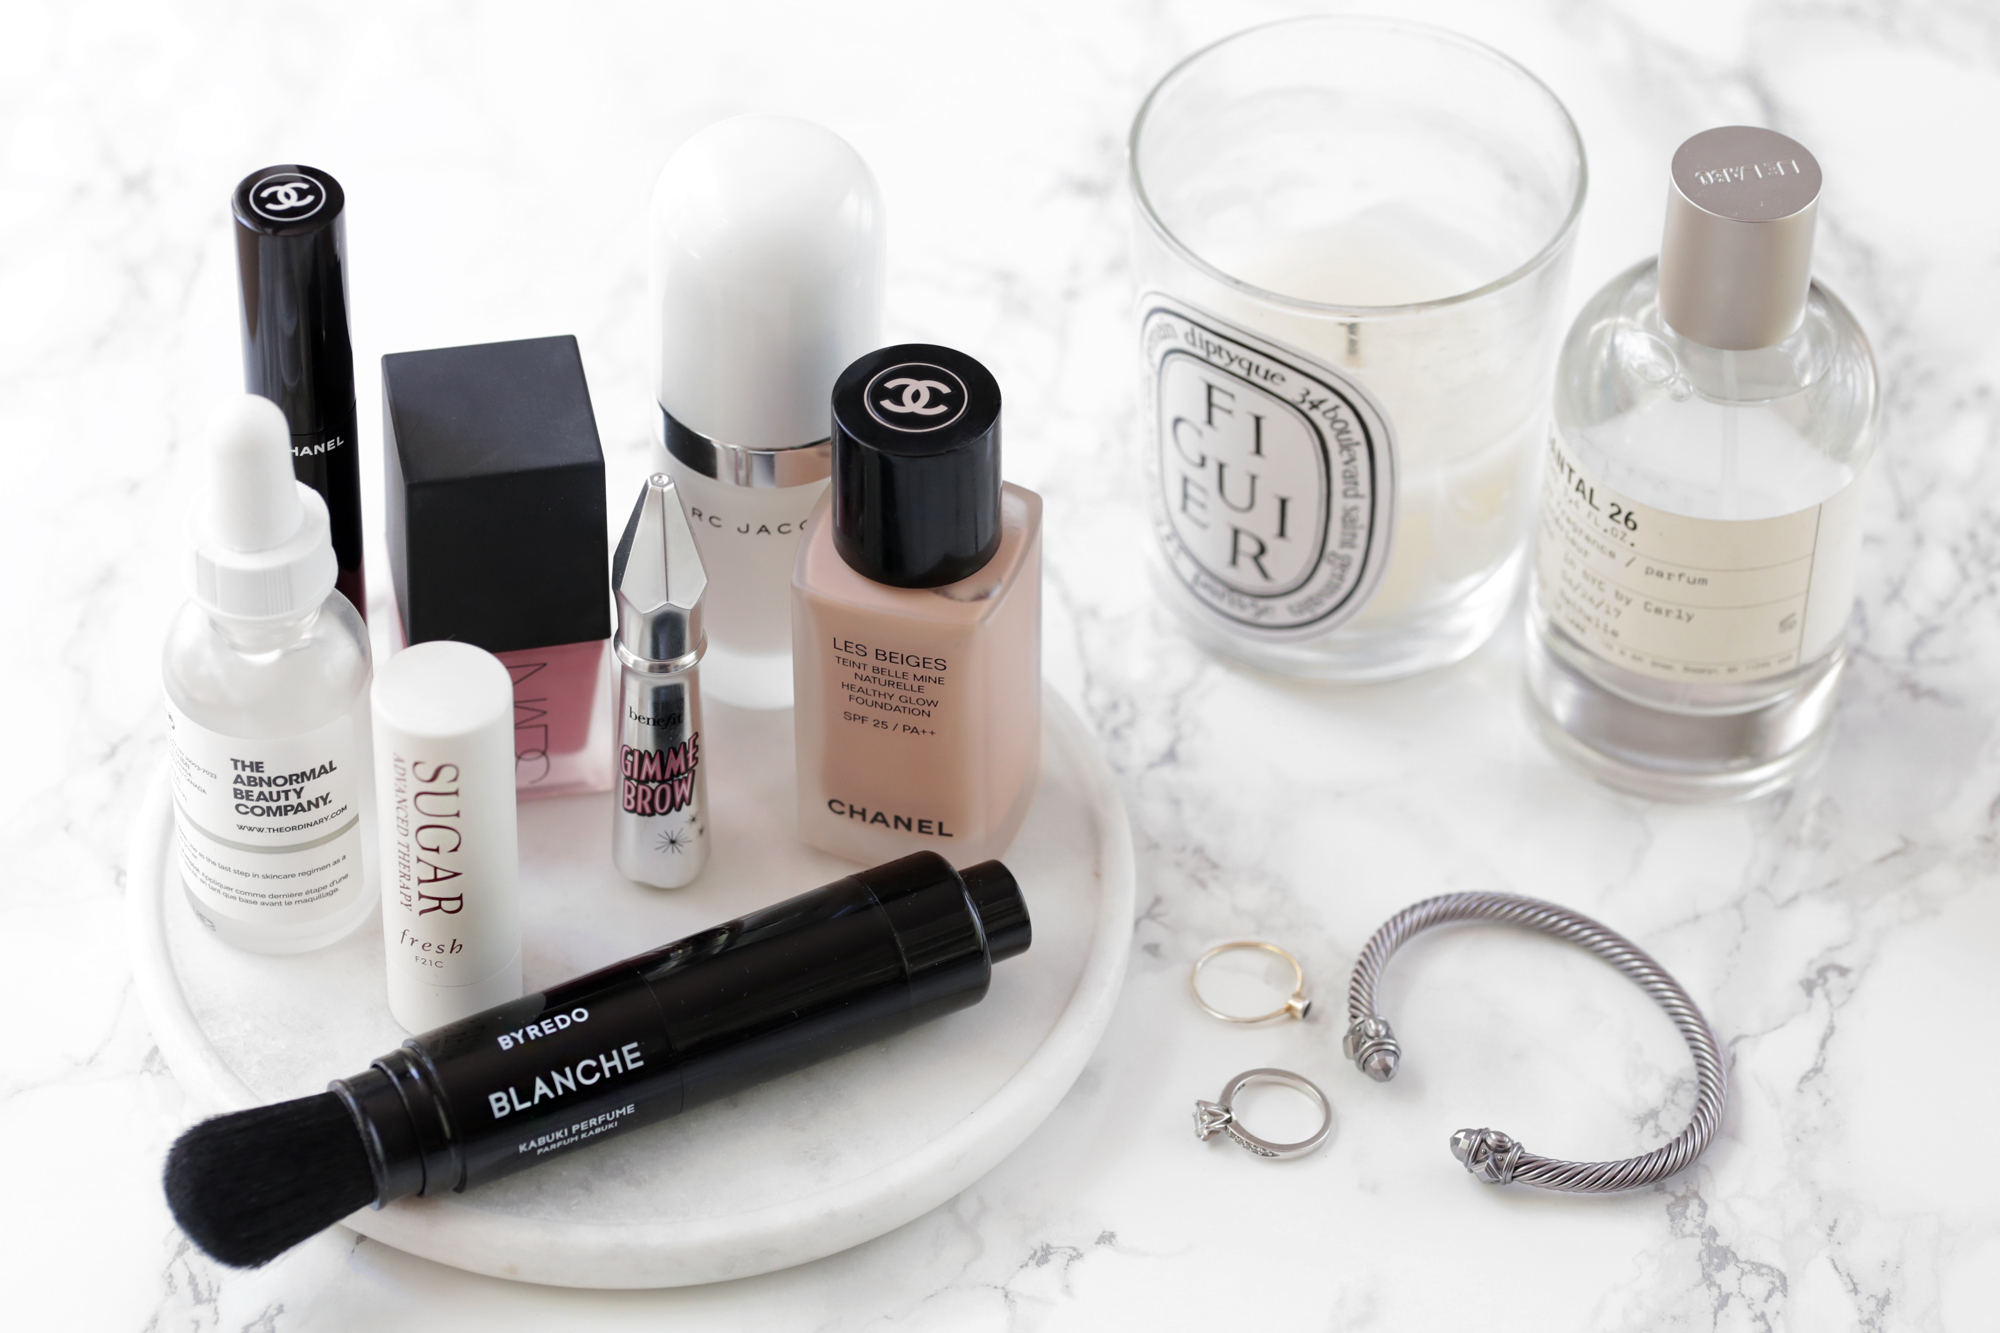
Summer skincare, hair & beauty haul + The Ordinary mini review
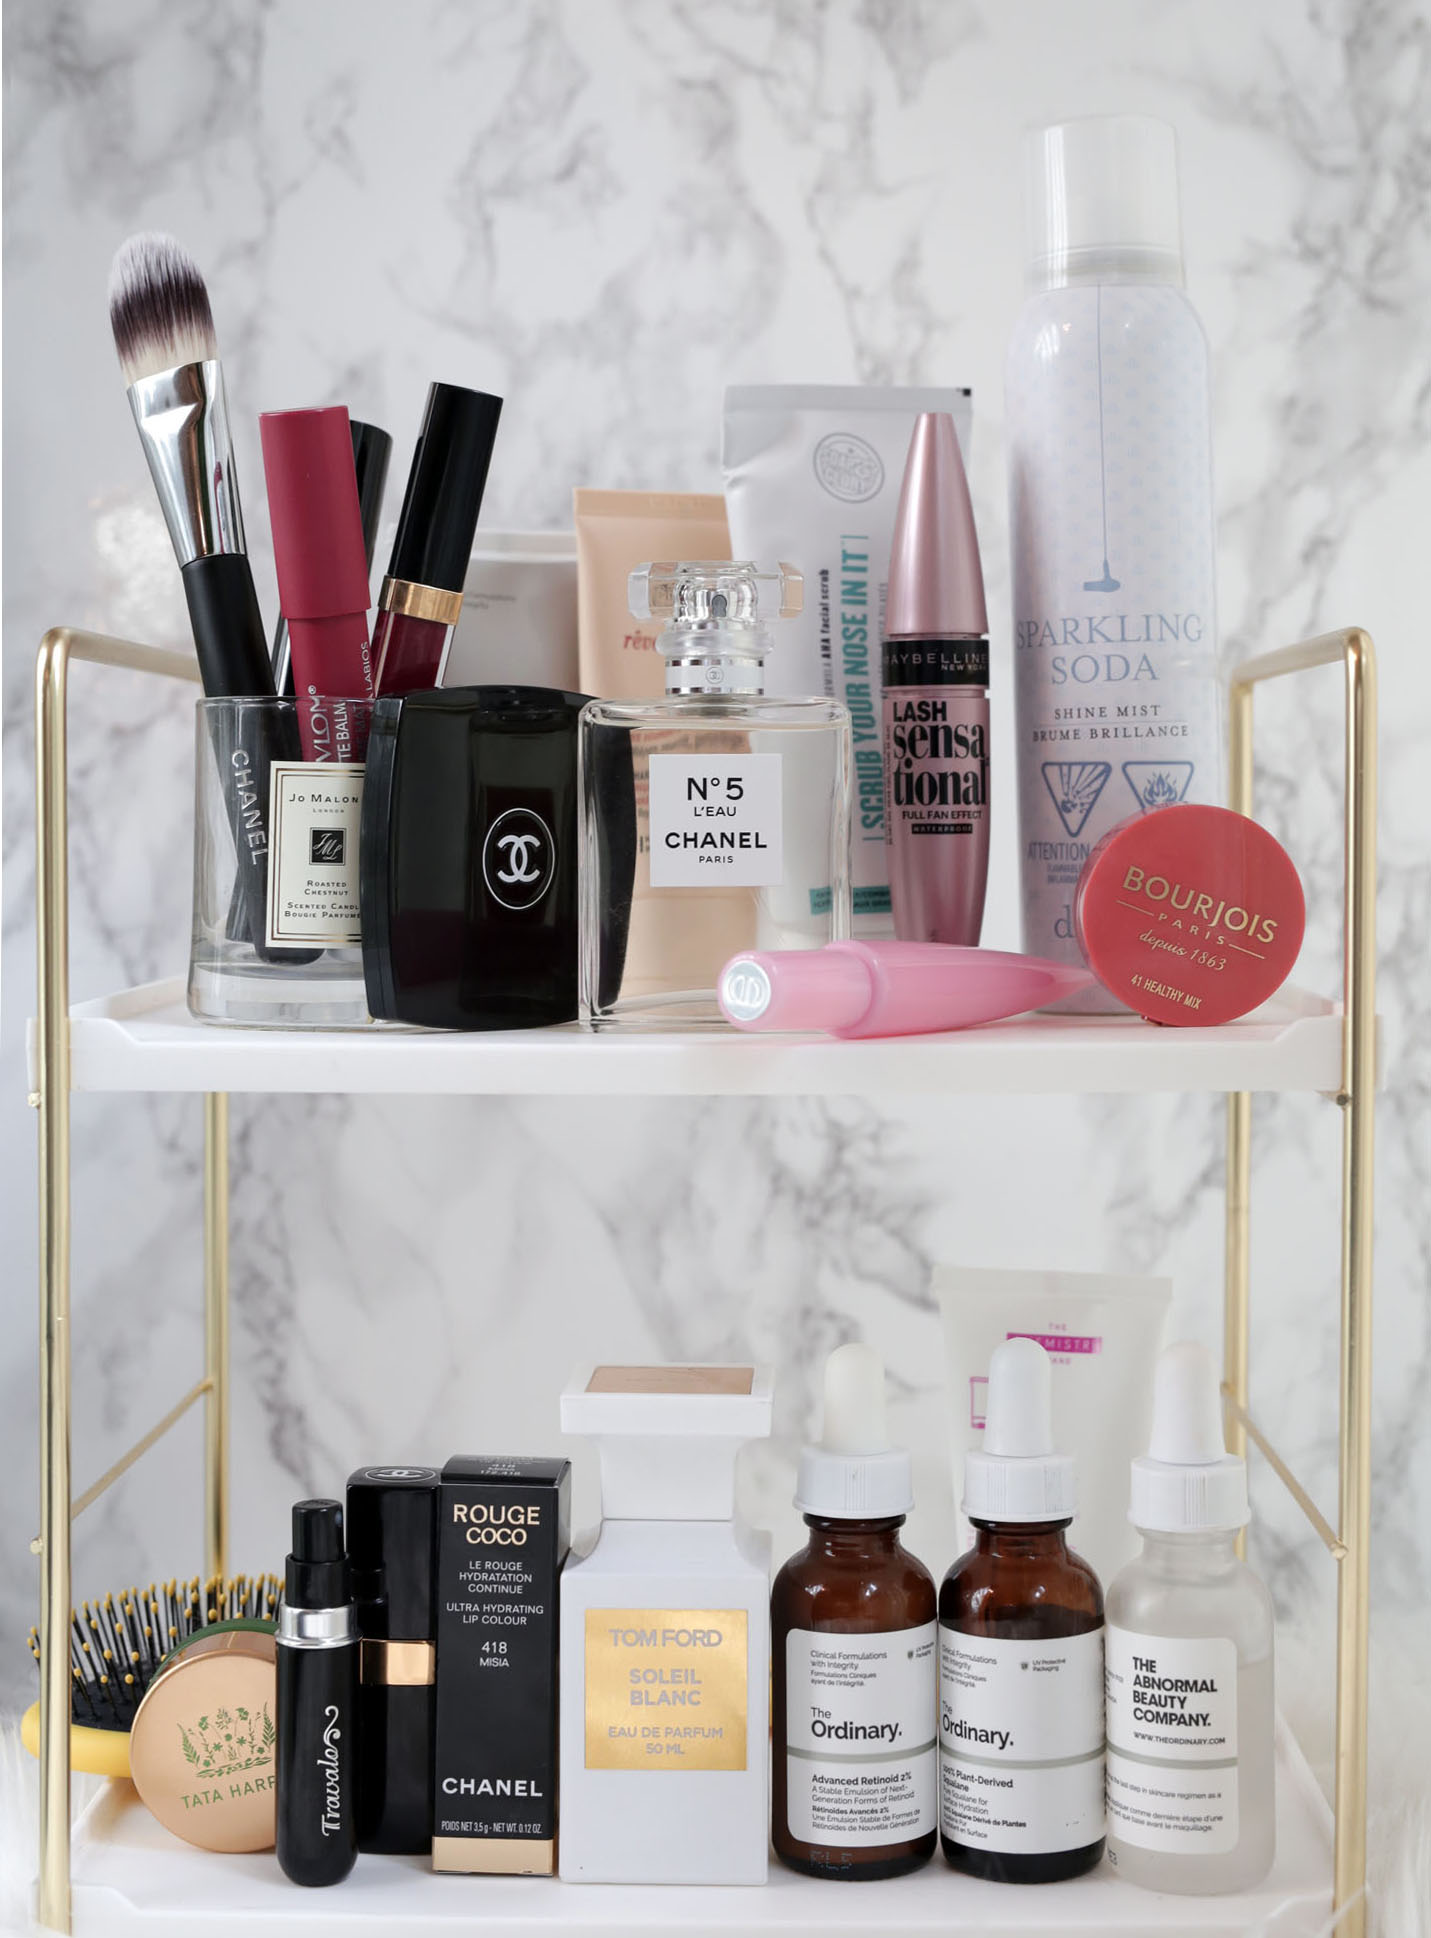
It's been ages since I've done a beauty haul and yet there are so many new products that I've recently purchased and haven't talked about. This haul is spread over a couple of months and I didn't include everything I bought because it might seem like I'm sick-in-the-head-crazy about beauty products, which I probably am but oh well! It's a beauty haul people and we're here to have fun!
BTW - Sign up to my email list at the bottom of this post if you want a chance to win monthly beauty giveaways! I want to be able to stay in touch with you guys and share some of my hauls as wells. :)
SHOPPERS DRUG MART BEAUTY HAUL

Since the Shoppers closest to me renovated their Beauty Boutique to include Chanel, I have been obsessed! Not just me, but also Diana (bff & WoahStyle beauty editor). We find ourselves at the store at least once a week to see what's new. The best part - the cosmeticians have an incredible range of knowledge and have been able to answer our questions on retinoids, liquid peels and help colour match us in our fave new Chanel foundation. Coincidentally both Diana and I are both No. 30.
SKINCARE
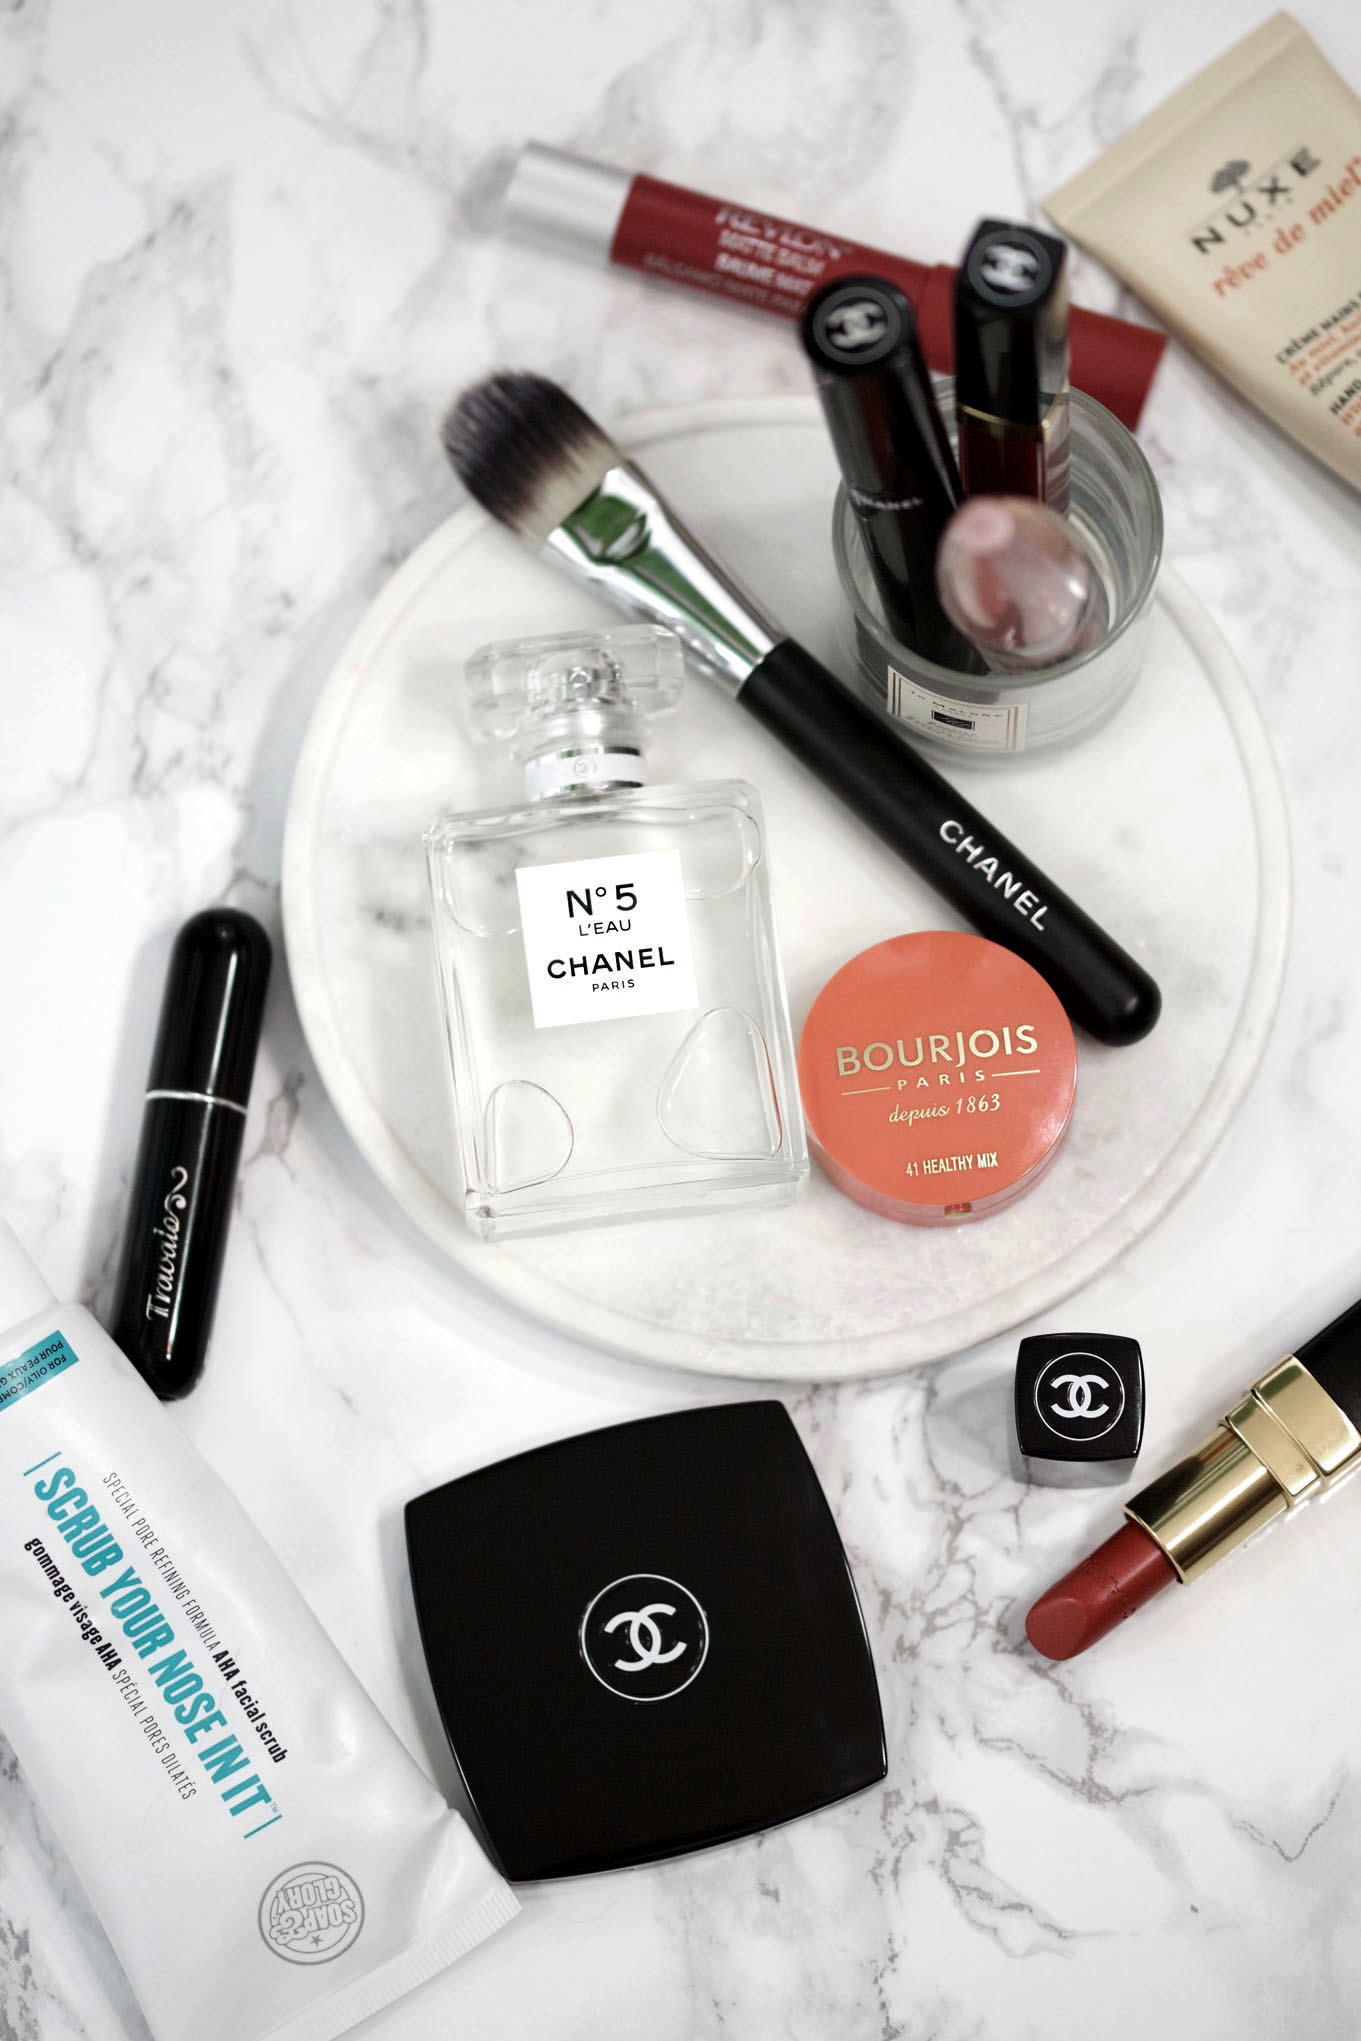
Trying to keep my textured skin under control is always a challenge but I'm getting there. I picked up a few cream cleansers recently, which I'll be talking about in an upcoming post, as well as this scrub by Soap & Glory called Scrub Your Nose In It, which is excellent for the t-zone and keeping blackheads away. I also got a new hand cream because I'm always applying it after I wash my hands. This one by Nuxe has lots of essential oils and is super hydrating without being greasy.
LIP & FACE COLOUR
Lipstick is the one thing I can never be without. I feel naked and ugly without it so I always have at least three in my bag. The new Chanel Rouge Coco Glosses are amazing and I couldn't resist picking up another shade, 754 Opulence, a rich burnt red with gold shimmery. I also grabbed a similarly toned Rouge Coco Lipstick in the shade 418 Misia. On the recommendation of a peer, I picked up Revlon's Matte Balm in the shade Standout, a burnt berry shade. It's a comfortable wearing matte lipstick that's highly pigmented. Finally, I couldn't resist this pretty coral blush by Bourjois in the shade 41 Healthy Mix. It smells really nice and the colour is like a healthy glow on the cheeks.
MASCARA
One of my readers recently recommended Chanel's Le Volume mascara so I picked it up and have been using it since! It separates and lengthens my lashes and creates really nice volume. I also got the Maybelline Lash Sensational mascara in the waterproof formula because I've heard so many great things! Both mascaras are clump, flake and smudge free.
PERFUM
L'eau Chanel No.5 is feminine and sophisticated and makes me so happy when I wear it. It's a lighter, contemporary version of the iconic No.5. I got one of those refillable perfum sprays by Travalo to go with it because I rather not carry around a full bottle in my purse.
ACCESSORIES
Sali Hughes, beauty editor extraordinaire and my personal beauty hero, wrote about the Chanel compact in her book Pretty Honest. I couldn't get it out of my mind so I picked it up and now it feels like the ultimate luxury item in my beauty bag. Apparently they're hard to track down so buy it if you see it! While I was at it, I got yet another makeup brush to add to my collection. This Chanel foundation brush is great for blending my lightweight foundations.

Sephora Beauty Haul
HAIR
I became obsessed with my hair after I signed on as a Clairol brand ambassador for their Natural Instincts campaign. I learned how to style my hair differently and get softer, prettier waves. I also started brushing my hair *gasp* so I picked up Drybar's Super Lemon Drop brush! I have thick, wavy, frizzy hair so I never brushed it between shampoo's because I didn't want to disrupt my curls and introduce frizz. Well, turns out brushing it ain't so bad after all! I've been spraying a little bit of Drybar's Sparkling Soda Shine Mist on the ends of my hair to smooth it out.
PERFUM
During the last VIB Rouge sale I finally got Tom Ford's Soliel Blanc perfum. I'd been wanting it for ages but it's pricey so I waited months until the sale came around. I'm so happy it's finally mine!
LIP & FACE COLOUR
I also got Tata Harper's Volumizing Lip & Cheek Tint in Very Popular, a warm rose shade. I love it as a blush because the colour is builable and hydrating on the skin so it looks like a really nice healthy glow. It's also 100% natural and non-toxic.
Finally I couldn't leave Sephora without picking up Dior's new Lip Pomade. One of my readers told me it was really good so I was curious to see if it lived up to the hype. Stay tuned for a drug store dupe on this one!
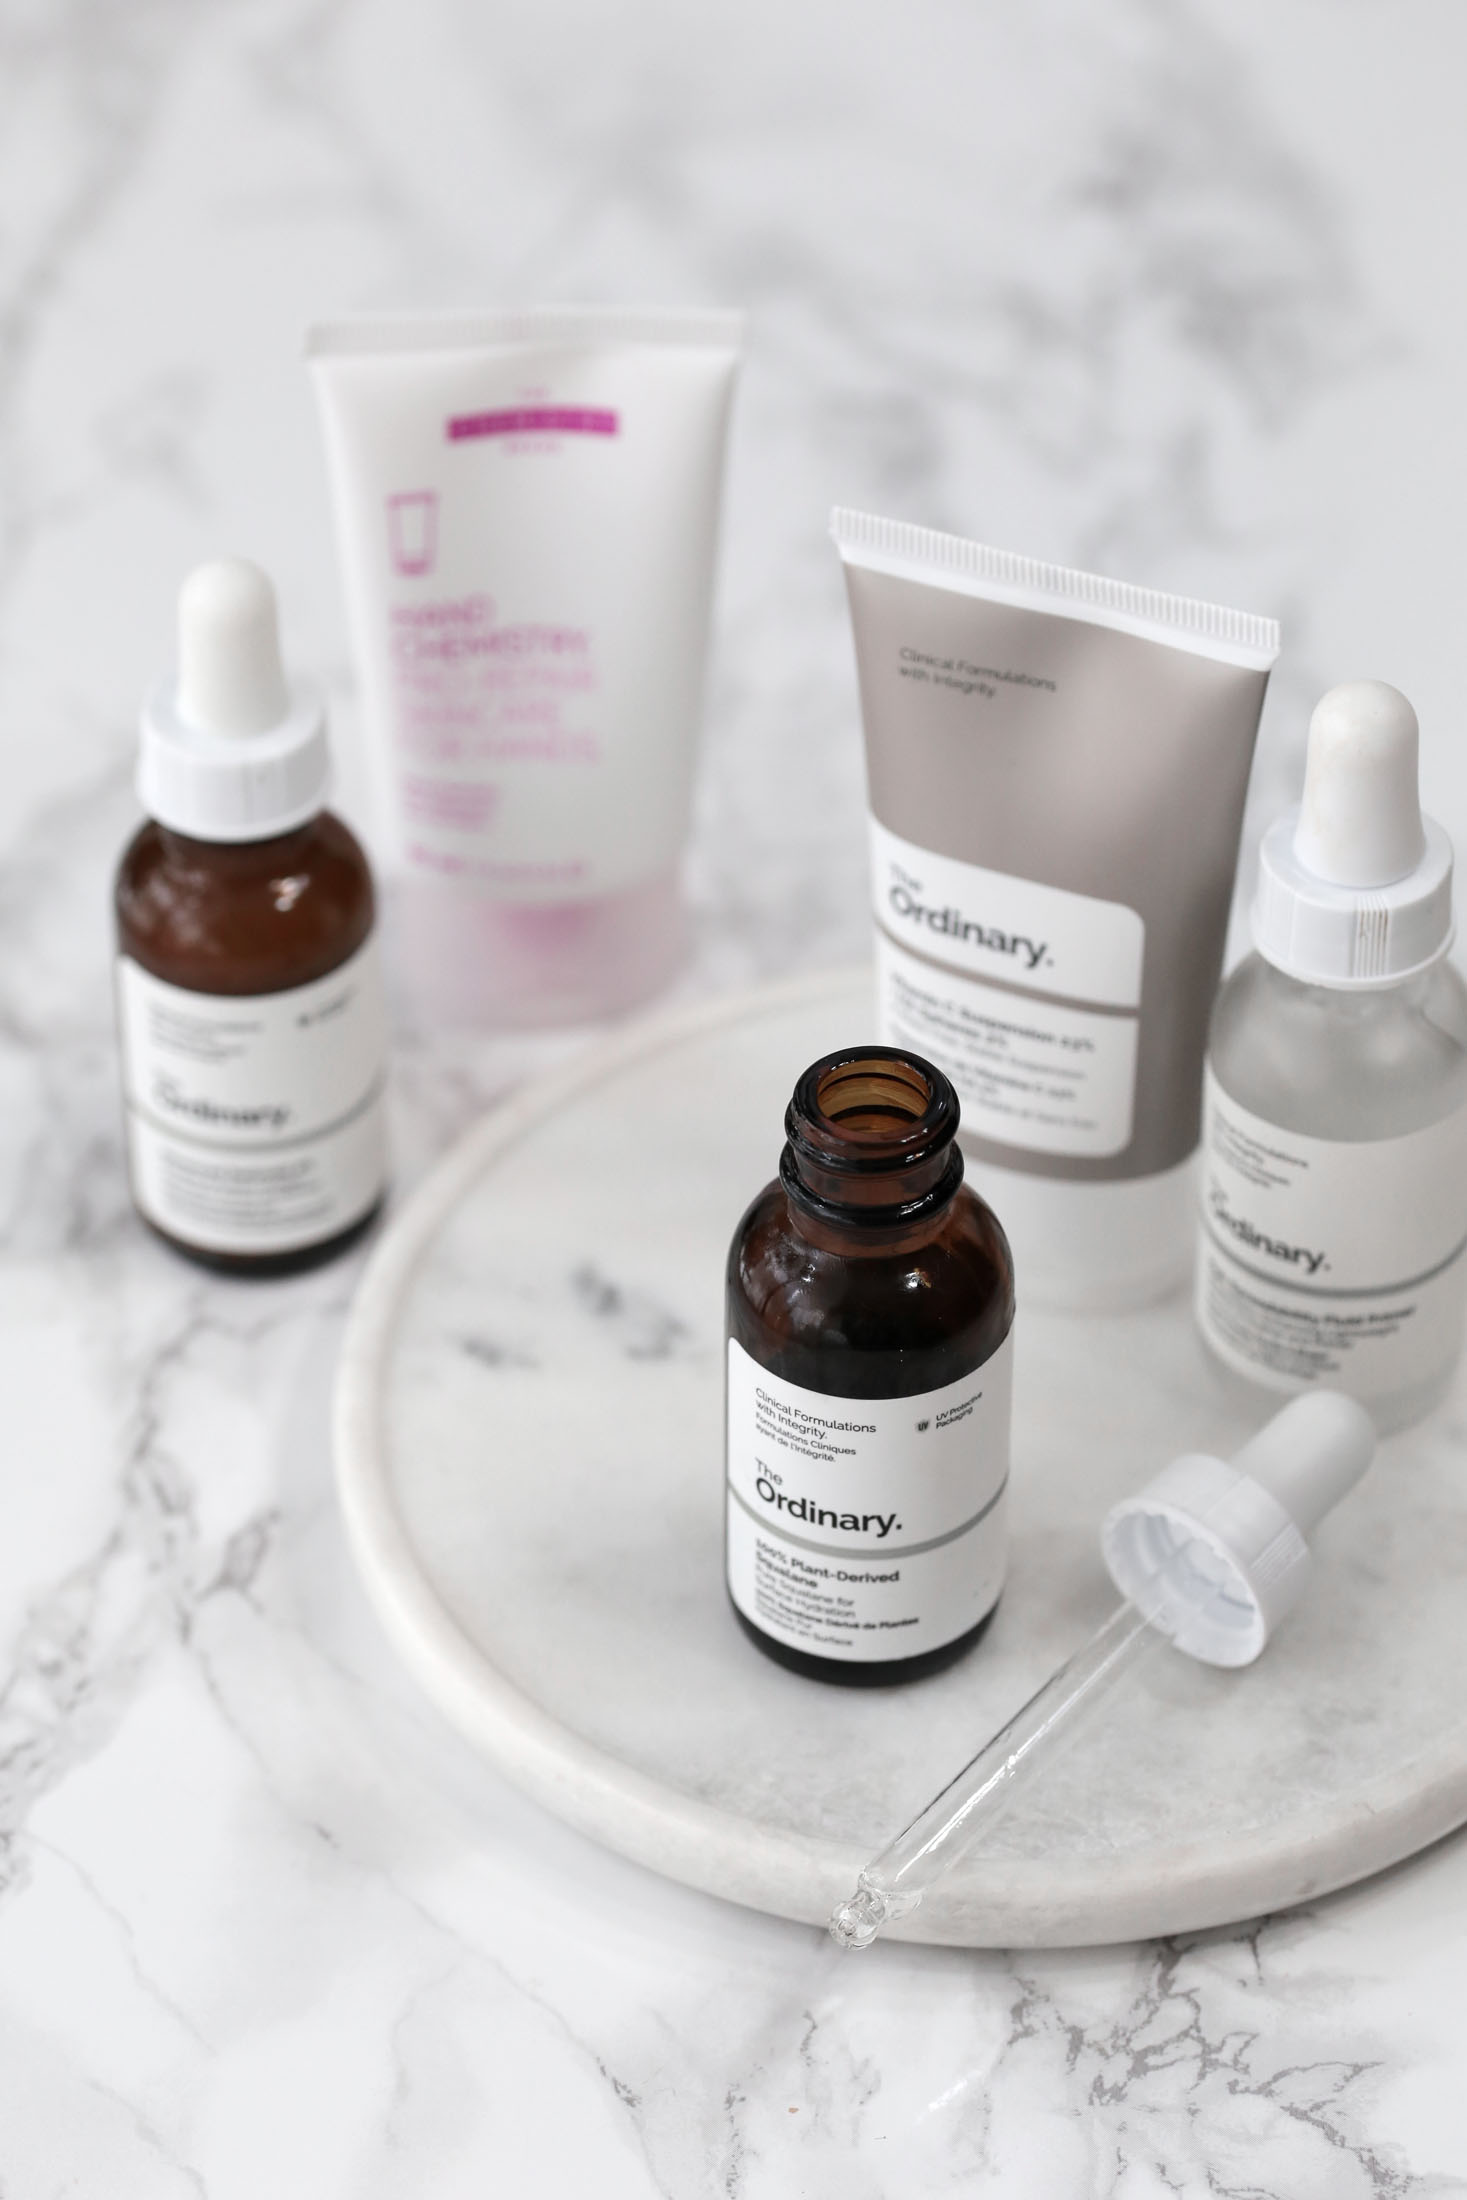
THE ORDINARY
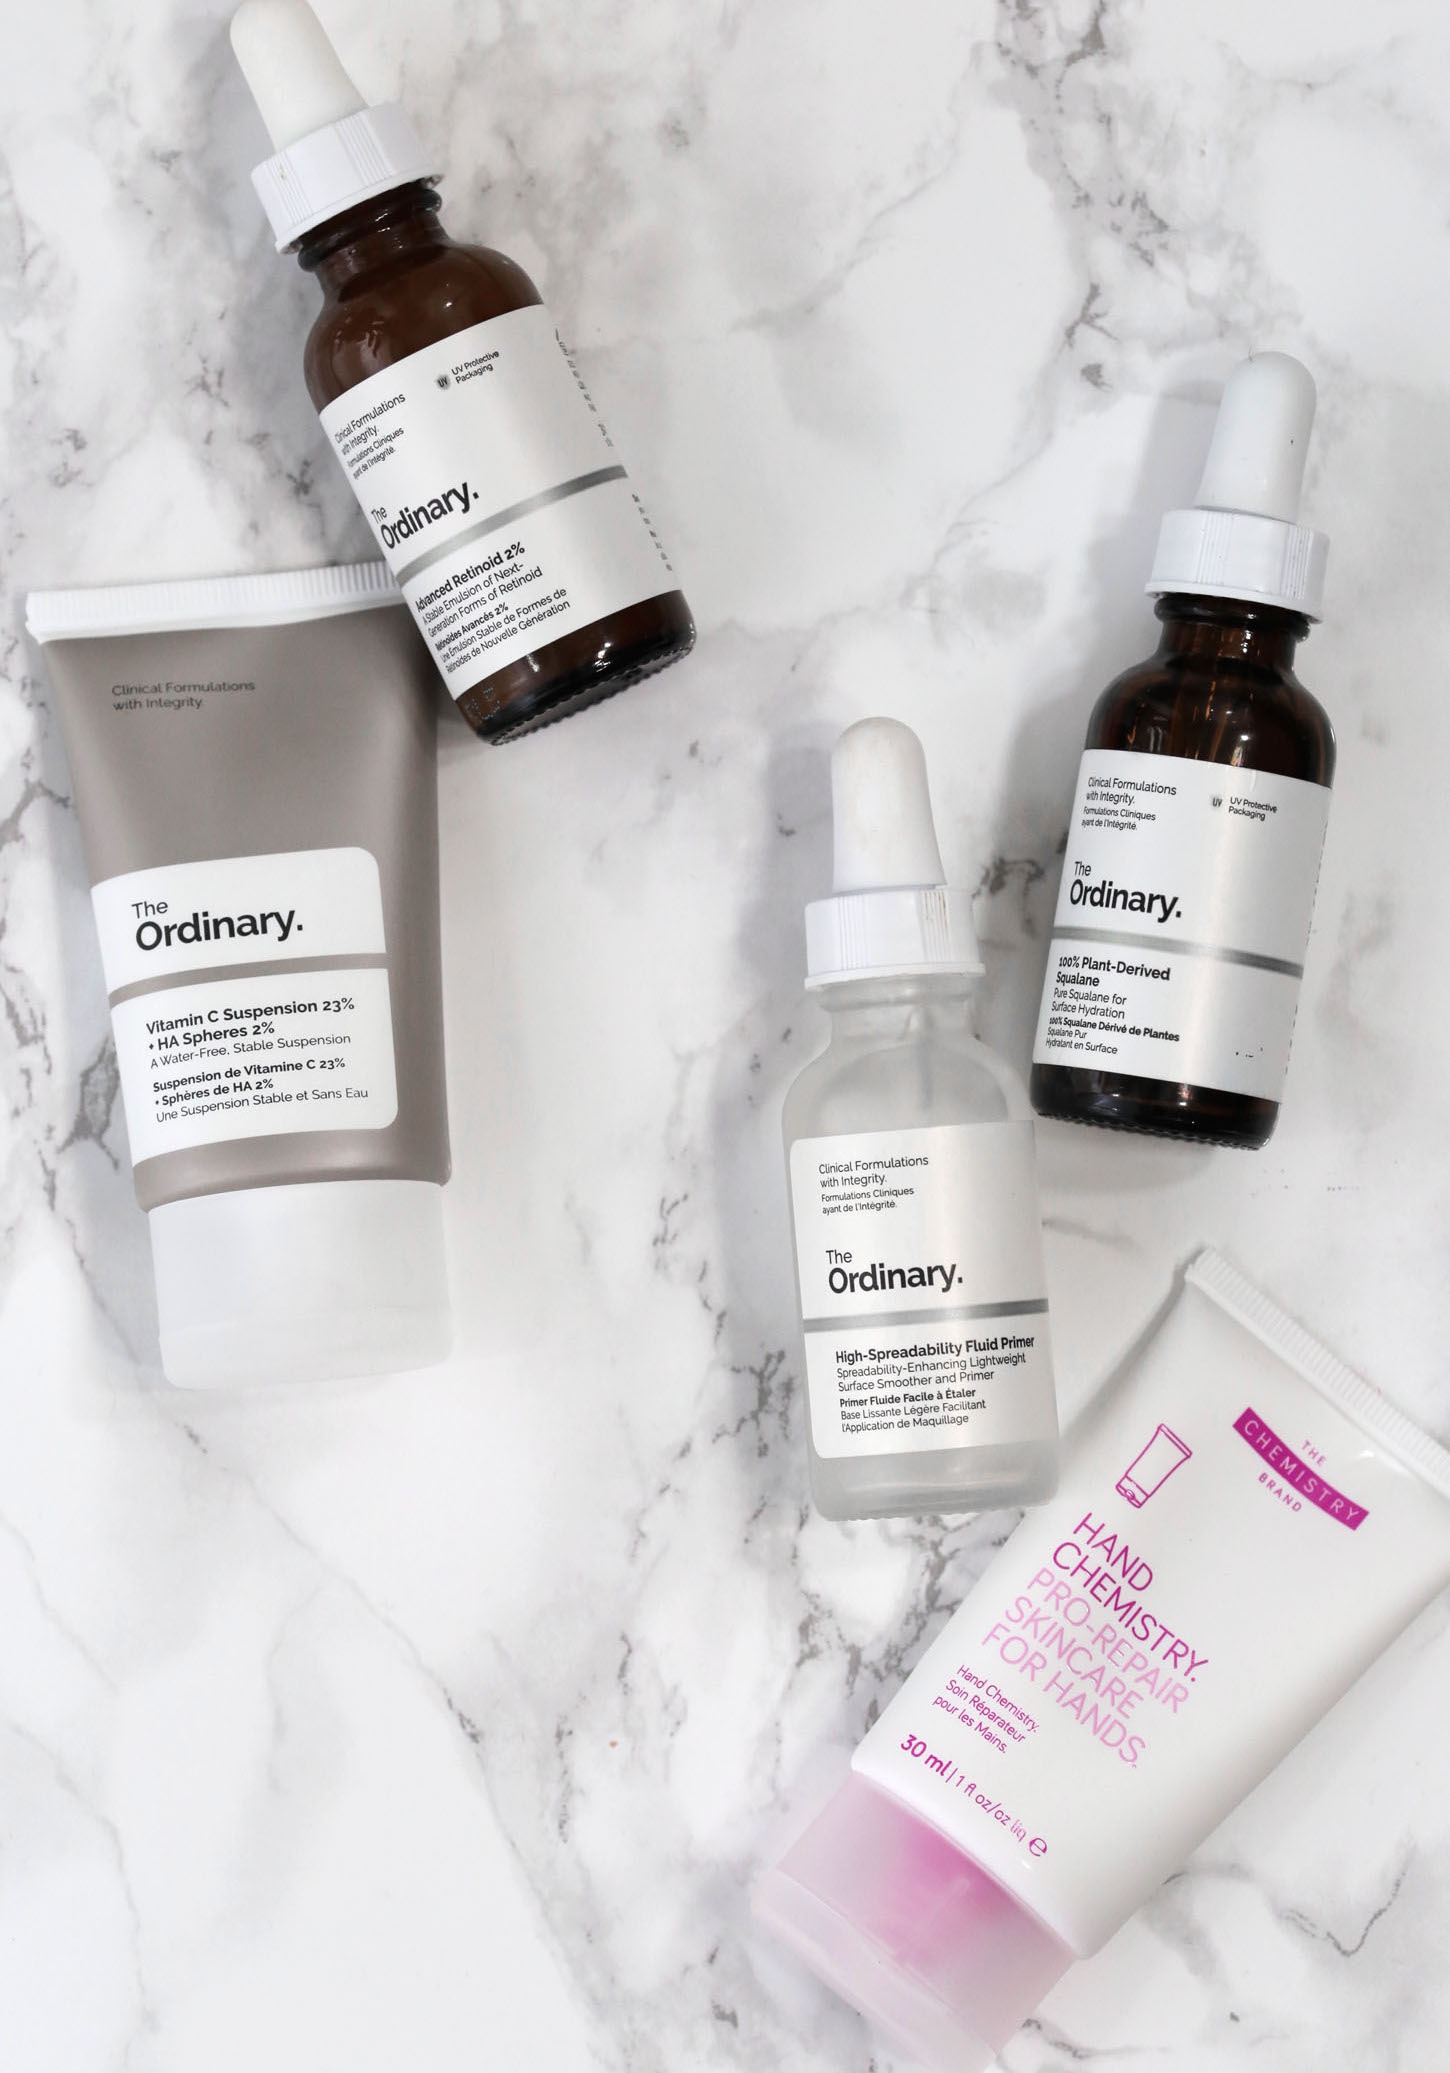
Just like everyone else I was curious to try The Ordinary's line of skincare. I picked up the High-Spreadability Fluid Primer, which is silicone based and sucks so bad, I could easily call it the worst primer ever! I used it a few times and each time it left my makeup patchy and streaky by the end of the day. It's actually worse than not wearing primer at all if you can believe it! It's also not a stable formula so it's begun to thicken considerably in the bottle since I bought it last month. If exposure to air is why the formula has begun to spoil, the company really should have put it in a pump bottle.
One item I do like from this brand is the 100% Plant-Derived Squalane. It's super hydrating and doesn't irritate my skin at all, even the skin on my chest which is hyper sensitive to oils and serums. My skin feels really nice and plump after using this product. For $8 a bottle, I would highly recommend it!
I also enjoy their Advanced Retinoid 2%. My skin reacts very well to retinoids and really took a liking to this one. It left my textured skin feeling super smooth and radiant looking. Normally I use this by going a few days on and a few days off to give my skin a break.
In the mornings I've been following up with their Vitamin C Suspension 23%. It left my skin feeling smooth and my complexion looking even.
Finally, I got the Hand Chemistry cream from their Chemistry Brand line. While I like the emollient properties of this cream, I can't stand the smell. It retails for $7 for a 30mL tube and I'd much rather splurge twice the amount to get the hand cream from Nuxe. If you can stand the smell of this cream, you'll probably enjoy Hand Chemistry.

Testing out Clarisonic's new foundation brush


Clarisonic has released their new makeup brush attachment and I've been putting it to the test for the last week. It blends powders to an airbrush finish and my bareMinerals powder foundation has never looked better. Even powder blushes apply nicely on my skin with the new makeup attachment.
Cream foundations like Make Up For Ever's HD Foundation Stick need a little more time to blend into the skin but medium-full coverage foundations like the Milani's Conceal + Perfect 2-in-1 also get blended to airbrush perfection with the Clarisonic.
Where the new makeup attachment falls short is with lightweight foundations like MAC Face & Body, Chanel CC Cream and even Armani's Luminous Silk foundation. Lightweight formulas took twice as long to blend versus the full-coverage formulas and powders. My liquid blush didn't stand a chance and got blended away to nothing so again, powders are where it's at.
The new Sonic Foundation Brush fits onto all Clarisonic devices and retail for $39.
It features handcrafted synthetic fibers.
It's anti-microbial and easy-to-clean with any brush shampoo.
Where it performed best: powder formulas! My powder foundation had never looked better!
Where I didn't like it: around my eyes! The bristles felt too rough and the oscillating motion was too intense around the gentle eye area.
Overall, if you prefer medium-full coverage makeup and powder formulas, you're probably gonna love this makeup attachment. Where it needs improvement is the fibers of the brush aren't as soft as the website claims so that's a bit of a letdown. Also, it's simple enough to blend the entire face with exception of the eye area which proved to be challenging and mildly uncomfortable. Finally, I wish it worked well on lightweight makeup formulas as well it does on powders. On the other hand, it blends powders to perfection!


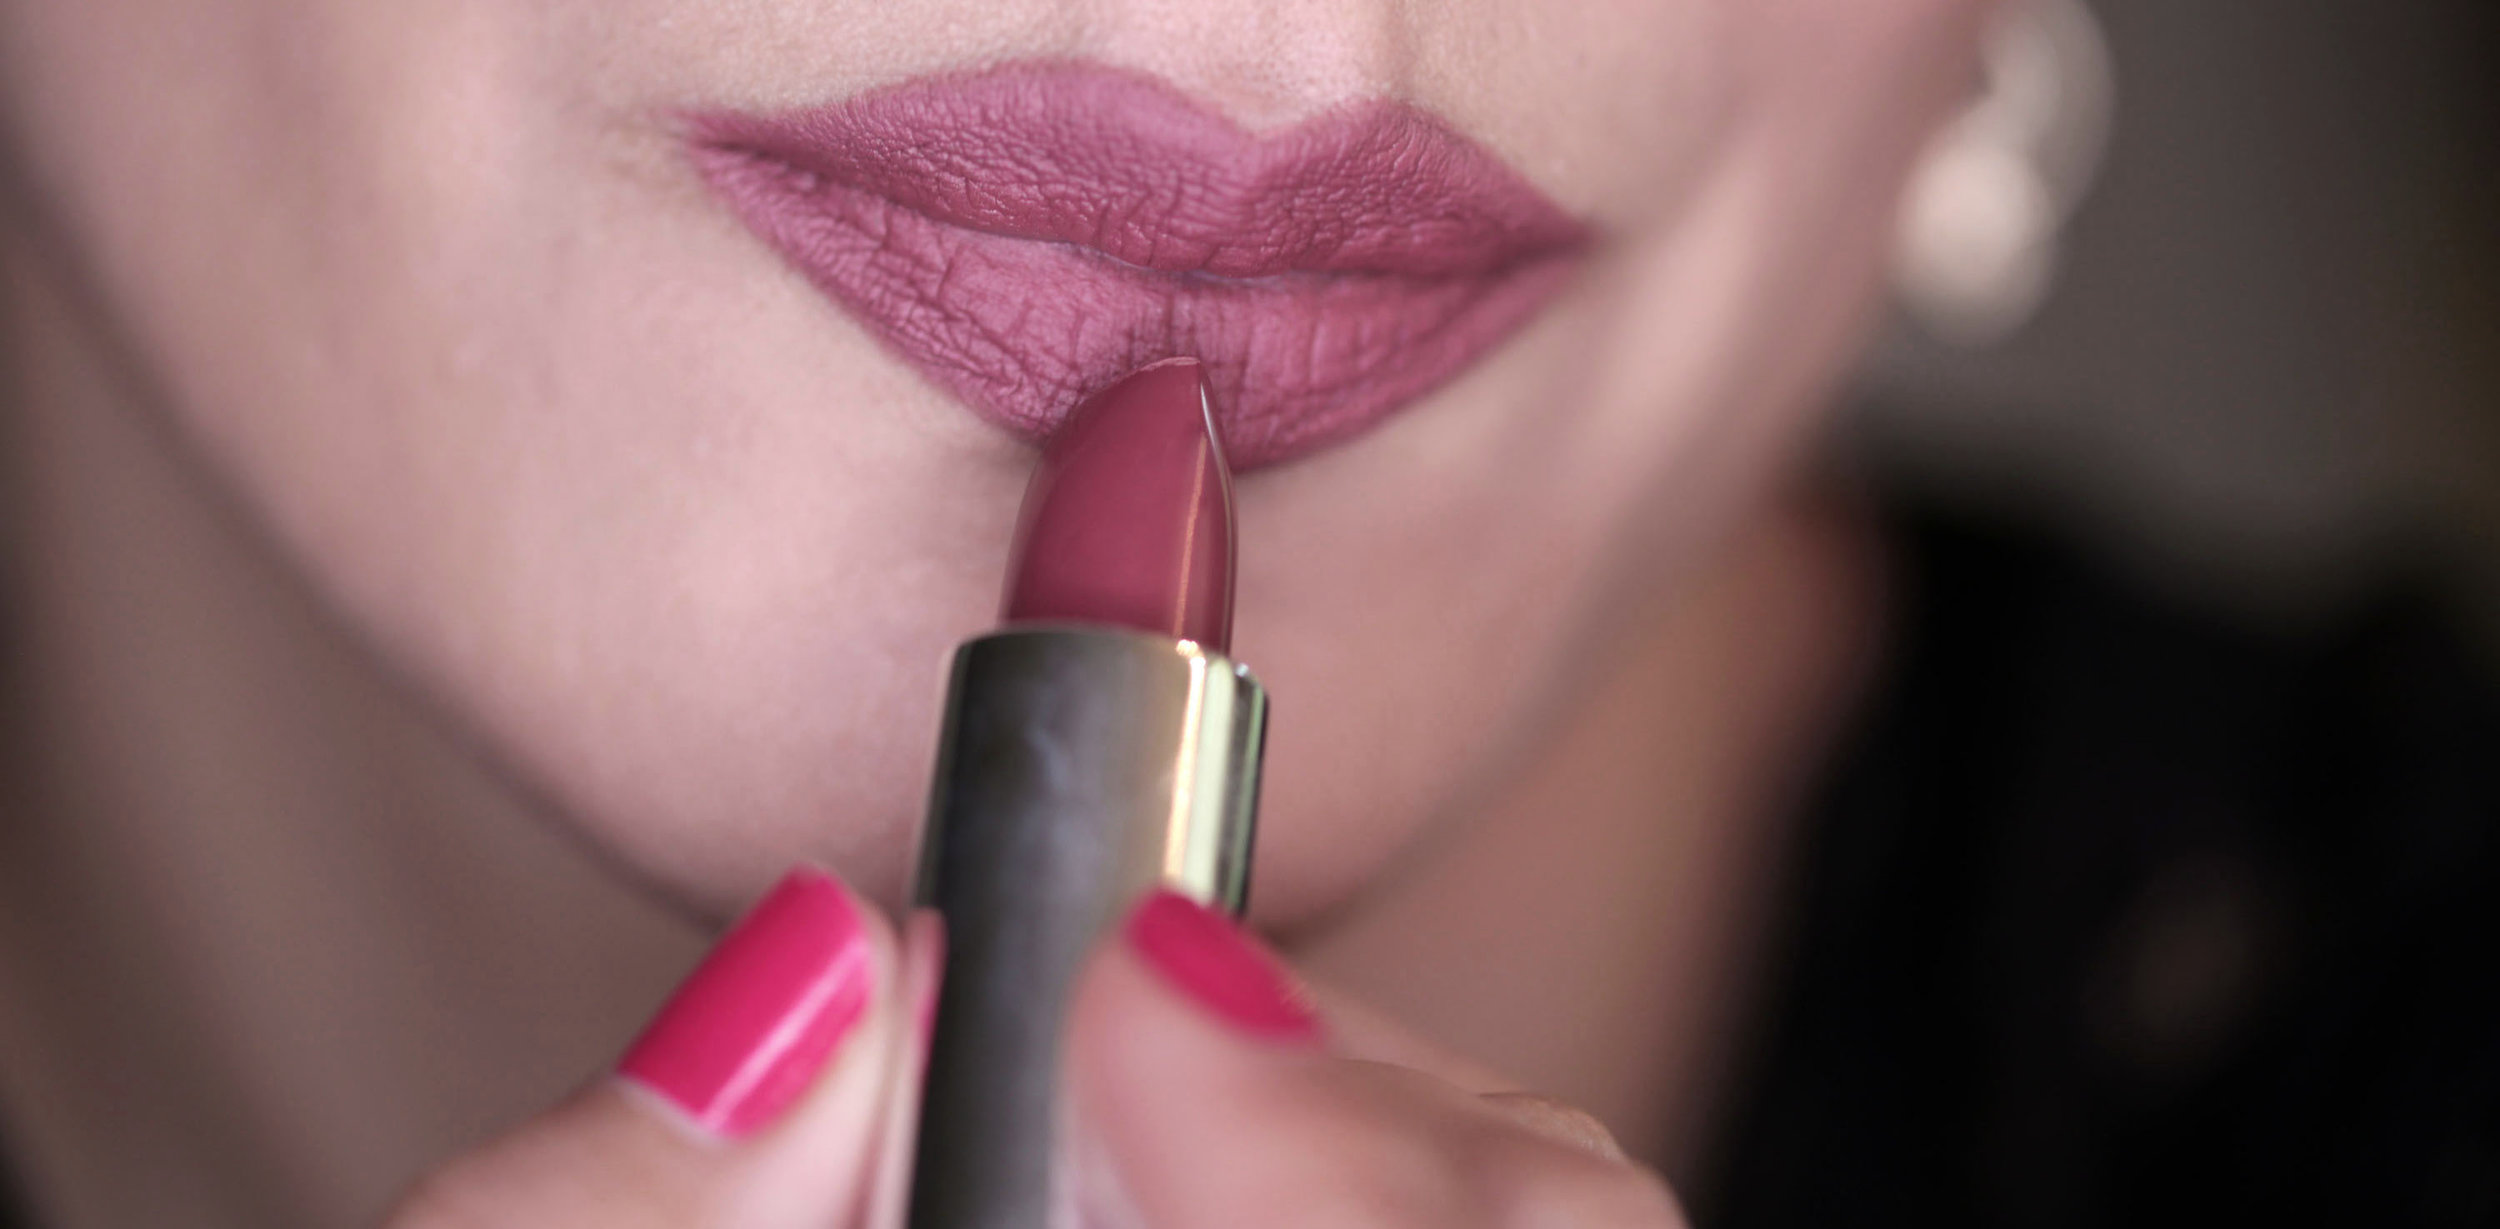
Is the bareMinerals Statement Lip Collection really long lasting?

Happy Friday! I took a little time away from the blog this week to get my hard drive in order. Not exactly by choice but my computer was completely out of space and it was so bad that I wasn't able to download a single photo! Normally I keep two months worth of photos on my desktop, basically anything that's related to the blog or Instagram. Previous months are archived in two external hard drives just in case one fails. I feel like I have a good system going except I didn't quite realize how many thousands of pictures I have stored in iPhoto. Whoops. I've had to do a massive purge to make room and I'm still not done! Lesson learned, keep iPhoto clear!
Anyway, I have some really amazing beauty and skincare launches to share with you guys so I want to dive in and talk about these three new bareMinerals lip products - the Luxe-Shine Lipsticks, Matte Lipcolors and Over Under Lip Liners. bareMinerals was nice enough to send me the entire collection so as always I've included swatches and reviews on these new items.
I'm also introducing a new rating system in this post so you know just how much I love the products that I'm talking about. That way it's easy for you to decipher at a glance whether or not you should be jumping on the bandwagon of the latest beauty trend but I do encourage you to read the review itself for a more comprehensive overview.


bareMinerals Statement Matte Lipcolors


I love the colour range on these Statement Matte Lipcolours. From Luxe (a pale pinky-brown nude) to Devious (a deep berry shade), there's something for every skintone. As always, I gravitate towards warm the red shades and my favourite of the collection has been Flash, a bright orange-red, that's truly unique and perfect for summer. It looks great with my light-medium olive skin and makes my brown eyes pop!
At $23 a tube, they're more affordable than most high-end lip products but they're also twice as expensive than their drugstore counterparts. The formula reminds me very much of the L'Oreal Infallible Pro-Matte Glosses - lightweight in formula, easy to apply, comfortable to wear but with a demi-matte finish that isn't a true matte.
I recommend lining the entire mouth with a lipliner first because this Statement Matte Lipcolour wears quickly if it doesn't have anything to cling to. The formula doesn't stain the lips either which is good and bad depending on what you want in a lipstick. I prefer staining so that when I eat or drink, the areas where my lipstick has worn off aren't obvious but that's because I normally wear red or bright colours.
When comparing these to the Smashbox Always On and Kat Von D Everlasting matte liquid lipsticks, I would say those take the cake in terms of being long-wearing, true matte lipsticks. Sorry bareMinerals!

I realize the swatches vary in colour slightly throughout this post. Please go with this image for true-to-life colours. It was very challenging for me to get all of the colours uniform in each picture so I do apologize.
Statement Matte Lipcolor (top row)
VS.
StatementLuxe-Shine Lipstick (bottom row)
As you can see from the comparison picture above, the shades in the Matte Lipcolors collection are very similar to those in the Luxe-Shine lipstick range.
The only real differences are the palest shades. The Tease lipstick is a peach/ coral shade with warm undertones versus the Luxe matte lipcolor, which is more of a cool mauve.
The Biba lipstick looks like a lighter version of the matte lippie Shameless. And finally, the Rebound lipstick looks similar to the Fresh matte.
Otherwise, the colours are practically a replica of each other and they vary in shade due to the different formulas. I personally would have liked to see more variety in terms of colours between the Matte and Luxe-Shine collections.

bareMinerals Statement Luxe-Shine Lipstick


I realize the swatches of the lipsticks are a little lighter than the image comparing the two formulas. Please go with comparison pic for true-to-life colours. It was very challenging for me to get all of the colours uniform in each picture so I do apologize.
Jumping right in, I have to say that I prefer the formula on the Statement Luxe-Shine lipsticks much more to the Matte collection. They have longer staying power and there was a slight stain on my lips after drinking my morning coffee. Exactly what I want in a highly pigmented lipstick so I don't look like a goof once I finish eating or drinking if I'm sporting a red lip.
The Luxe-Shine lipstick is hydrating, feels comfortable on my lips and the colour payoff is awesome. My lips also looked a bit plumper when I wore the lipstick versus the Matte Lipcolor but I wonder if that has to do with the way I over lined my mouth. Or maybe it has to do with the shiny finish which can also give the appearance of a plumper lip. I checked the press statement that came with the collection there's no claim of plumping so this is an added bonus if you ask me.
As always, I would recommend pairing lipstick with a lip liner underneath for extra staying power especially since it's a shiny formula, which can fade quicker than a matte.
It probably comes as no surprise that my favourite shade here is Flash, an orange-red that's strikingly similar to Fire, it's matte shade counterpart.
The lipsticks overall are really nice. At $25, a tube, it can be seen as either steep or cheap depending on how luxe you like to go with your makeup.
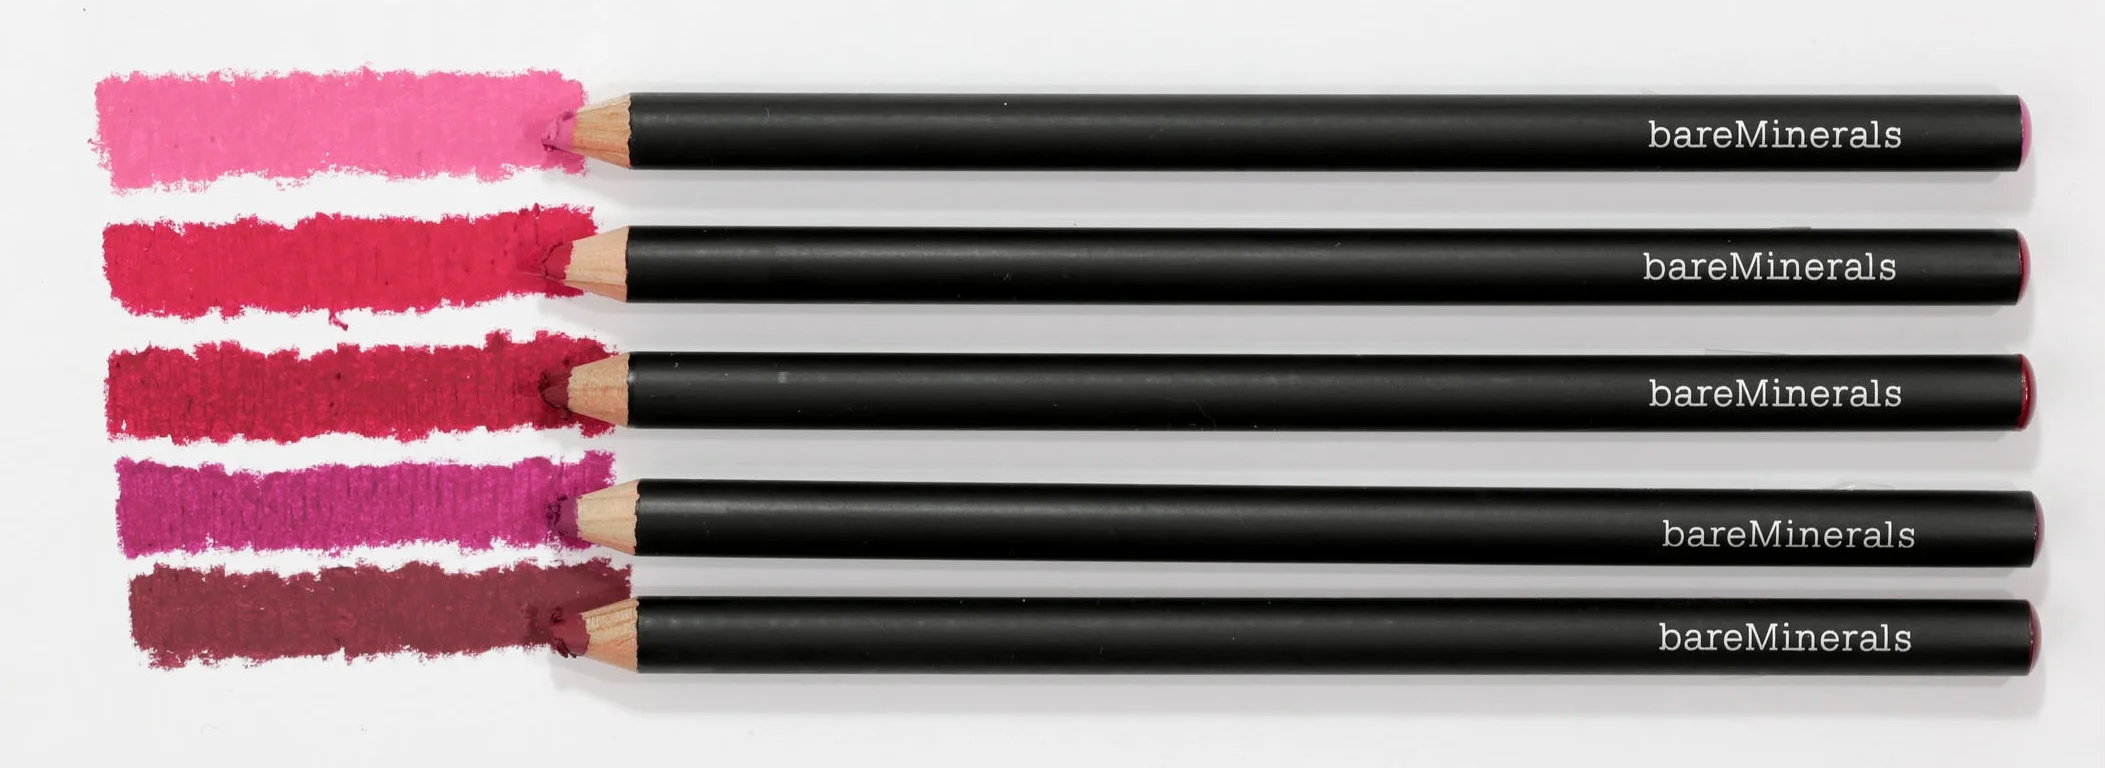
bareMinerals Statement Under Over Lip Liners


I love lip liners and I'm a true believer in them. If you want your lipstick to last, you need a lipliner! I'm still surprised when women ask me, "how can I get my lipstick to stay". Lip Liner!
Start by lining the outline of your lips and then fill them in. I like to overdraw slightly because I think my lips are too thin otherwise but you certainly don't have to.
When it comes to formula, I prefer drugstore liners over designer ones because I don't see the value in a $35 lip pencil versus a $6 one. I've tried Chanel, MAC, Givenchy, Annabelle and NYX and I always prefer the cheaper ones.
That being said, Bite Beauty and Kat Von D are making some excellent lip pencils in the mid-range price point with excellent formulas. Now, bareMinerals is giving us their own version at $21.
Like the rest of the Statement Collection, these wooden lip pencils are similar in shade and work well together. They're super creamy, highly pigmented, tug-free and go on like a dream. They make my lipstick last, exactly as they should and it keeps my lipstick from fading.
In terms of formula, it's excellent but where it falls short is that it's not budge proof but then again, very few lip liners are. Also, I believe the price point should be lower than it is. A tube of Statement Matte Lipcolor is $23 and a Statement Lipstick is $25. If you ask me, $21 for a liner is a bit of a stretch when the volume is a fraction of the other full sized items in the collection. Then again, Kat Von D and Bite Beauty are similarly priced so... take that for what you will.

Collection Overview

Overall, the collection is really nice in terms of the range of colours and the comfortable-to-wear formulas. Compared to a lot of products at Sephora, I believe they're well priced. If you're already a bareMinerals fan, you're going to love the Statement lip collection so I'd say check it out!
What I really would have wanted to see from these lip products are long-wearing formulas with some staining since so many of the colours here are vibrant and so beautiful. It's a pet peeve of mine to constantly be checking and reapplying my lipstick and that's how I kind of felt wearing these. The lip pencil helped a lot in making the formulas longer-wearing otherwise both the lipstick and matte lipcolour faded fast when worn alone.

DISCLAIMER: bareMinerals Statement Lip Collection was provided by the brand.
All opinions are my own and completely honest.
Photography by Nathalie and Geoff Martin.
Archive
- May 2025
- February 2025
- January 2025
- December 2024
- October 2024
- August 2024
- July 2024
- June 2024
- May 2024
- March 2024
- February 2024
- January 2024
- December 2023
- November 2023
- October 2023
- September 2023
- August 2023
- July 2023
- April 2023
- March 2023
- February 2023
- January 2023
- September 2022
- July 2022
- June 2022
- May 2022
- April 2022
- February 2022
- December 2021
- October 2021
- September 2021
- August 2021
- July 2021
- June 2021
- May 2021
- April 2021
- March 2021
- February 2021
- January 2021
- December 2020
- November 2020
- October 2020
- September 2020
- August 2020
- July 2020
- June 2020
- May 2020
- April 2020
- February 2020
- January 2020
- December 2019
- November 2019
- October 2019
- September 2019
- August 2019
- July 2019
- June 2019
- May 2019
- April 2019
- March 2019
- February 2019
- January 2019
- December 2018
- November 2018
- October 2018
- September 2018
- August 2018
- July 2018
- June 2018
- May 2018
- April 2018
- March 2018
- February 2018
- January 2018
- December 2017
- November 2017
- October 2017
- September 2017
- August 2017
- July 2017
- June 2017
- May 2017
- April 2017
- March 2017
- February 2017
- January 2017
- December 2016
- November 2016
- October 2016
- September 2016
- August 2016
- July 2016
- June 2016
- May 2016
- April 2016
- March 2016
- February 2016
- January 2016
- December 2015
- November 2015
- October 2015
- September 2015
- August 2015
- July 2015
- June 2015
- May 2015
- April 2015
- March 2015
- February 2015
- January 2015
- December 2014
- November 2014
- October 2014
- September 2014
- August 2014
- July 2014
- June 2014
- May 2014
- April 2014
- March 2014

Red Vinyl Skirt & Patent Leather Kitten Heels
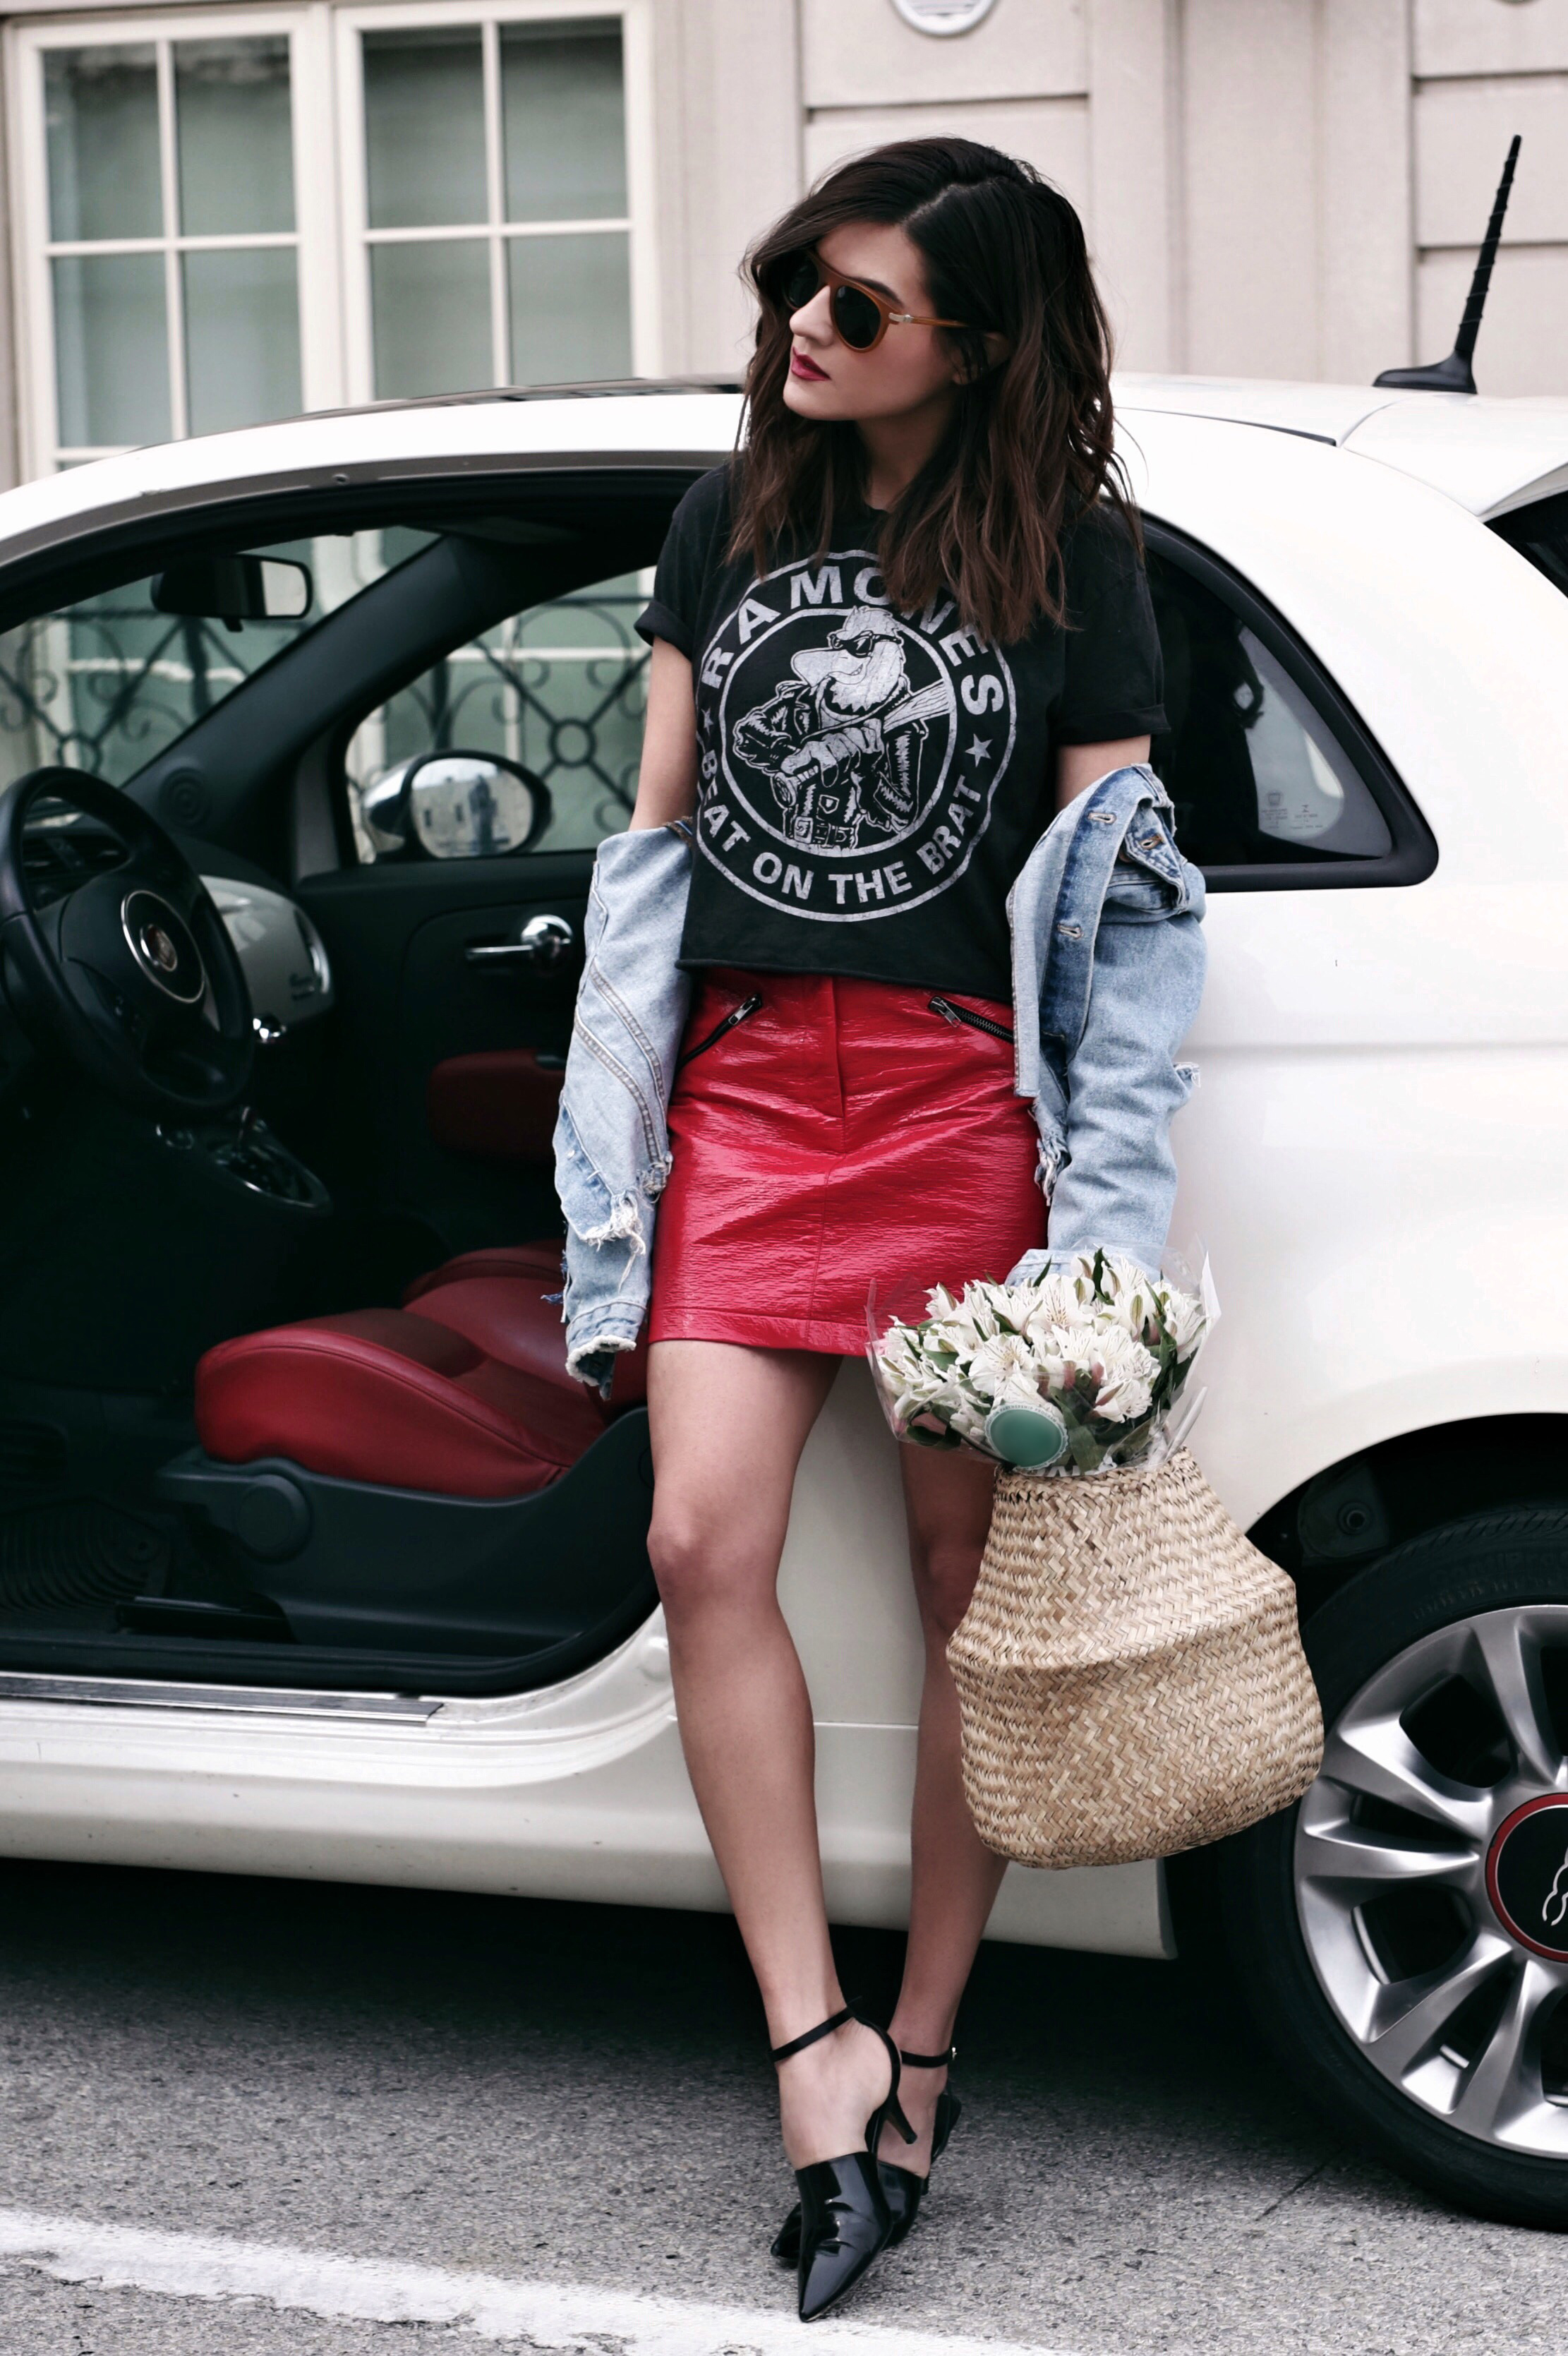
Honestly, what's your take on vinyl pants? You know the ones that are super glossy and shiny and if you have mega bucks to spend you'll invest in a patent leather pair because you roll like that.
Kendall Jenner was spotted in a black patent leather pair in March topped off with a Gucci sweatshirt and red coat. Bloggers Sonya Esman and Aimee Song paired their red patent leather pants with knits and graphic tees - my favourite combo.
I first saw shiny pants on Instagram about a year about and honestly, I wanted to retch. Slowly shiny pants started creeping up on my Pinterest and next thing you know, I'm online, desperately looking for a pair of my own. Trends are annoying like that, aren't they? We turn our back on ourselves and suddenly we're investing our hard earned money on something silly like shiny effing pants. Or in my case, skirts, because there are currently three in my closet.
Vinyl pants and skirts are not for the faint of heart. They can't be passed off as office attire like that too-short summer dress, "cleverly" disguised as professional when topped off with a blazer. Depending on who you ask and what age bracket you happen to fall into, vinyl clothing isn't even suitable for a first date. On second thought, unless that first date is a concert, don't even think about it.
But you know when it's appropriate? Fashion week, a night out with the girls, or date night with your partner. Make the outfit chic and effortless with a patent leather kitten heel or a cute ankle boot. Top it off with a silk blouse and make the outfit softer and more feminine. The contrast of the silk and a vinyl pant is perfect for a night time look. I'm even thinking a cute clutch and suede pointed-toe pump as a finishing touch.
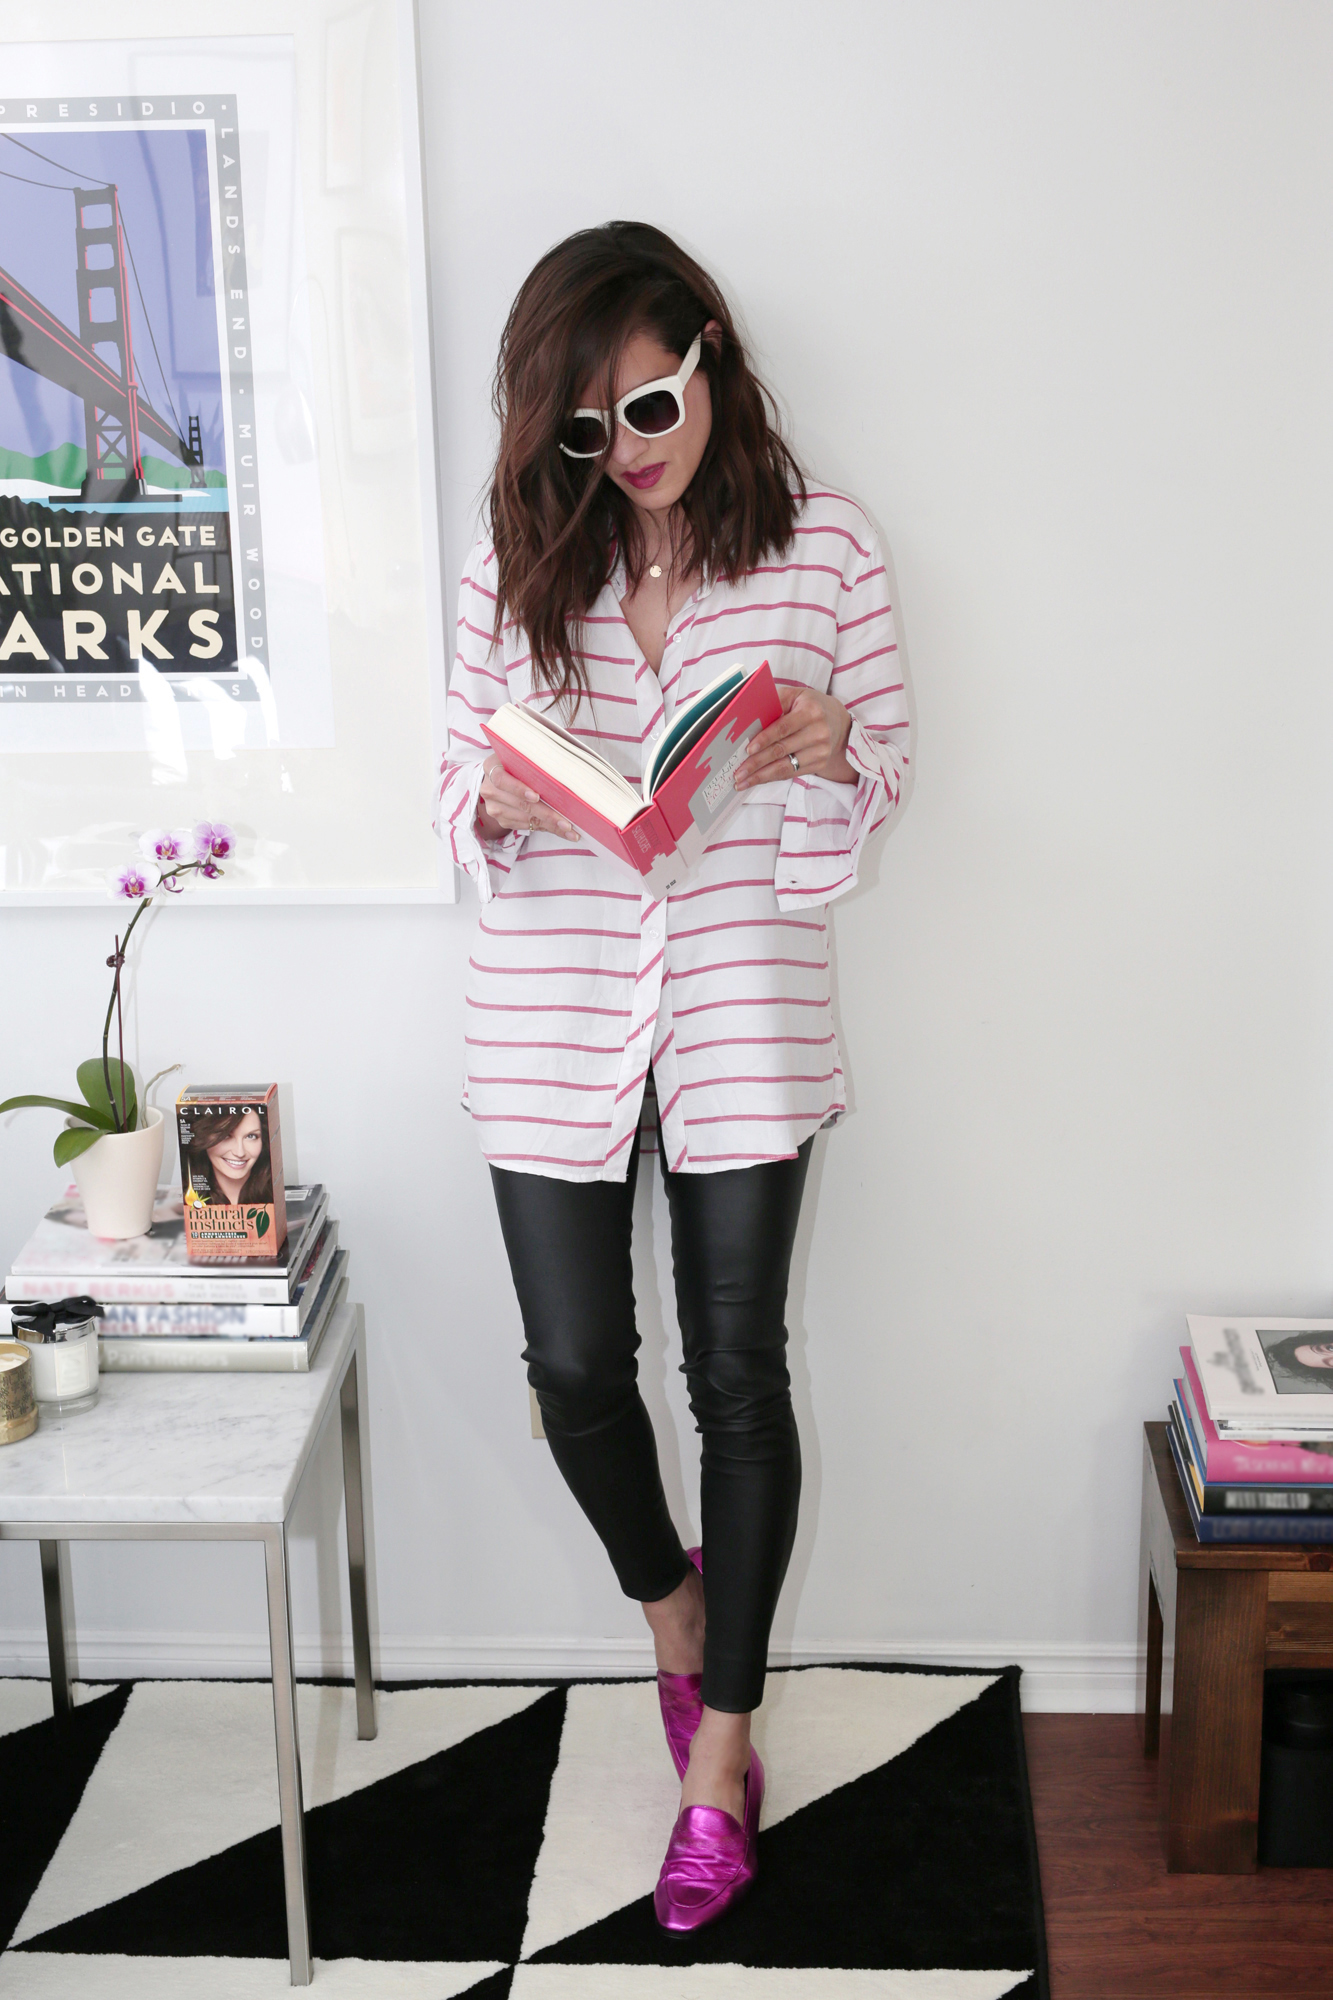
For this daytime look, I kept it low key and paired my red vinyl Topshop skirt with a Ramone's band tee from Zara, a shredded denim jacket, a rattan basket instead of a purse, and glossy red lips contrasted with matte, mustard coloured Ferragamo sunglasses.
The key is CONTRAST in textiles when wearing vinyl pants or skirts.
Have fun when you get dressed and don't overthink it. Just go with the flow! If you're not sure of what to pair with your vinyl clothes just think of what's appropriate in terms of dress code or jump in Pinterest for some inspo and you'll be fine!
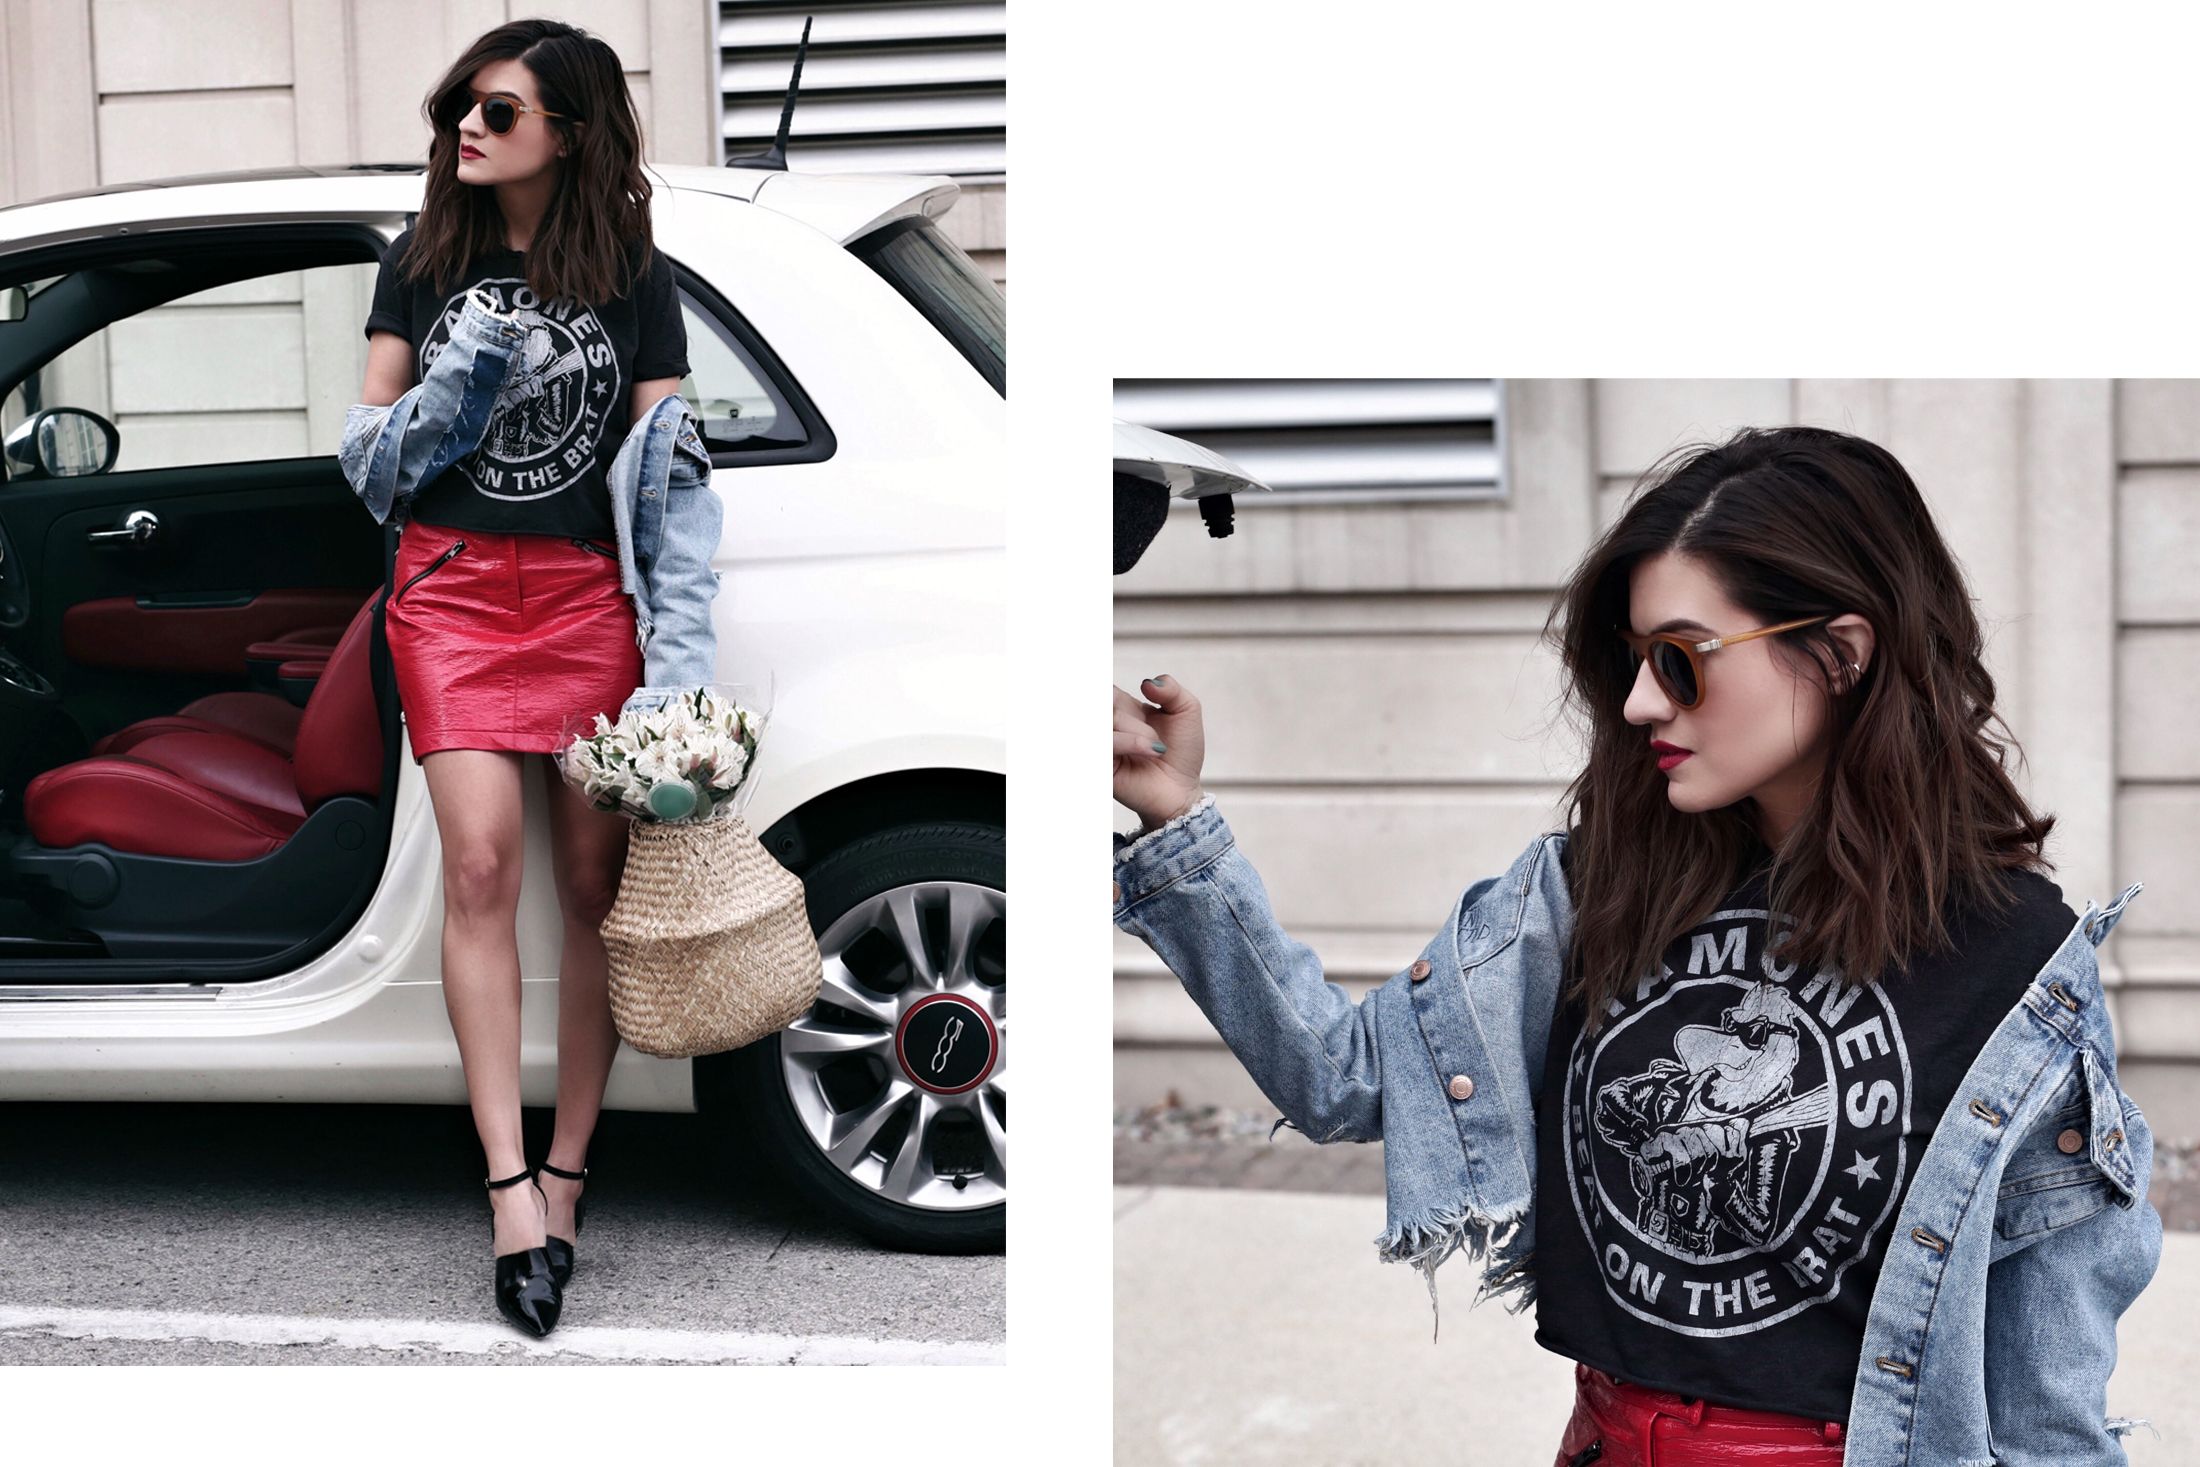
What I'm Wearing
Ramone's cropped tee, Zara.
Denim jacket, Zara.
Sunglasses, Ferragamo.
Red vinyl skirt, Topshop.
Patent leather kitten heels with ankle strap, Alexander Wang circa 2014.
Rattan basket, unknown.


2107 is all about gloss. Update your look with glossy lips, metallic shoes, vinyl skirts and glossy hair. I'm currently hosting a contest with Clairol and you can win a years supply of Natural Instincts or a trip for two to New York! All of the details are on my recent hair post so make sure you check it out!

Photography by Geoff Martin

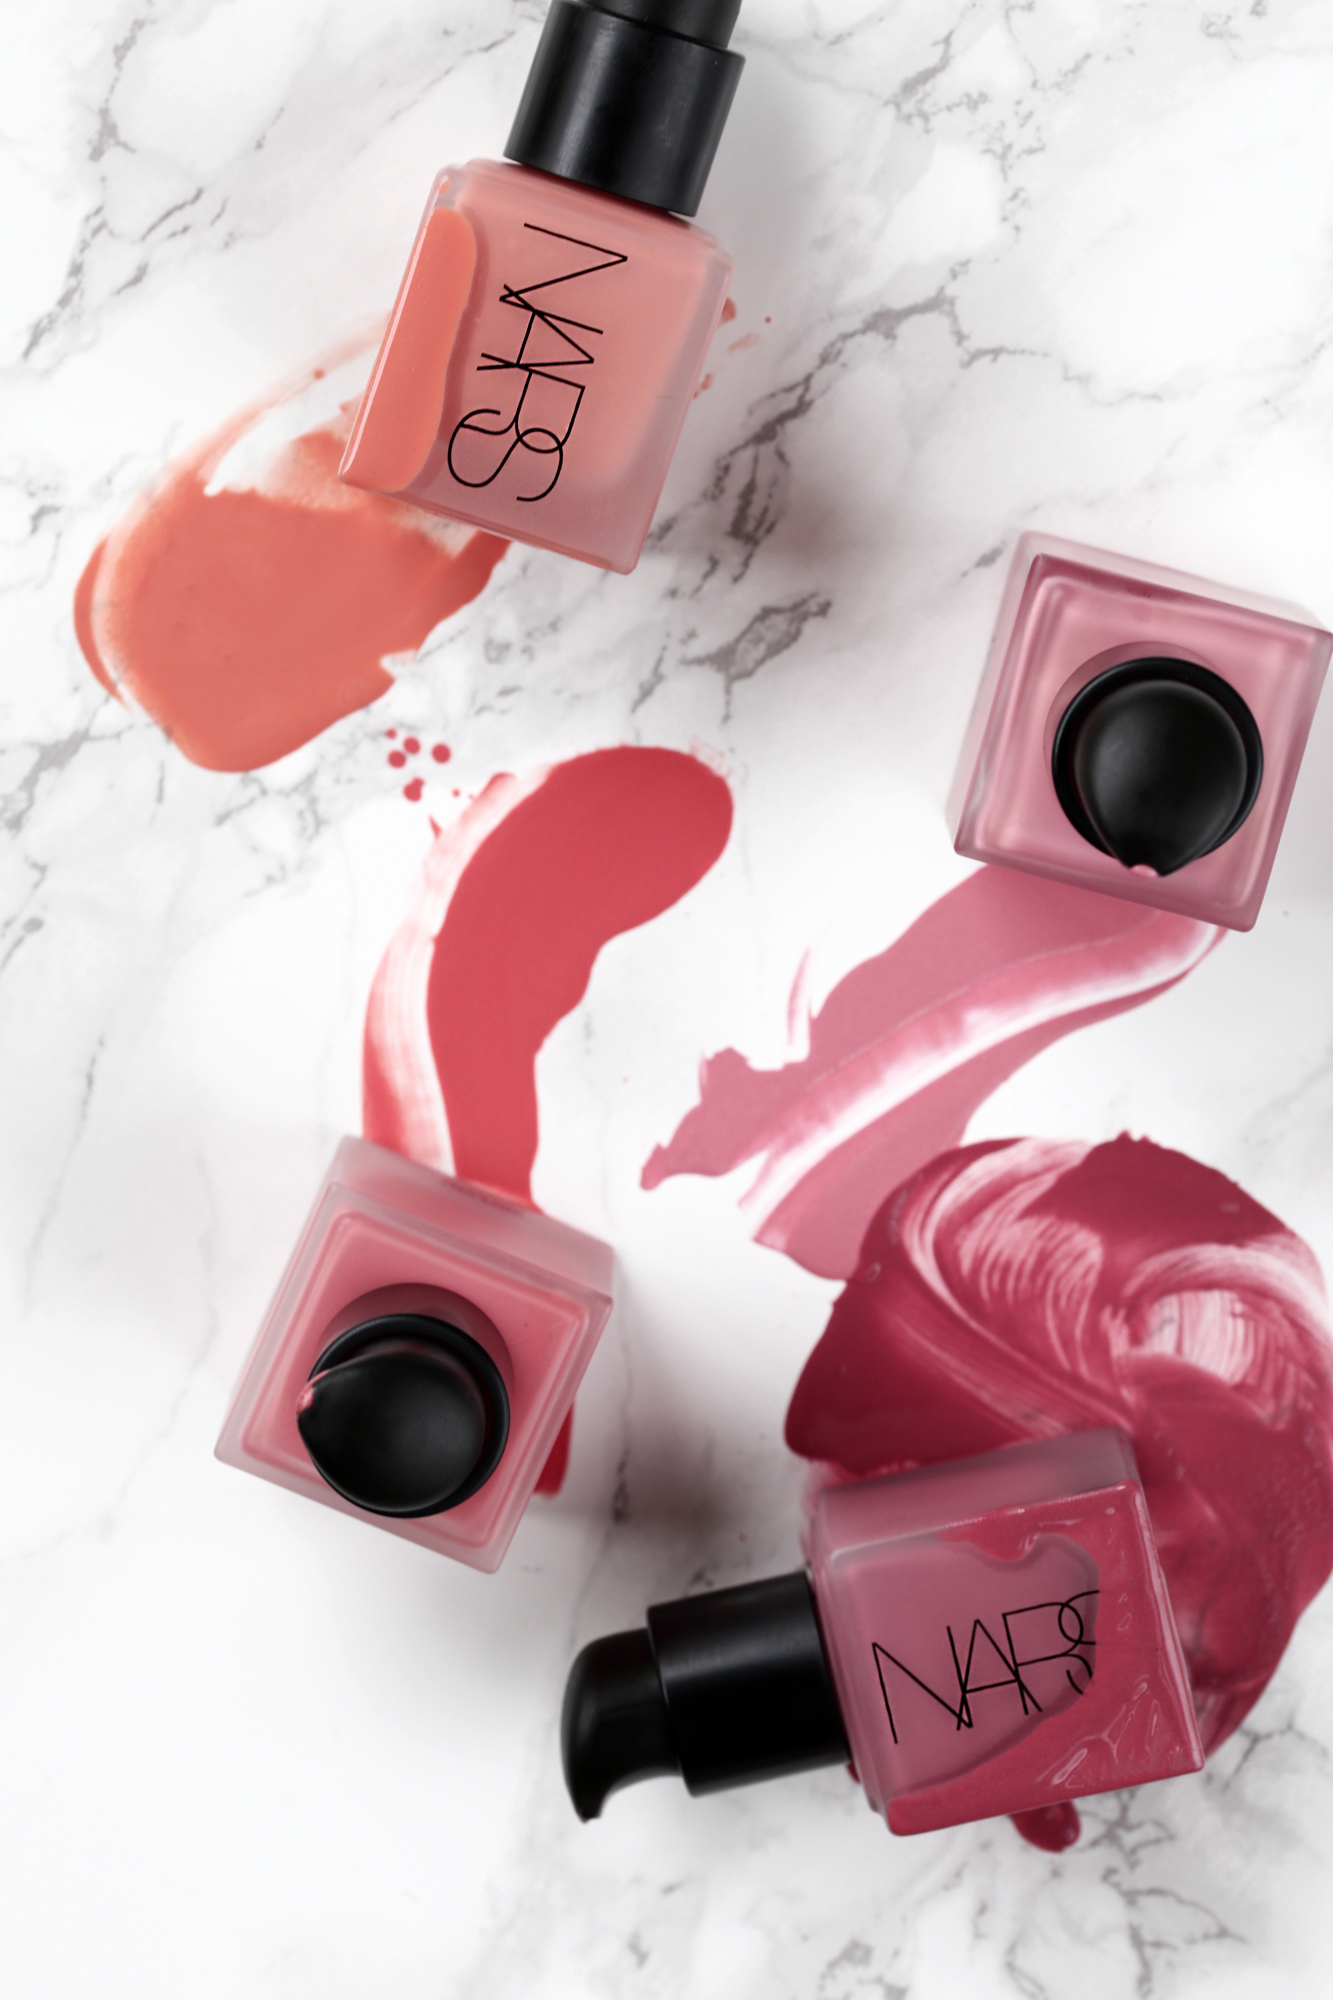
My favourite new blush for summer - NARS Liquid Blush
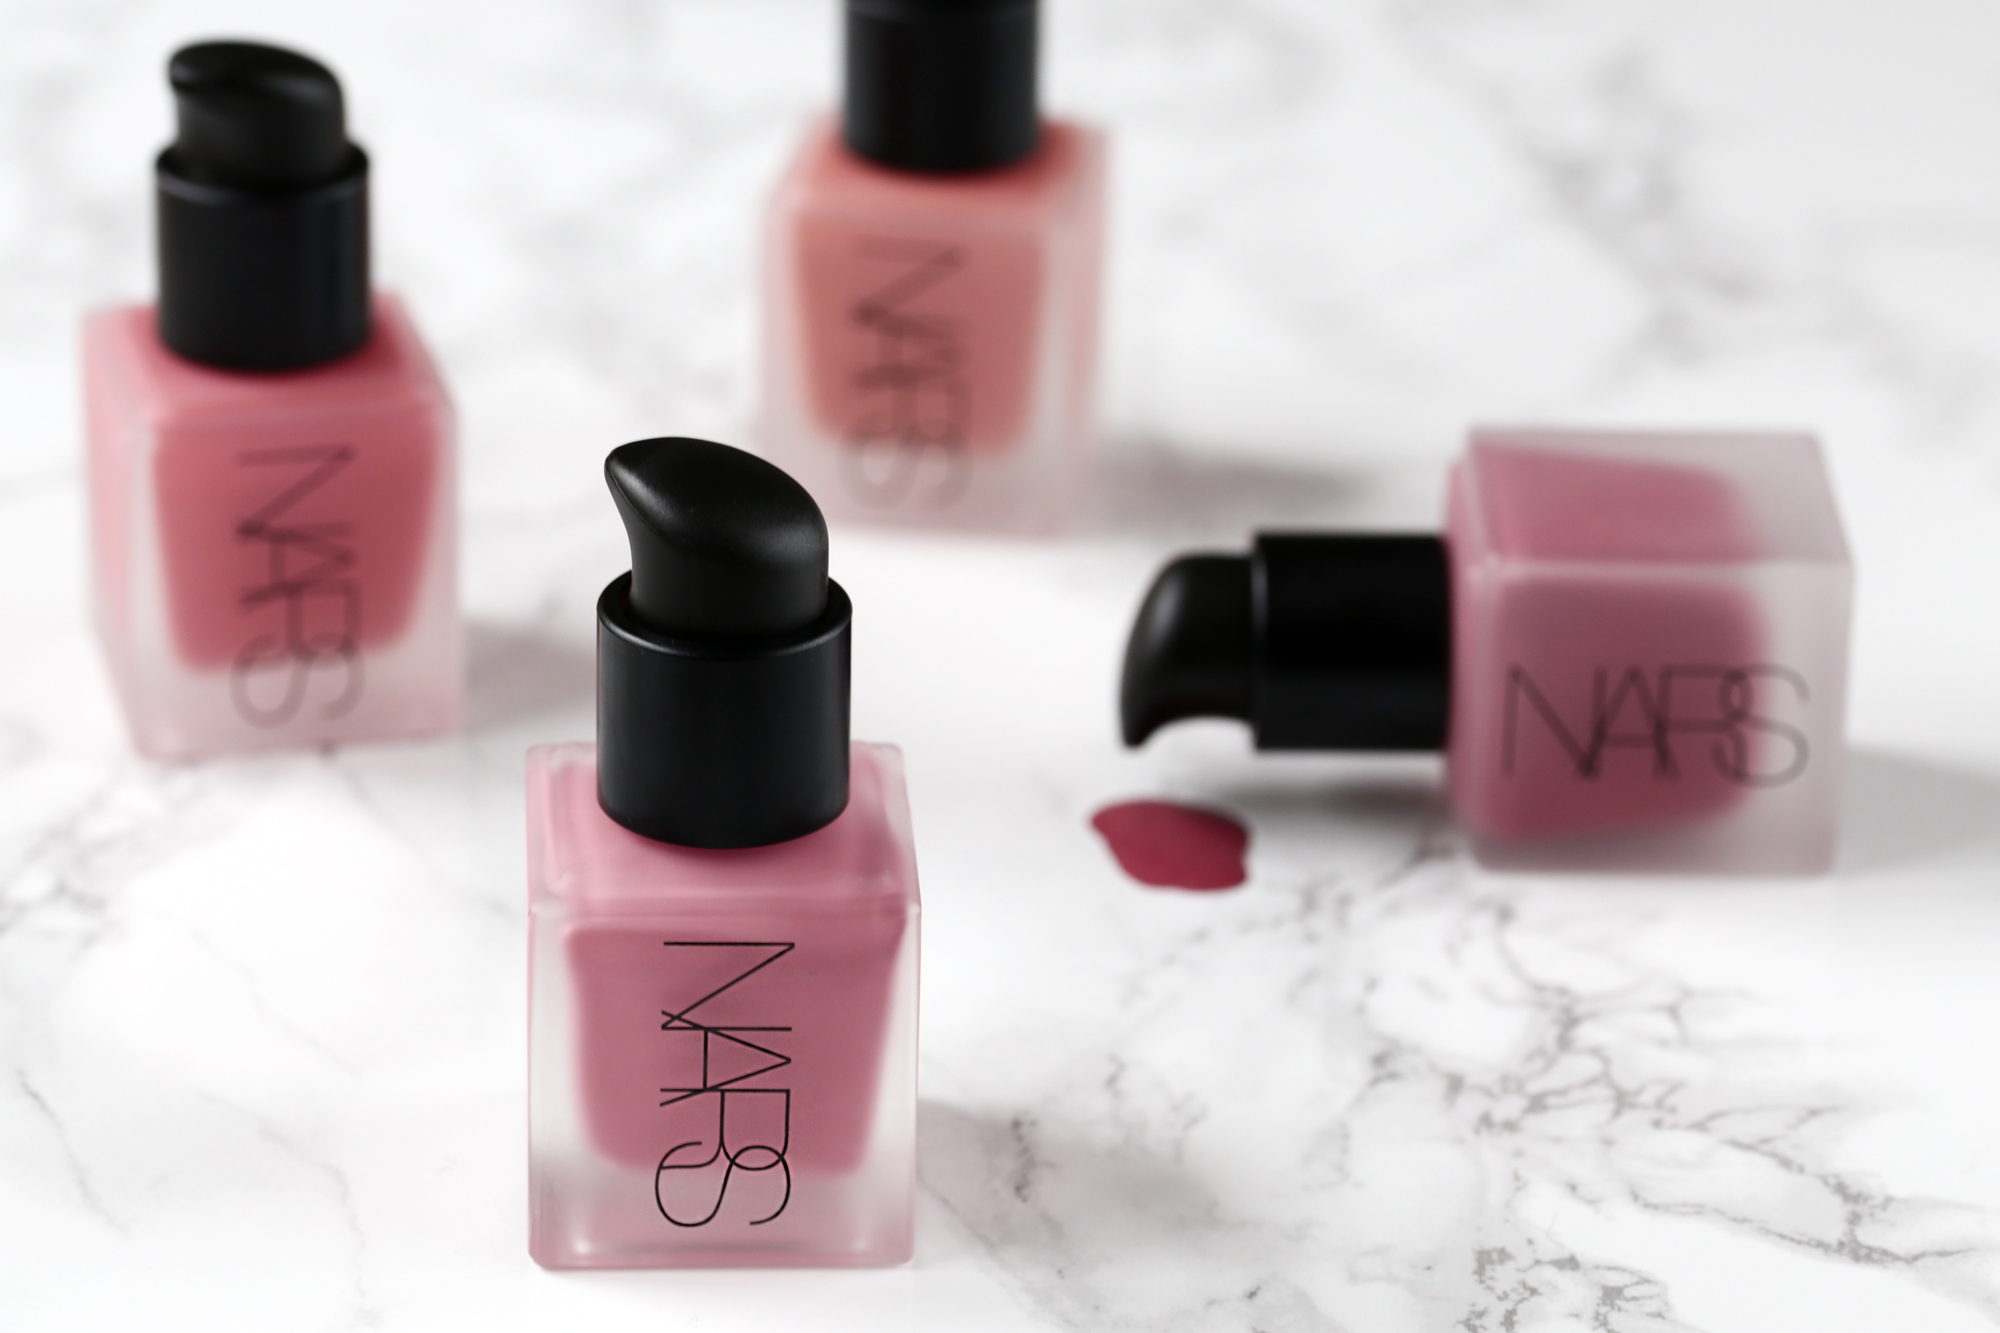
When these new liquid blushers from NARS hit my desk I wanted to start playing around with them right away and yet as someone who recently converted from powder blush to cream blush, I was initially hesitant on how well a liquid blush would apply.
Would it have the same control as cream or powder? Would it look streaky on my cheeks? Would it drip down my face? How would I apply it?
I was overwhelming myself with too many questions so instead of overthinking, I sat down in front of the mirror to start using the product and you know what, application is way easier than I thought.
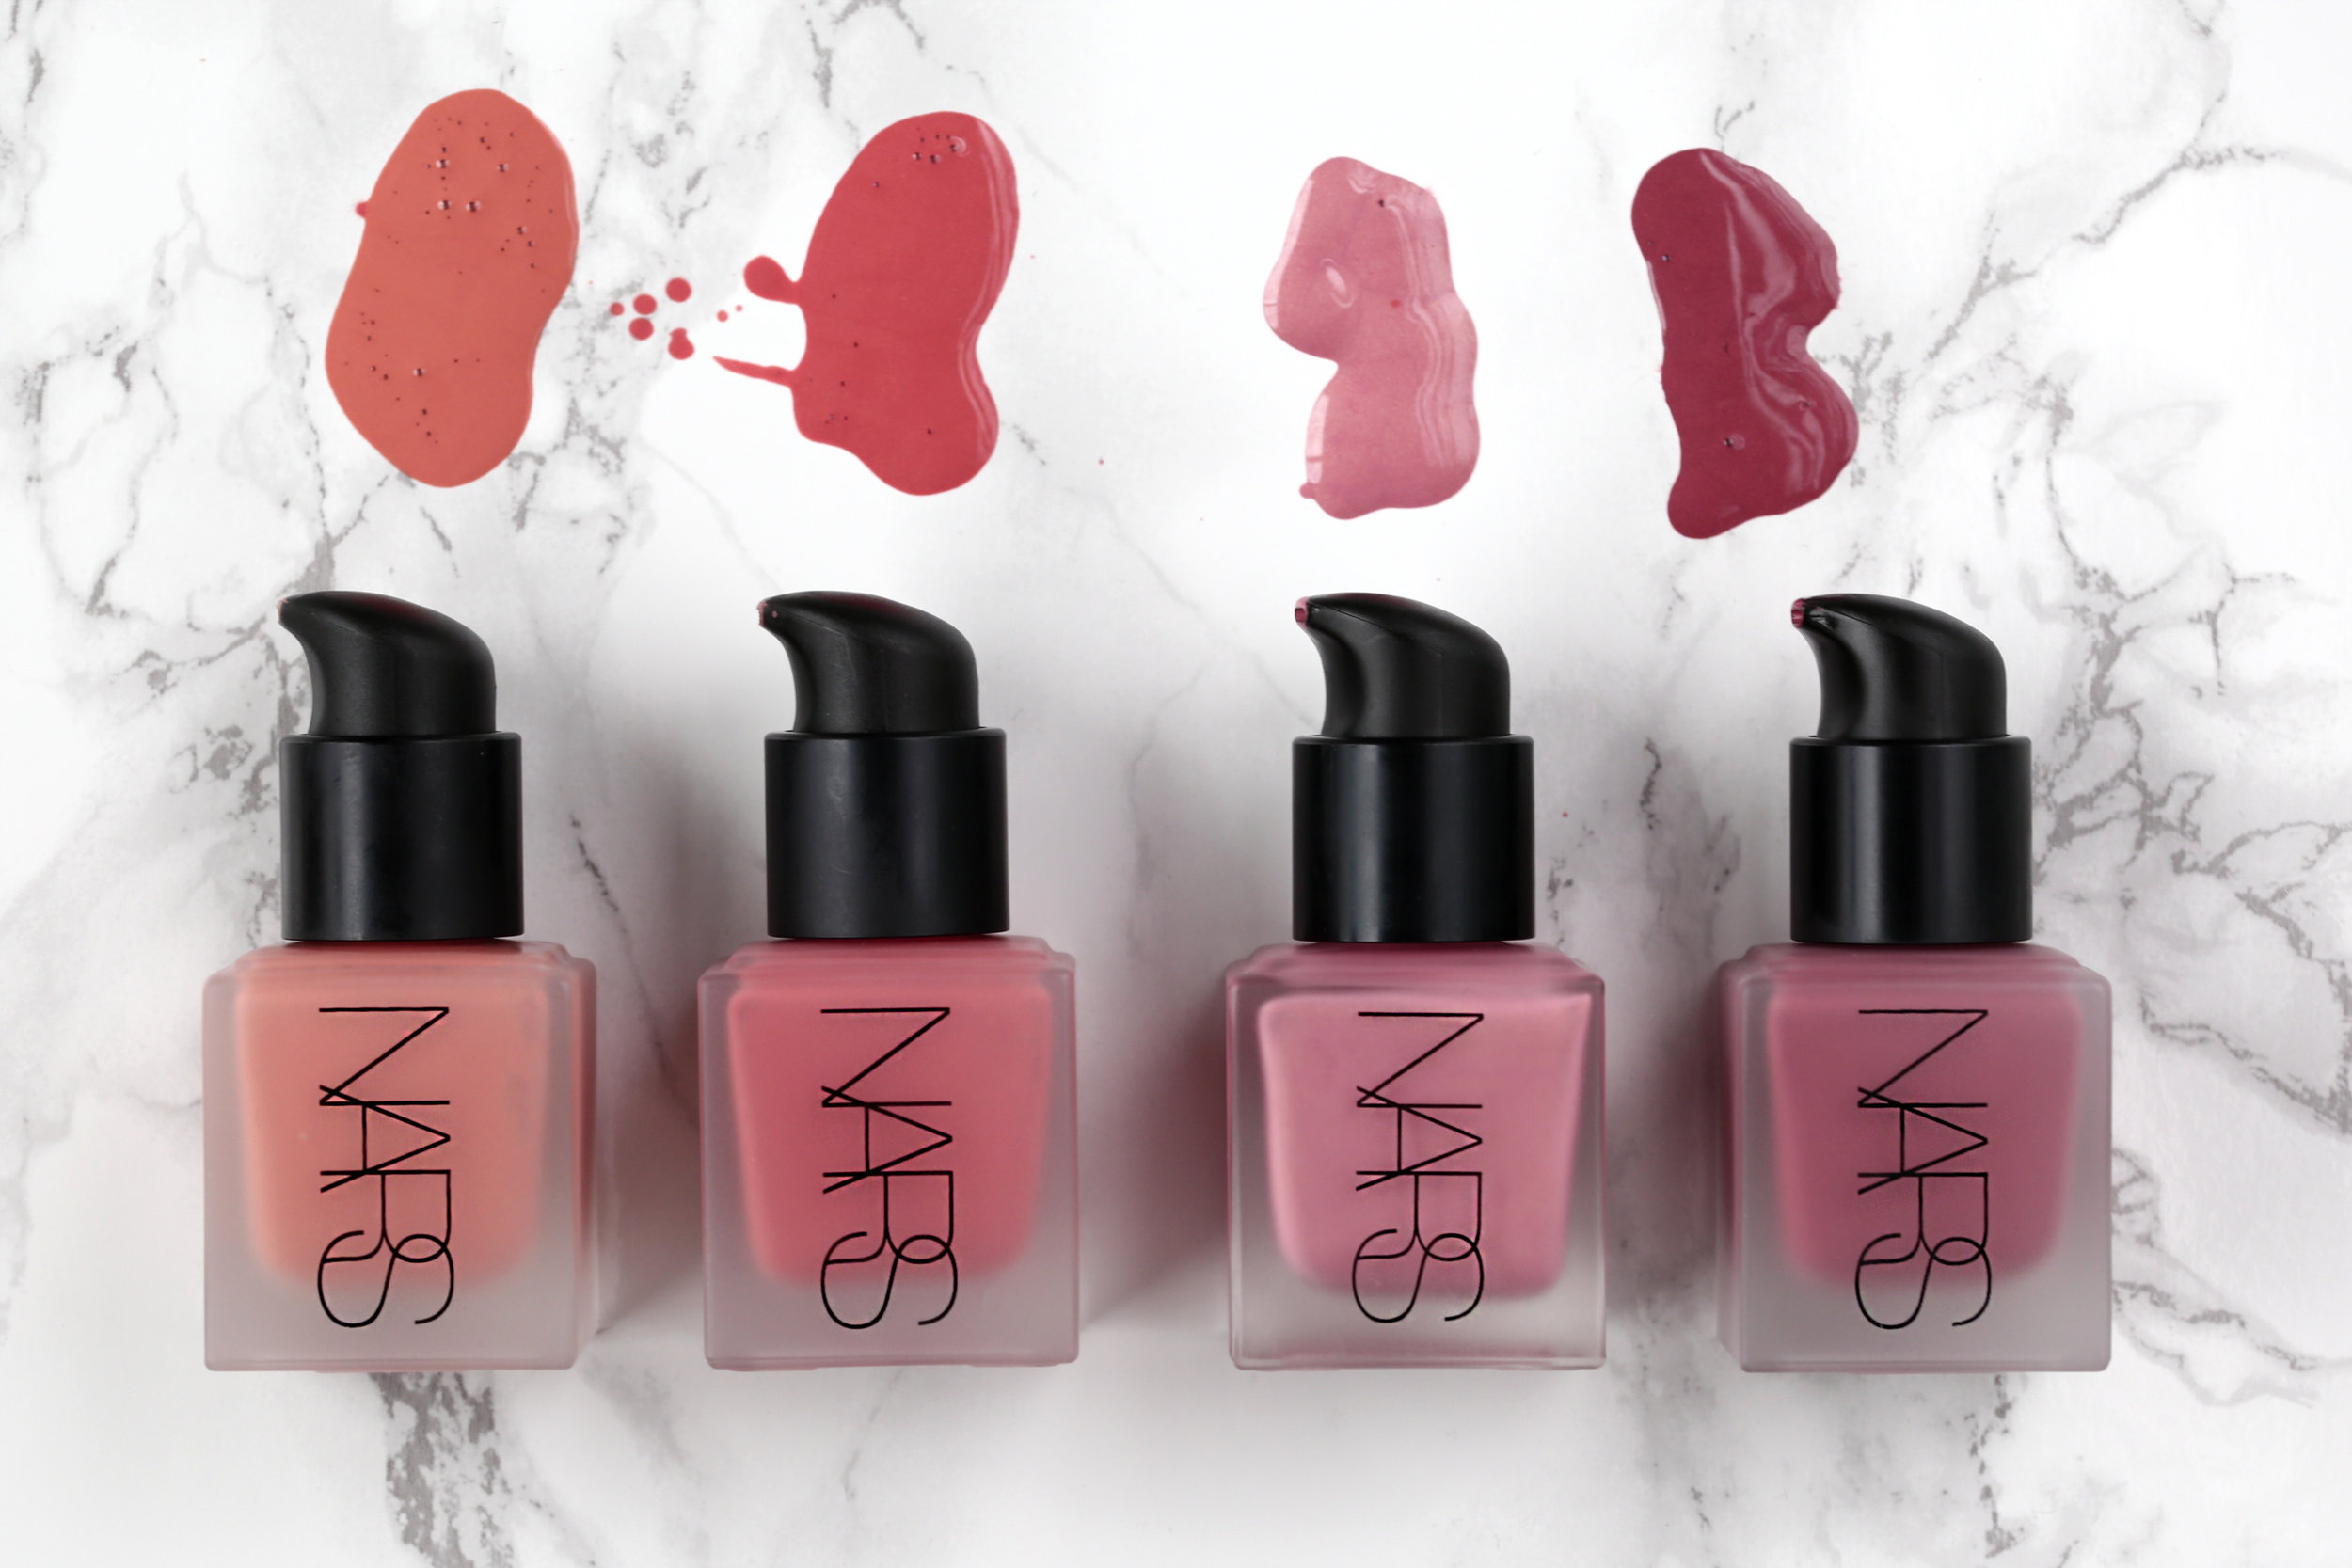
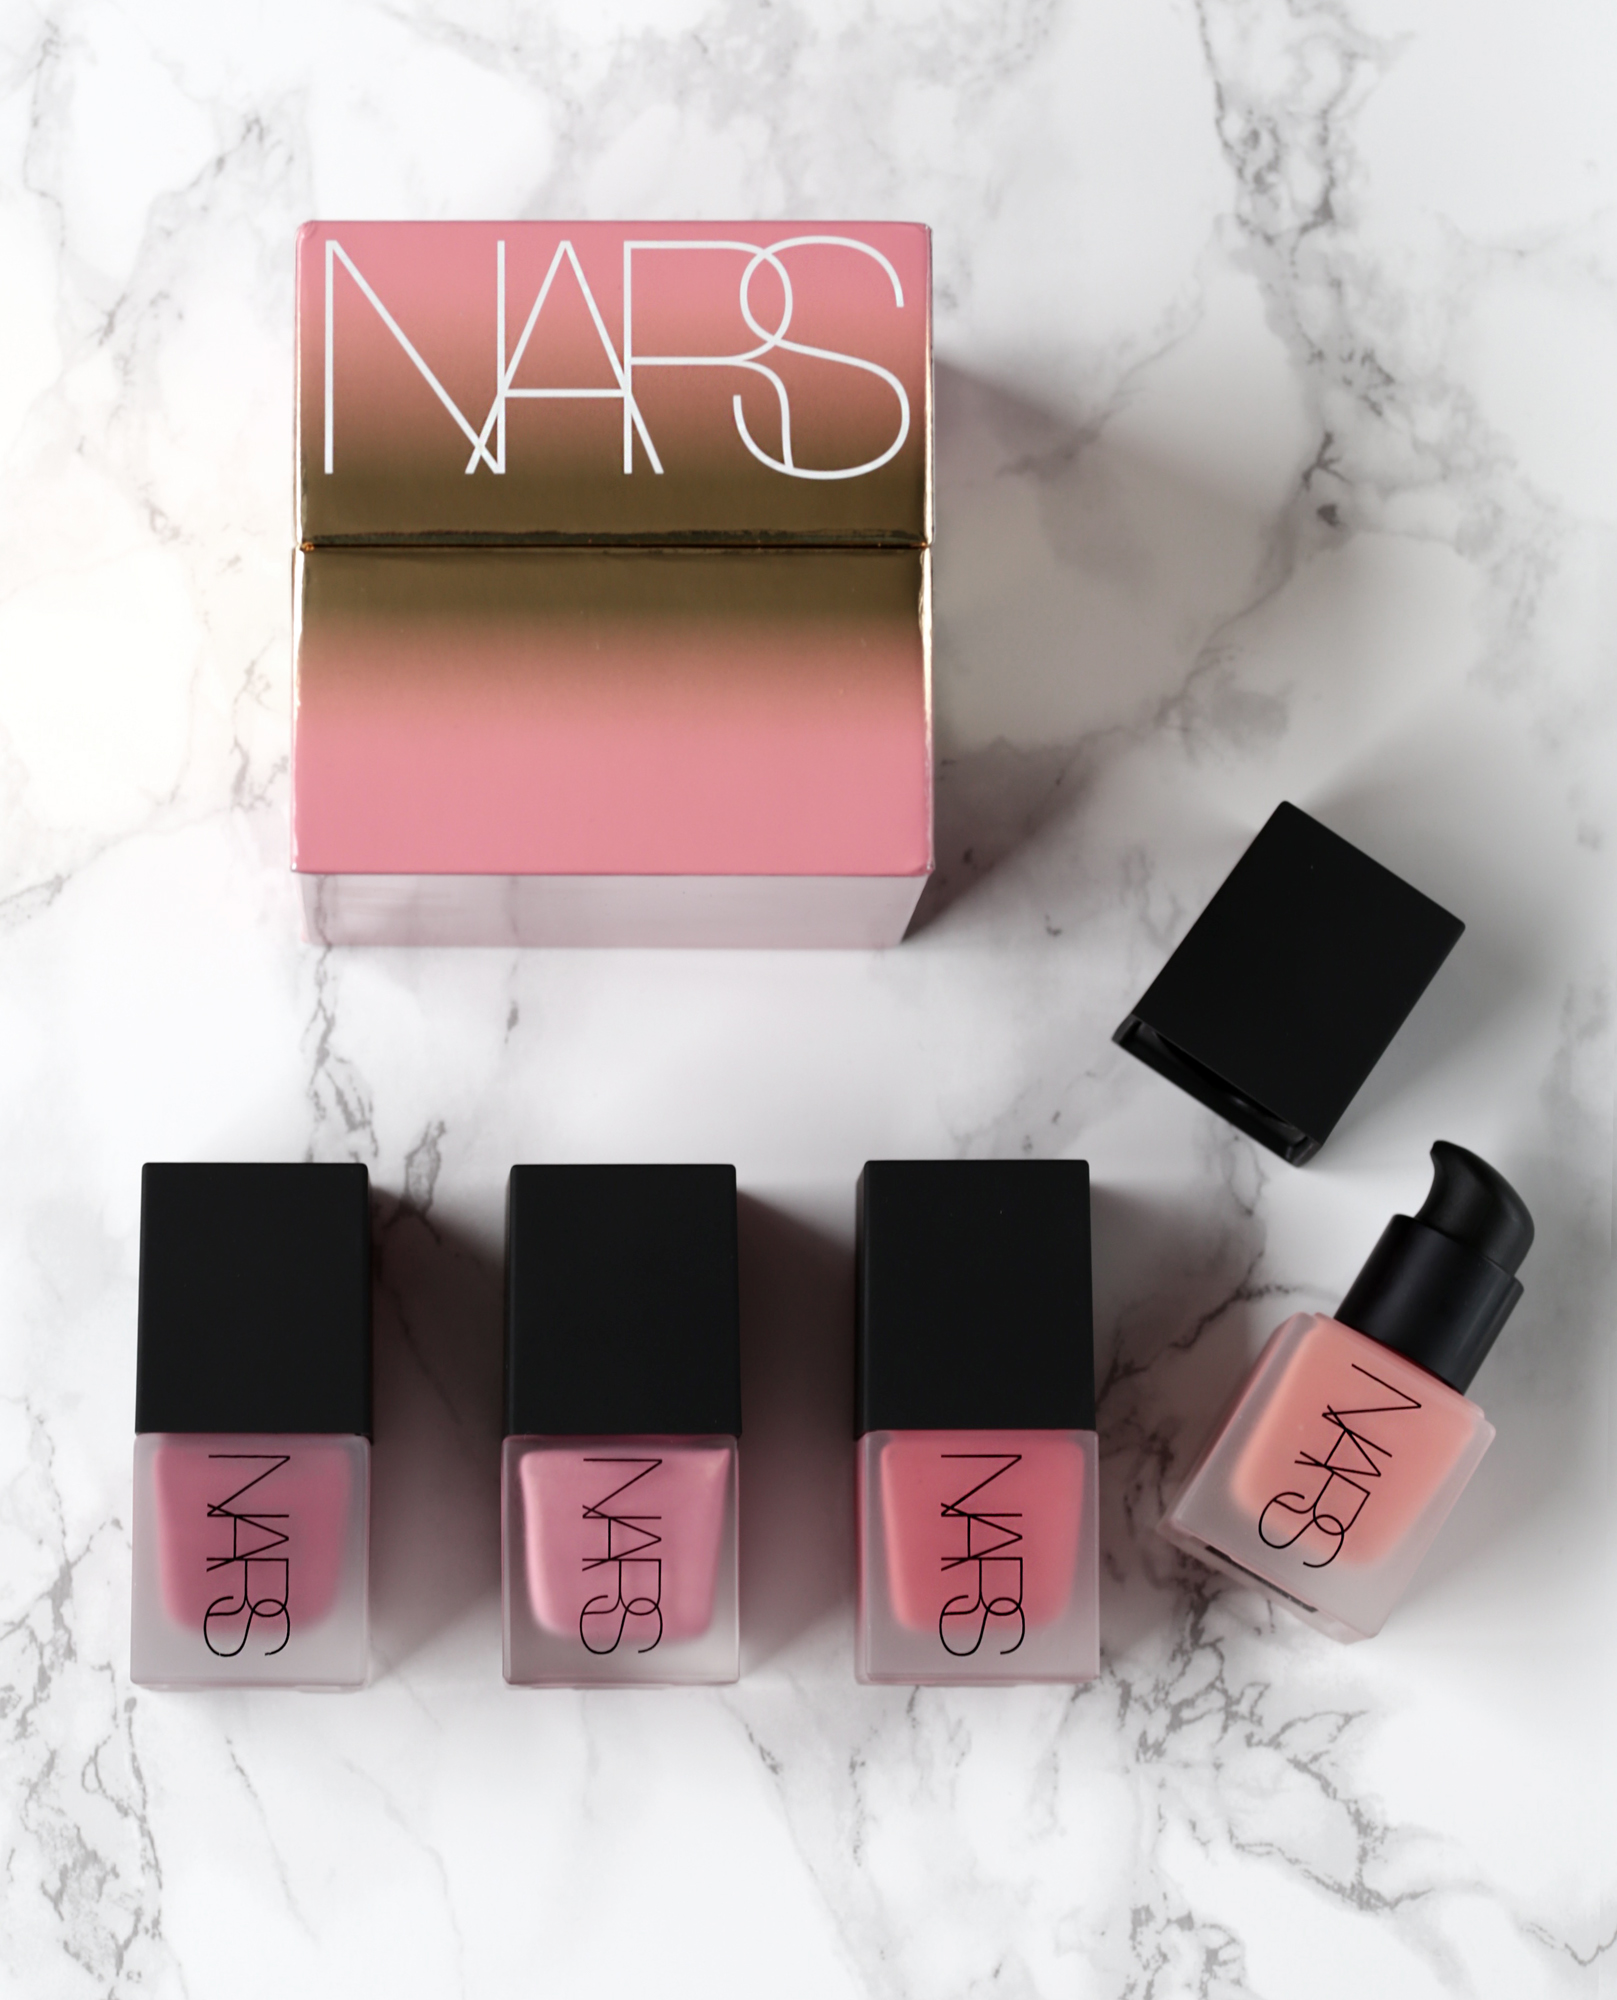
NARS LIQUID BLUSH: Luster, Torrid, Orgasm, Dolce Vita
Before getting into best practices on how to apply liquid blush, let's just look at the colour range. NARS released four flattering shades that should be suitable for an array of skin tones, LUSTER (sheer golden apricot), TORRID (warm coral with golden shimmer), the cult favourite ORGASM (sheer, warm pink with golden shimmer), and DOLCE VITA (matte dusty rose, the deepest shades in the collection).
How To Apply NARS Liquid Blush
One pump is all you need.
Dispense the blush onto the back of your hand. They should be clean btw. Applying makeup with dirty hands is yucky and can lead to pimples. No one wants pimples.
Dab your middle finger in the blush and dot it onto your cheek.
Using the same finger, tap the blush into the skin using the flat of your finger. Tapping the blush into the skin will give you a beautiful natural glow.
Repeat the process on the other cheek.
Next up, do your concealer for that glow-from-within look. If you want more info about this technique, make sure to read my 5 Minute Makeup Tutorial and why this step works well with liquid and cream blush.
If you're like me and want bright, happy, healthy cheeks, you'll want to pat more blush onto your cheeks. The key is to build up liquid blush and work in layers to get that beautiful flushed look.
Normally I'll follow the dab & tap technique about three times or until I'm happy with the way my blush looks.
To set my makeup I apply a very thin veil of loose powder on my skin using a fluffy blush. The formula on NARS Liquid Blush sets beautifully even without powder so skip this step if you have normal or dry skin. I have combination skin that can look oily in the summer so a little touch of powder is a must for me.

NARS Liquid Blush Review
To say that I love NARS' new liquid blush formula is an understatement and I've been using them almost every day for almost a month now.
What's great about these is that they layer beautifully with powder blush and cream formulas as well so if I want a more bronzed or flushed look, I just layer another product over top for more oomph. That's what makes them so great, the versatility and the wearability.
Based on my past experience with liquid blush they're difficult to work and fade and look patchy on my skin as the day wears on.
NARS nailed it with this formula - it's buildable, blendable, long-lasting and easy to work with. The blush contains Monoi and Tamanu oils, known for extra moisture.
The blush looks beautiful and natural on the skin and wears well into the day even when it's hot and sweaty.
I have combination skin that's oily prone in the summer and this blush stays put on my skin. Best of all it wears well and looks better as the day goes on because it melts into the skin to give that glow-from-within look.
Normal skin, dry skin, and combination skin will love this formula.
For those with oily skin, it would be ideal to set the liquid blush with powder over top to prevent it from slipping off the skin and fading. A translucent powder should do the trick along with a quick touch up of powder blush as a final step. Finally, depending on how oily your skin is, you may also want to use a mattifying primer to lock the liquid blush into place.
I find this formula looks best when applied with fingers and layered in stages as I explained above. I applied it using a brush a few times and I found the brush to remove product from my skin and blend it away so again, fingers are best.
Otherwise, I say five stars NARS! It's such a beautiful blush and I have been loving all of the colours equally. To pick a favourite shade for my olive skin would be like picking a favourite child, er, cat in my case.
Photography by Nathalie Martin.
DISCLAIMER: NARS Liquid Blush was provided by NARS.
All opinions are my own and completely honest.

GLOSSY is the new matte feat. Clairol Natural Instincts + win a trip to NYC!
Put away those matte lipsticks because SS17 is all about gloss! In my latest beauty posts, I’ve talked about glossy eyes, shiny lips and even face gloss. Yes, it exists and done right, it can look super chic and editorial. We’re even seeing gloss in fashion, and vinyl pants and skirts are everywhere. As someone with an extensive collection of shiny patent leather shoes, vinyl skirts are just a natural progression in my wardrobe so I’m totally jumping on the gloss wagon.
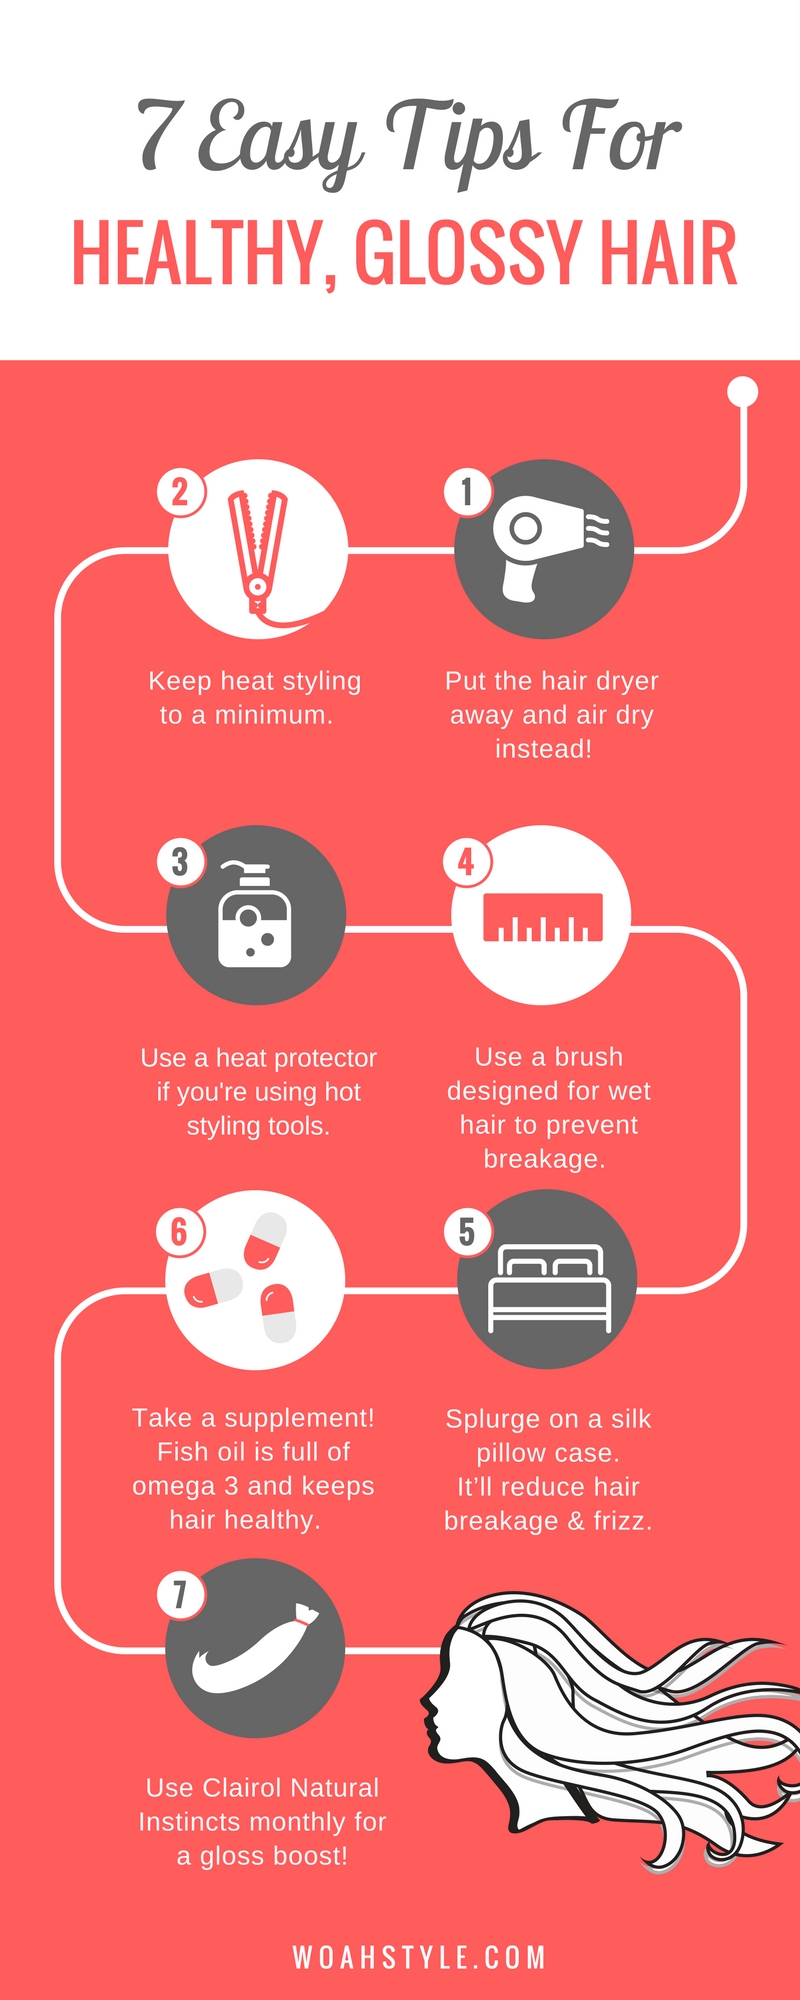
Regardless of where you stand on this trend, I think we can all agree that glossy hair is always chic. From adding oils and treatments to hair, we’re all striving for shiny, healthy looking hair. In this post, I’ll be sharing my low maintenance hair tricks and tips with you, as well as announcing my partnership with Clairol Natural Instincts and how using this semi-permanent at home dye can add gloss and strengthen your hair at the same time.

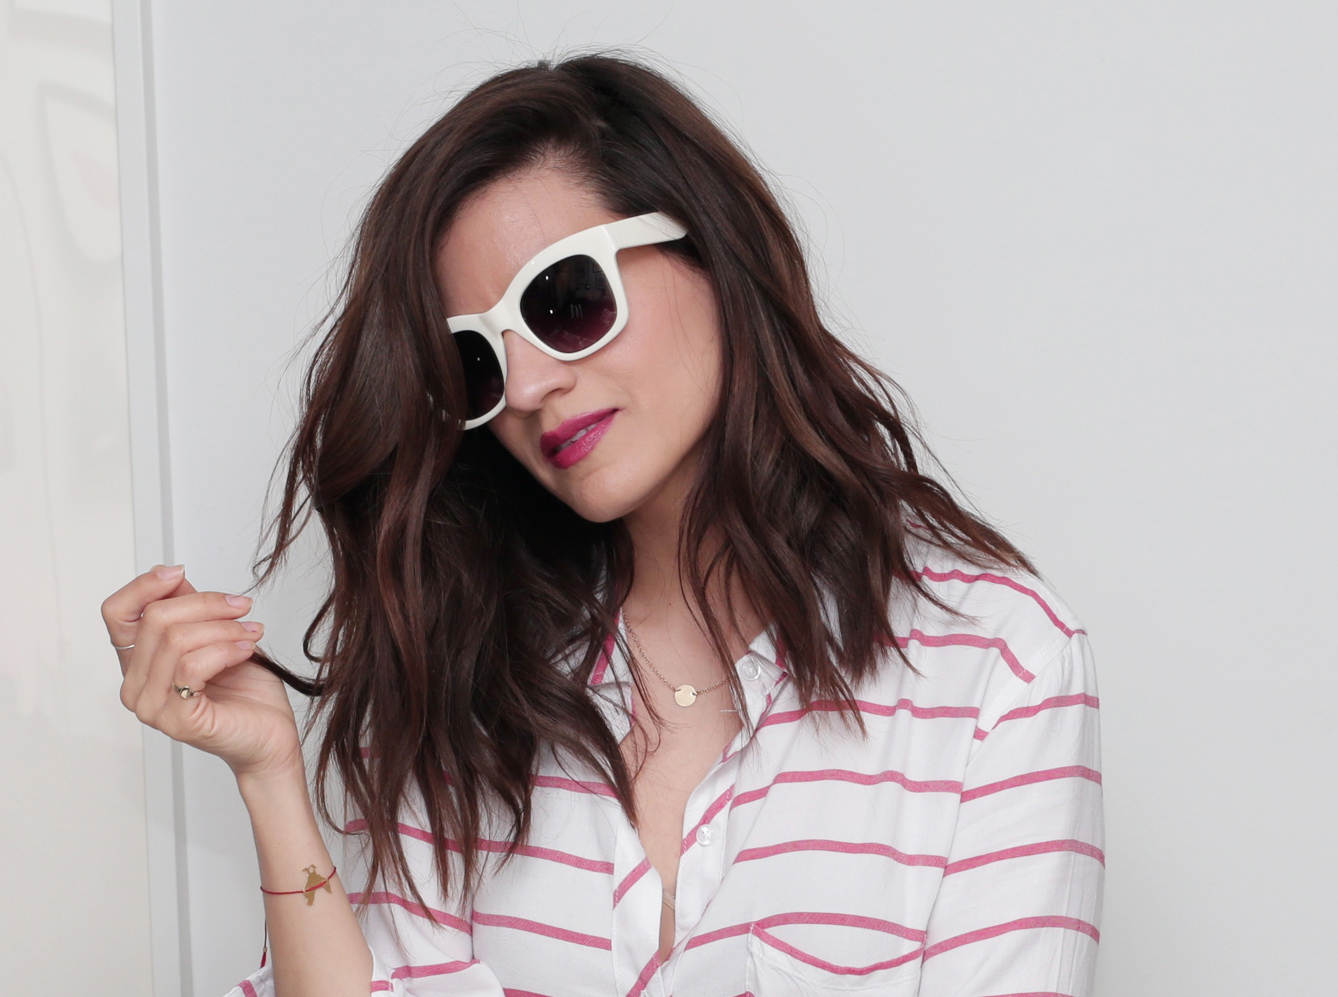
I get a lot of questions about my hair – where I get it done, how I style it and how I get it cut. The truth is I’m really low maintenance when it comes to my hair. My whole life I’ve never really enjoyed going to the salon so I’ve picked up a few tricks along the way to minimize my visits. To start, my cut is a blunt lob that’s slightly longer in the front and shorter in the back and I always have my hairdresser thin out the bulkiness at the bottom because my hair is so thick. Most importantly this cut grows out well so I can go months between visits. Another thing I do is keep heat styling to a minimum and I always use a heat protector. I wash my hair about two to three times a week to prevent further damage and I almost always let it air dry.


Another thing I do is maintain my colour at home with a quick monthly touch up. Clairol Natural Instincts is a non-permanent at-home hair colour that gives natural-looking results because it contains coconut oil, aloe, vitamin, and antioxidants. The coconut oil in Natural Instincts adds moisture, further strengthening and preventing damage. To be honest, up until last year I had virgin hair and the thought of putting dye in my hair was really frightening to me. Even though I colour my hair at home I try to keep it natural looking because again, I’m super low maintenance with my hair! Natural Instincts is definitely the way to go if you’re looking to add gloss to your hair with a touch of colour.

Since Natural Instincts adds a subtle shift to your existing hair colour, it’s best to stay within a shade or two of your existing shade. That’s why I went with shade 5A, Clove, a medium cool brown, which was recommended to me by James Corbett, Clairol’s Colour Director. I’ve included a coupon code for you guys here so you can go try it out for yourselves. Make sure you let me know what you think!

I dyed my hair early one morning before heading for a super busy day full of meetings and events. It was super easy, just 10 minutes and my hair was shiny and healthy looking again.
I was pleasantly surprised by the lack of odor in the dye. Again, it’s ammonia free so it didn’t sting my eyes or bother my cats who were in the powder room with me and curious to see what I was up to.

Natural Instincts is a gloss that’s nourishing for the hair. It contains coconut oil, aloe, vitamins, and antioxidants. The coconut oil adds moisture, further strengthening and preventing damage.
BENEFITS TO USING CLAIROL NATURAL INSTINCTS
Quick and easy at home dye. Takes as little as 10 minutes!
Subtle colour enhancement to current hair colour with a beautiful, glossy finish.
Semi-permanent. Lasts only 28 washes.
No harsh root-line.
0% ammonia free.
Gently blends away greys.
Adds a boost of shine to your natural colour – use monthly to restore the gloss.
Natural Instincts is available in 32 shades. It retails for $8.99 and can be found at most major retailers.

Another reason I was excited for this partnership is because it involves giving back to you guys for being such awesome readers and always supporting me. Seriously, thank you!
So here’s the deal – I’m giving away two amazing prizes:
Prize 1
Year supply of Clairol Natural Instincts
Prize 2
A trip for 2 to New York City, one of my favourite cities ever!
The prize includes:
Two flights
Two nights hotel stay (one room)
One colour consultation and haircut at the James Corbett Salon, Clairol Colour Director
One Visa gift card for $500 in spending money
In order to enter the contest, you’ll need to try out the Clairol Natural Instincts product, take a photo and share on Instagram using #GlossBoss. Clairol is also offering a coupon code for $2 off all Natural Instincts products! To download the coupon, click here: bit.ly/2p1zmv7. Really looking forward to you trying out Natural Instincts and seeing why I’ve been loving it!
Good luck!
Rules & Regulations
Contest closes on Monday June 19th at 12:00 am.
Must be Canadian Resident.
Hair appointment with James Corbett, Clairol Colour Director to take place on June 24, 2017 in NYC at the James Corbett Salon. Recommended travel is Friday, June 23, 2017 to Sunday, June 25, 2017.
DISCLAIMER: I partnered with Clairol to create this blog post. As always, all opinions are 100% my own and I only partner with brands that I truly love prior to being contacted!

Byredo's new Kabuki Brush. Is it worth it?

Article by Diana Aldea
Photos by Nathalie Martin
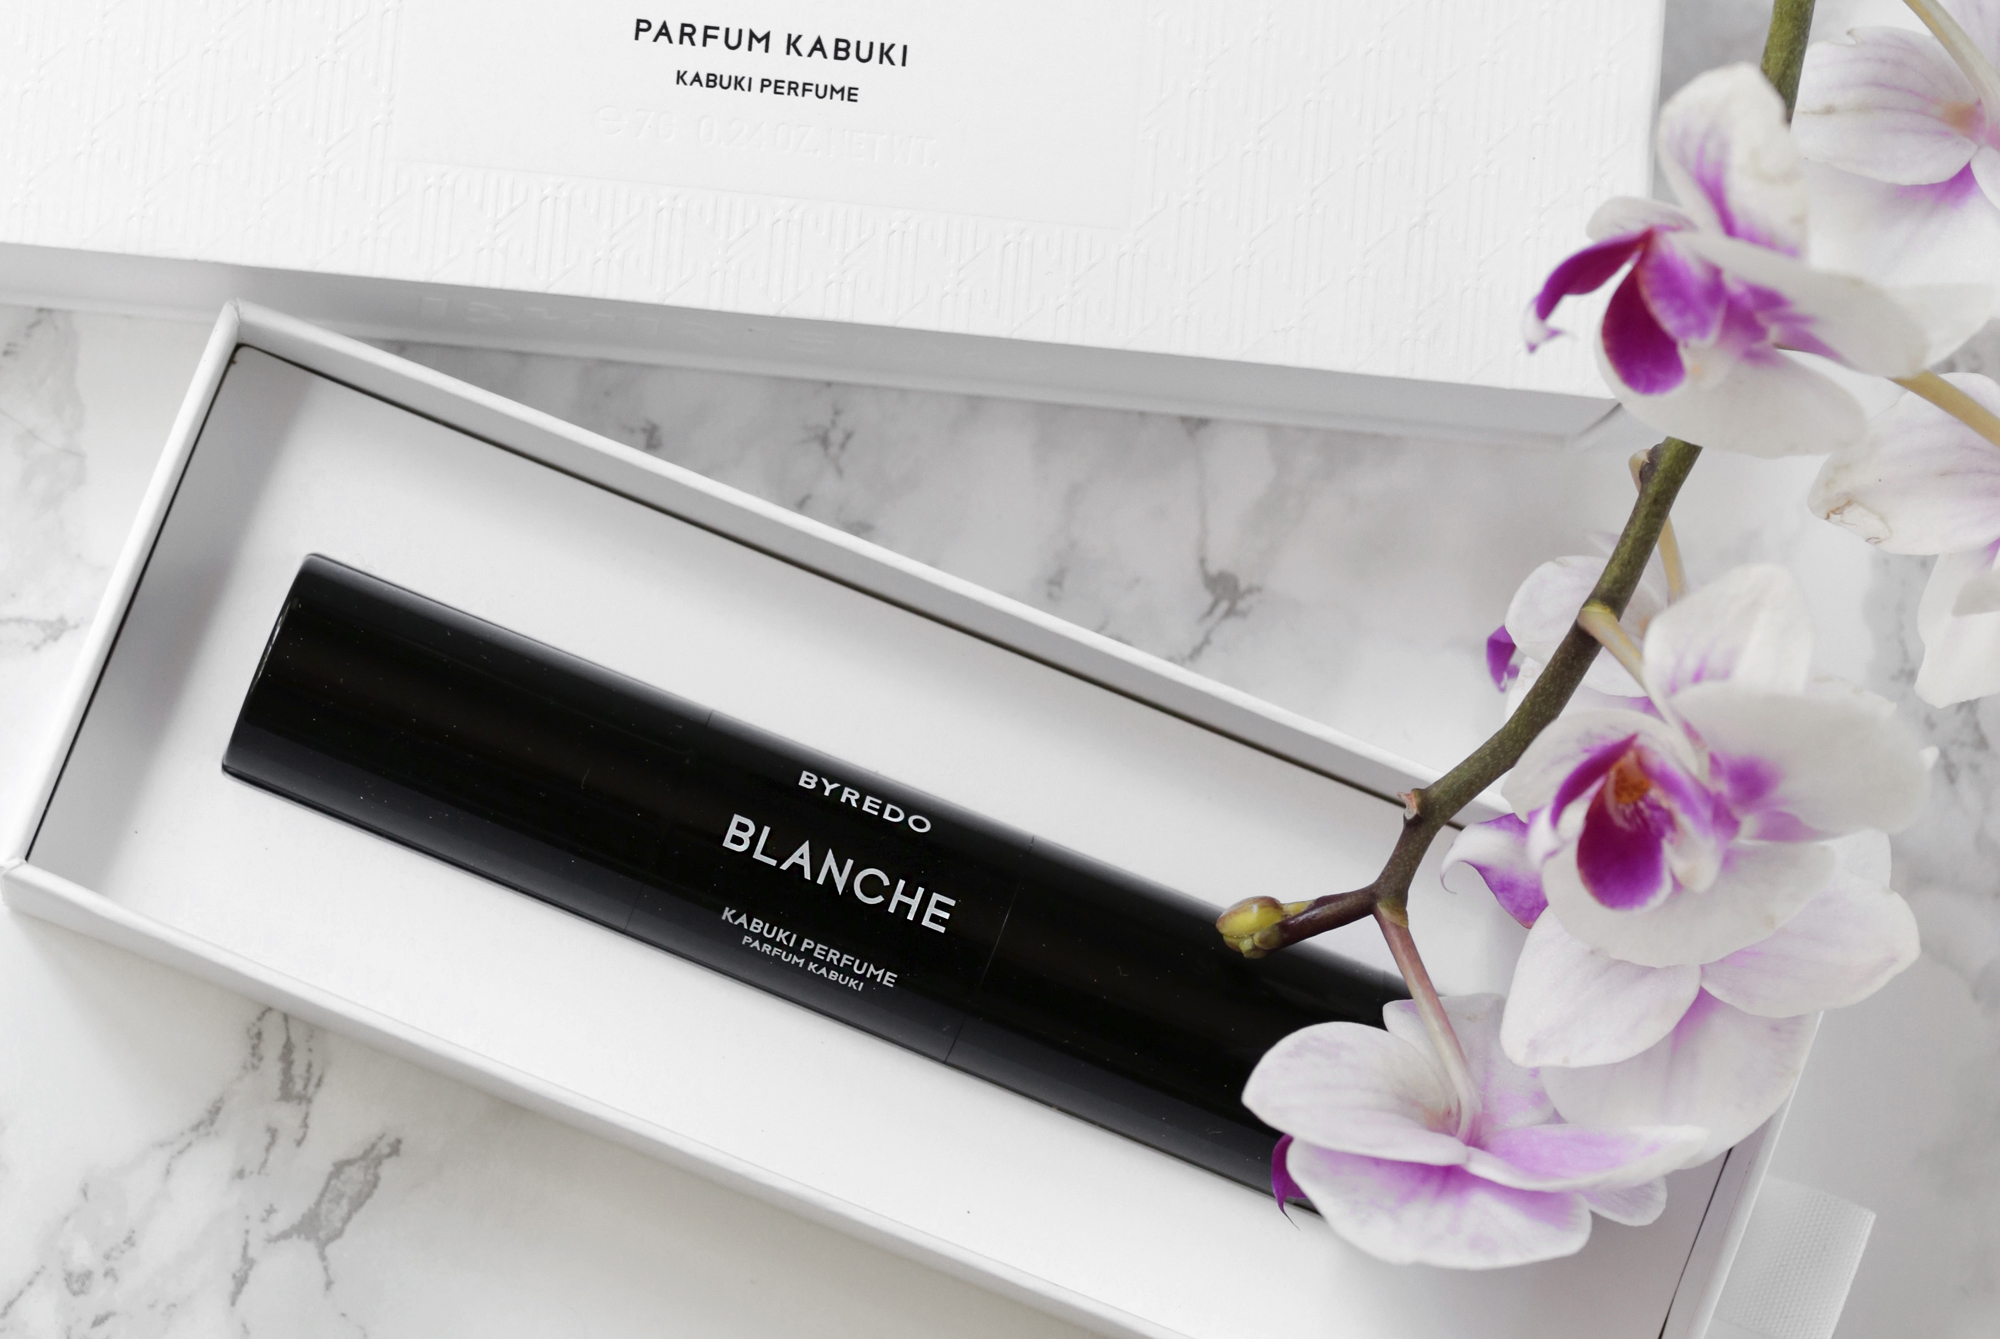
Did you know that our sense of smell is 10,000 times more sensitive than our other senses? Not entirely surprising, considering that scent has the ability to change our moods and stimulate our senses. I’ve been addicted to fragrances for as long as I can remember. It started with an innocent affair with Bath & Body Works body sprays in my early teens, and it has since escalated to buying a fragrance a month, the latest being Byredo’s Blanche.
The first time I smelled Blanche - it blew me away - it was the perfect combination of fresh and luxurious. Sure, the price point for Byredo fragrances is a little high (it starts at $150 for a 50ml of their eau de parfum), but you really do get what you pay for. When I heard that Byredo was releasing kabuki perfumes in three of their most popular scents (one being Blanche), I was super excited. To give you a bit of background, kabuki perfumes are exactly what they sound like – kabuki brushes which are filled with perfumed talc, and are designed to be lightly dusted where you desire. They market it as the “new art of perfuming”. Sounds pretty sensual and fancy, right? Like all things Byredo, the price point can be a little jarring for the uninitiated ($85 for a kabuki brush with 7 grams of perfumed talc). Loving Byredo as much as I do, I bit the bullet and fully expected to love it. Sadly, I didn’t.

First, it took a long time for me to get the brush working. I followed the instructions closely, yet, the perfumed talc would not emerge. When it did, it was very sparingly, which is probably because there’s only 7 grams in the brush. Second, the talc was very, very light. I’m sure this appeals to some people who love super subtle fragrances, but I found that there was little to no longevity. I layered it over my eau de parfum and found that the scent lasted for the same amount of time. Lastly, the price point is really high for what you’re getting. I understand that you’re also paying for the brush and if you’re a collector, or have a lot of money to spend, this might be for you. Sorry Byredo, you can’t have my cash this time.